
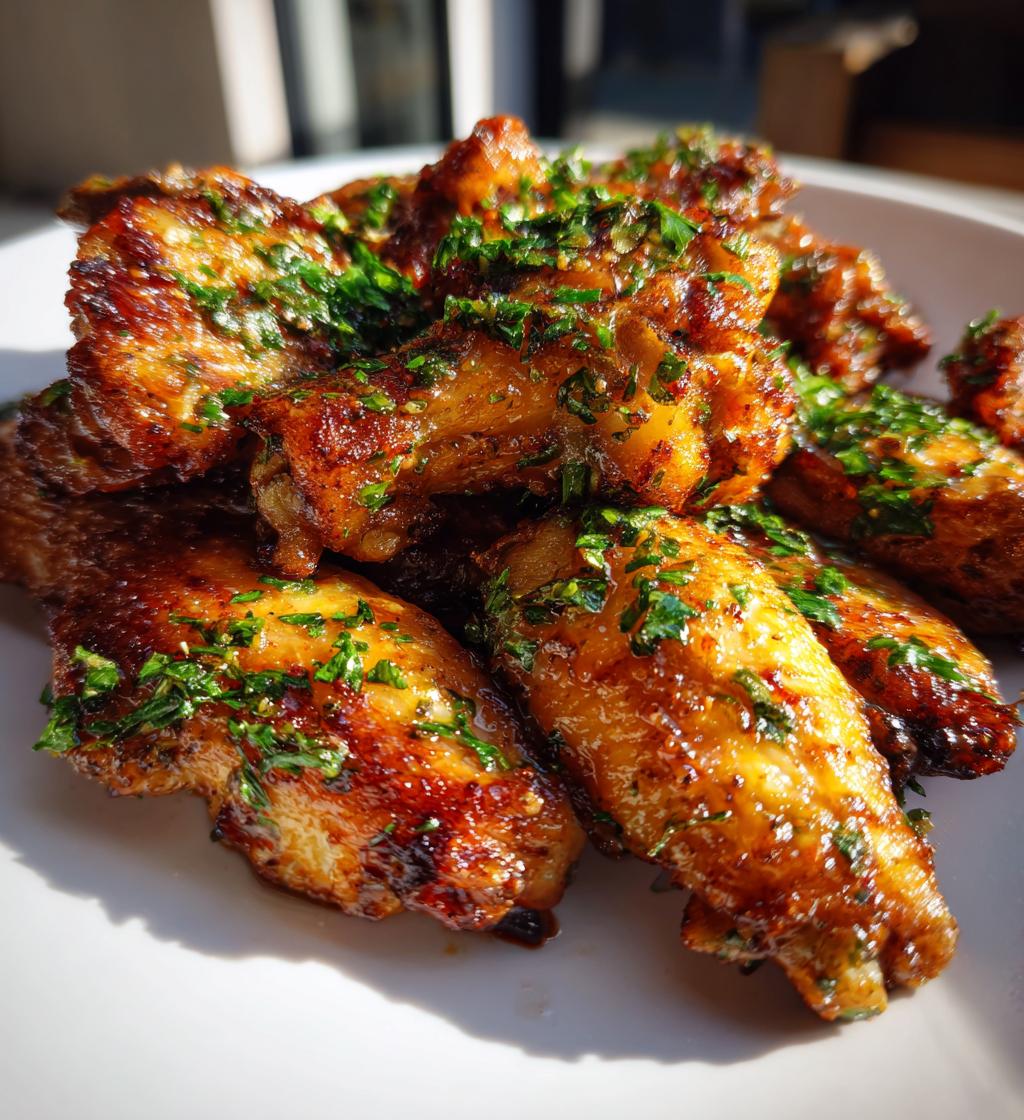
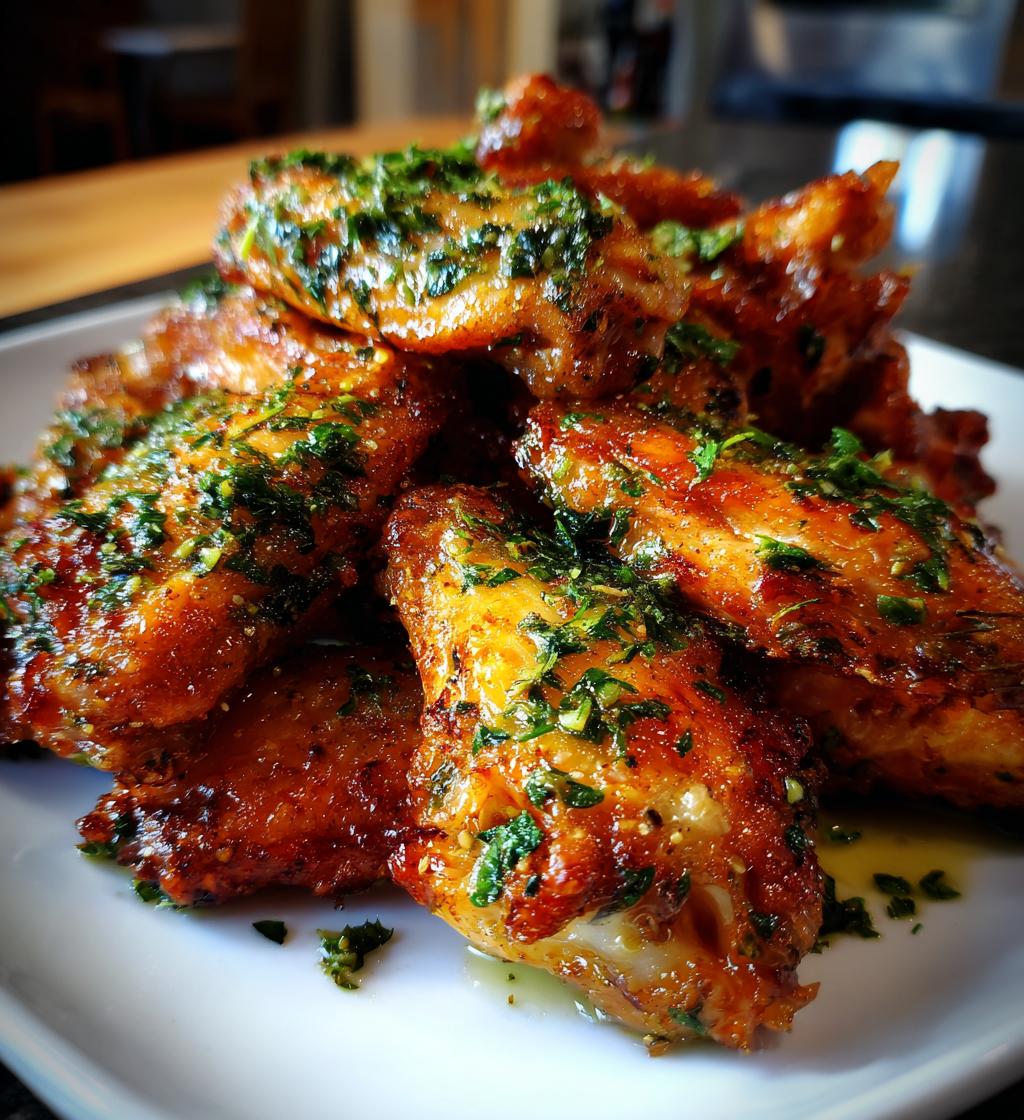
Oh my goodness, let me tell you about these Air Fryer Garlic Butter Wings! They’re not just any wings; they’re crispy, flavorful, and oh-so-easy to make! I remember the first time I made them for a game night with friends. The aroma of garlic wafting through the kitchen had everyone drooling before they even hit the table. It’s like a party in your mouth, and the best part? They’re guilt-free, thanks to the air fryer magic! No more deep-frying mess or greasy fingers. Just pure, delectable wings coated in the heavenly goodness of garlic butter. Seriously, it’s a game changer. Trust me when I say that every bite is a savory delight, and you’ll find yourself going back for seconds (or thirds!). Perfect for gatherings, movie nights, or just because you deserve a treat! Let’s dive into how to whip up this mouthwatering dish together!
Ingredients List
- 2 pounds chicken wings: Make sure they’re thawed and ready to go. You can use fresh or frozen wings, but thawing is essential for even cooking.
- 1/2 cup unsalted butter: This will be melted to create that rich, buttery flavor. Unsalted allows you to control the saltiness of the dish.
- 4 cloves garlic, minced: Fresh garlic brings a vibrant kick, so don’t skimp on this! The finer you mince, the more flavor will infuse into the wings.
- 1 teaspoon salt: This is key for enhancing all the delicious flavors. Adjust to your taste if you prefer less salt.
- 1/2 teaspoon black pepper: A pinch of pepper adds a nice warmth without overpowering the garlic.
- 1 teaspoon paprika: This gives the wings a lovely color and a subtle smokiness that pairs perfectly with the garlic butter.
- 1 tablespoon fresh parsley, chopped: This will be sprinkled on top at the end for a pop of color and freshness. It’s the perfect finishing touch!
How to Prepare Air Fryer Garlic Butter Wings
Prepping the Wings
First things first, let’s get those chicken wings ready for their moment in the air fryer! If you’re starting with frozen wings, make sure to give them enough time to thaw. I usually leave them in the fridge overnight, but if you’re in a hurry, you can submerge them in cold water for about an hour. Once they’re thawed, it’s crucial to dry them thoroughly with paper towels. This step helps achieve that crispy skin we all love! Trust me, skipping this part could lead to soggy wings, and nobody wants that!
Making the Garlic Butter Sauce
Now, let’s get to the buttery goodness that will coat those wings. In a small saucepan, melt the 1/2 cup of unsalted butter over low heat. Be patient here; we want it melted, not bubbling away! Once your butter is melted, add in the 4 cloves of minced garlic, 1 teaspoon of salt, 1/2 teaspoon of black pepper, and 1 teaspoon of paprika. Stir everything together and let it simmer for just a minute to let those flavors mingle. The aroma will start to fill your kitchen, and you’ll know you’re on the right track! Once mixed, remove it from heat and set aside.
Cooking the Wings
Alright, it’s time to bring it all together! Preheat your air fryer to 400°F (200°C). While it’s heating up, take those dried wings and toss them in the garlic butter sauce until they’re well-coated. It’s a bit messy, but I promise it’s worth it! Once the air fryer is hot, place the wings in the basket in a single layer. Don’t overcrowd them; you want each wing to have space to get crispy. Cook for about 25-30 minutes, flipping them halfway through to ensure they’re golden brown and evenly cooked all around. This flipping step is key for that perfect crispiness! As they cook, keep an eye on them, and get ready for the garlic aroma to drive you wild!
Nutritional Information
Here’s the estimated nutritional data for these delightful Air Fryer Garlic Butter Wings. Keep in mind that these values can vary based on specific ingredients and portion sizes, but this should give you a good idea of what to expect!
- Calories: 320
- Fat: 25g
- Saturated Fat: 15g
- Unsaturated Fat: 8g
- Trans Fat: 0g
- Cholesterol: 80mg
- Sodium: 600mg
- Carbohydrates: 0g
- Fiber: 0g
- Sugar: 0g
- Protein: 25g
These wings pack a punch of flavor while keeping the calorie count reasonable, making them a fantastic choice for your next gathering or movie night! Enjoy every bite guilt-free!
Tips for Success
Want to nail these Air Fryer Garlic Butter Wings every single time? Here are my top pro tips to help you achieve wing perfection!
- Pat Dry, Pat Dry, Pat Dry: Seriously, drying your wings is non-negotiable! This step helps them crisp up beautifully. Use paper towels to soak up any excess moisture before tossing them in the garlic butter.
- Don’t Skip the Preheat: Preheating your air fryer is crucial for even cooking. If you toss those wings in a cold fryer, they won’t get that crispy texture we all love!
- Flipping is Key: Make sure to flip your wings halfway through cooking. This ensures both sides get that gorgeous golden brown color and crispy skin. Set a timer so you don’t forget!
- Experiment with Seasonings: Feel free to tweak the spices in the garlic butter sauce! If you love a kick, add a pinch of cayenne pepper or your favorite hot sauce. It’s all about your taste buds!
- Let Them Rest: After cooking, give the wings a few minutes to rest before diving in. This allows the juices to redistribute, keeping them moist and flavorful!
- Serve with Dipping Sauces: While these wings are delicious on their own, don’t forget to whip up a fun dipping sauce! Ranch, blue cheese, or even a spicy aioli can elevate your wing experience.
With these tips in your back pocket, you’re all set to impress your friends and family with the tastiest wings ever! Happy cooking!
Why You’ll Love This Recipe
- Crispy Perfection: The air fryer gives these wings an irresistible crispiness without the need for deep frying. You’ll get that crunch you crave in every bite!
- Quick and Easy: With just a few simple steps and minimal prep time, you can have these delicious wings ready in about 40 minutes. Perfect for last-minute gatherings!
- Flavor Explosion: The combination of garlic and butter creates a rich, savory flavor that’ll have everyone coming back for more. It’s a flavor bomb you won’t want to miss!
- Healthier Option: By using the air fryer, you’re cutting down on excess oil and calories, making these wings a guilt-free treat. Enjoy the flavor without the extra fat!
- Customizable: Want to spice things up? You can easily adjust the seasonings to suit your taste. Add some heat with hot sauce or try different herbs for a unique twist!
- Perfect for Any Occasion: Whether it’s game day, a movie night, or just a cozy dinner at home, these wings fit right in. They’re sure to impress your friends and family!
Storage & Reheating Instructions
So, you’ve made a batch of these amazing Air Fryer Garlic Butter Wings, and now you’ve got some leftovers? No worries! Storing and reheating them the right way will keep that crispy goodness intact for your next snack attack!
First off, let them cool down a bit before storing. If you throw hot wings straight into the fridge, they can create moisture, which will lead to soggy skin. Once they’re cool, place the wings in an airtight container. I like to layer them with parchment paper to keep them from sticking together. You can store them in the fridge for up to 3 days. If you want to keep them longer, you can freeze them for up to a month. Just make sure to use a freezer-safe bag or container!
Now, when it’s time to reheat, you want to bring back that crispy texture. I recommend using the air fryer again for the best results! Preheat your air fryer to about 350°F (175°C) and toss in the wings for about 5-10 minutes, flipping halfway through. This will help them regain that delicious crunch while warming them through. If you don’t have an air fryer, you can also pop them in a conventional oven at the same temperature. Just spread them out on a baking sheet and keep an eye on them!
And there you have it! Easy storage and reheating tips that will keep your Air Fryer Garlic Butter Wings just as tasty as when they first came out of the fryer. Enjoy every last bite!
Frequently Asked Questions
If you’ve got questions about making these Air Fryer Garlic Butter Wings, you’re not alone! Here are some of the most common questions I get, along with my answers to help you out.
How can I adjust the cooking time for different quantities of wings?
Great question! If you’re cooking more than 2 pounds of wings, you might need to increase the cooking time slightly. Just keep a close eye on them! For smaller batches, you can reduce the cooking time by a few minutes. The key is to check for that golden brown color and ensure they’re cooked through. A meat thermometer should read 165°F (74°C) when they’re done!
Can I use frozen wings, or do they need to be thawed first?
You can absolutely use frozen wings! Just keep in mind that they’ll need a bit longer to cook. I recommend thawing them first for best results, but if you’re in a pinch, you can cook them frozen. Just add about 5-10 extra minutes to the cooking time and make sure to check for doneness.
What if I want to spice things up? Any seasoning variations?
Oh, definitely! If you’re a fan of heat, adding some cayenne pepper or a splash of hot sauce to the garlic butter sauce can take these wings to the next level. You could also play around with other herbs and spices like smoked paprika, lemon pepper, or even some Italian seasoning for a different flavor profile. Don’t be shy—experiment until you find your perfect mix!
What are some good dipping sauces to serve with the wings?
These wings are fantastic on their own, but a good dipping sauce can elevate them even more! Classic choices include ranch or blue cheese dressing, which pair beautifully with the garlic flavor. If you’re feeling adventurous, try a spicy aioli or a zesty lemon garlic sauce. Even a sweet chili sauce can add a nice contrast to the savory wings. The possibilities are endless!
Can I make these wings ahead of time?
While these wings are best served fresh, you can definitely prepare them in advance. Just cook them according to the recipe and let them cool completely before storing in the fridge. When you’re ready to eat, simply reheat them in the air fryer as mentioned earlier to bring back that crispy goodness!
Hopefully, these FAQs have cleared up any questions you might have had! If you think of anything else, don’t hesitate to reach out. Happy cooking, and enjoy those delicious wings!
Print
Air Fryer Garlic Butter Wings: 5 Reasons You’ll Crave Them
- Total Time: 40 minutes
- Yield: 4 servings 1x
- Diet: Gluten Free
Description
Crispy and flavorful air fryer garlic butter wings.
Ingredients
- 2 pounds chicken wings
- 1/2 cup unsalted butter
- 4 cloves garlic, minced
- 1 teaspoon salt
- 1/2 teaspoon black pepper
- 1 teaspoon paprika
- 1 tablespoon fresh parsley, chopped
Instructions
- Preheat the air fryer to 400°F (200°C).
- In a saucepan, melt the butter over low heat.
- Add minced garlic, salt, pepper, and paprika to the melted butter.
- Coat the chicken wings in the garlic butter mixture.
- Place the wings in the air fryer basket in a single layer.
- Cook for 25-30 minutes, flipping halfway through.
- Once cooked, sprinkle with fresh parsley before serving.
Notes
- Adjust seasoning based on your taste.
- For extra crispiness, increase cooking time slightly.
- Serve with your favorite dipping sauce.
- Prep Time: 10 minutes
- Cook Time: 30 minutes
- Category: Appetizer
- Method: Air Frying
- Cuisine: American
Nutrition
- Serving Size: 4 wings
- Calories: 320
- Sugar: 0g
- Sodium: 600mg
- Fat: 25g
- Saturated Fat: 15g
- Unsaturated Fat: 8g
- Trans Fat: 0g
- Carbohydrates: 0g
- Fiber: 0g
- Protein: 25g
- Cholesterol: 80mg
Keywords: Air Fryer Garlic Butter Wings