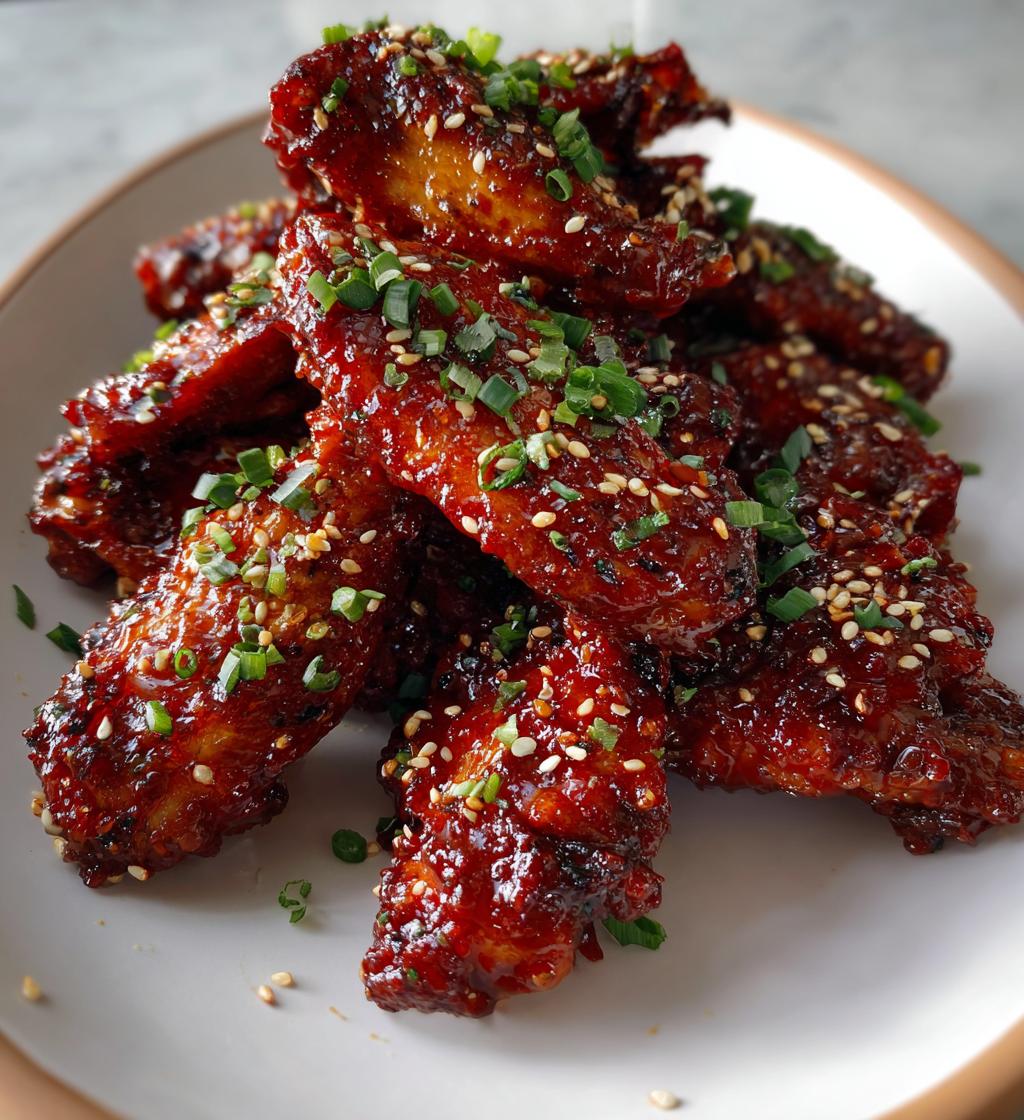
As a passionate home cook, I can’t help but get excited about the magic of air frying. When it comes to juicy, flavorful chicken, air fryer skin-on chicken thighs are my go-to choice. They’re not just easy to prepare; they also deliver that delightful crunch we all crave. Imagine biting into a perfectly cooked thigh, the skin crackling under your teeth, while the tender meat inside bursts with flavor. It’s a culinary adventure that I love sharing with friends and family!
Ingredients for Air Fryer Skin-On Chicken Thighs
When it comes to making air fryer skin-on chicken thighs, the ingredients are simple yet essential. I love how a few quality components can create a dish that’s bursting with flavor. Here’s what you’ll need:
- ???? Chicken Thighs: 4 pieces (bone-in, skin-on) – about 1.5 lbs or 680 g. The skin is key for that crispy texture!
- ????️ Olive Oil: 2 tablespoons – this helps the seasoning stick and adds a lovely richness.
- ???? Garlic Powder: 1 teaspoon – it brings a warm, savory flavor that complements the chicken beautifully.
- ????️ Paprika: 1 teaspoon – for a hint of smokiness and a pop of color.
- ???? Salt: 1 teaspoon (or to taste) – it enhances all the flavors, making each bite delightful.
- ???? Black Pepper: 1/2 teaspoon (or to taste) – a dash of pepper adds a subtle kick.
As I gather these ingredients, I can’t help but feel a sense of excitement. Each one plays a role in creating that perfect balance of flavors. I often find myself experimenting with different spices, too. Sometimes, I’ll add a pinch of cayenne for heat or some dried herbs for an aromatic twist. The beauty of this recipe is its flexibility; you can make it your own! Just remember, the quality of your chicken thighs matters. I always opt for fresh, high-quality meat to ensure the best results. Trust me, it makes a world of difference!
Tools Needed for Air Fryer Skin-On Chicken Thighs
Before diving into the delicious world of air fryer skin-on chicken thighs, it’s essential to gather the right tools. Having the right equipment not only makes the cooking process smoother but also enhances the overall experience. Here’s what you’ll need:
- ????️ Air Fryer: This is the star of the show! I love my air fryer for its ability to cook food quickly while keeping it crispy. Make sure it’s large enough to fit your chicken thighs comfortably.
- ????️ Mixing Bowl: A good-sized bowl is perfect for mixing your marinade. I often use a glass or stainless steel bowl, as they’re easy to clean and don’t retain odors.
- ???? Measuring Spoons: Accurate measurements are key to achieving the perfect flavor. I always keep a set of measuring spoons handy for my spices and oils.
- ???? Paper Towels: These are a must for patting the chicken dry. A dry surface helps the skin crisp up beautifully, and I always keep a roll nearby.
- ???? Sharp Knife: While you won’t need to do much cutting, a sharp knife is handy for trimming any excess fat from the chicken thighs.
- ???? Tongs: These are perfect for flipping the chicken halfway through cooking. I love using tongs because they give me a good grip without damaging the skin.
- ????️ Meat Thermometer: To ensure your chicken is cooked perfectly, a meat thermometer is invaluable. It takes the guesswork out of cooking and guarantees juicy, safe-to-eat chicken.
As I gather these tools, I feel a sense of anticipation. Each item plays a role in my culinary adventure. The air fryer, in particular, has become my trusty sidekick in the kitchen. I remember the first time I used it; I was amazed at how quickly it cooked my chicken thighs while keeping them juicy inside. It’s like having a little magic oven that fits right on my countertop!
With these tools at the ready, I’m all set to create a mouthwatering dish that will impress anyone lucky enough to share a meal with me. So, let’s get cooking!
Preparation of Air Fryer Skin-On Chicken Thighs
Now that I have all my ingredients and tools ready, it’s time to dive into the preparation of these delicious air fryer skin-on chicken thighs. This part is where the magic truly begins! Each step is simple yet crucial for achieving that perfect crispy skin and juicy meat. Let’s get started!
Step 1: Preparing the Chicken Thighs
First things first, I always make sure to prepare the chicken thighs properly. I take a few paper towels and pat them dry. This step is essential because moisture is the enemy of crispiness! When the skin is dry, it crisps up beautifully in the air fryer. I remember the first time I skipped this step; the skin turned out soggy, and I learned my lesson the hard way. So, trust me, take a moment to dry those thighs!
Step 2: Seasoning the Chicken Thighs
Next, it’s time to season the chicken. I grab my mixing bowl and combine the olive oil, garlic powder, paprika, salt, and black pepper. The aroma of the spices fills the air, and I can’t help but smile. I love getting my hands in there, rubbing the marinade all over the chicken thighs. It’s like giving them a warm hug! I make sure every inch is coated, as this is where the flavor really comes to life. If I have time, I sometimes let them marinate for a few hours or even overnight. The longer they sit, the more flavorful they become!
Step 3: Preheating the Air Fryer
With the chicken seasoned, I move on to preheating the air fryer. I set it to 400°F (200°C) and let it warm up for about 5 minutes. This step is like warming up before a big race; it ensures everything cooks evenly. I love the sound of the air fryer as it heats up, almost like it’s getting ready to work its magic. While I wait, I take a moment to admire my beautifully seasoned chicken thighs. They look so inviting!
Step 4: Cooking the Chicken Thighs
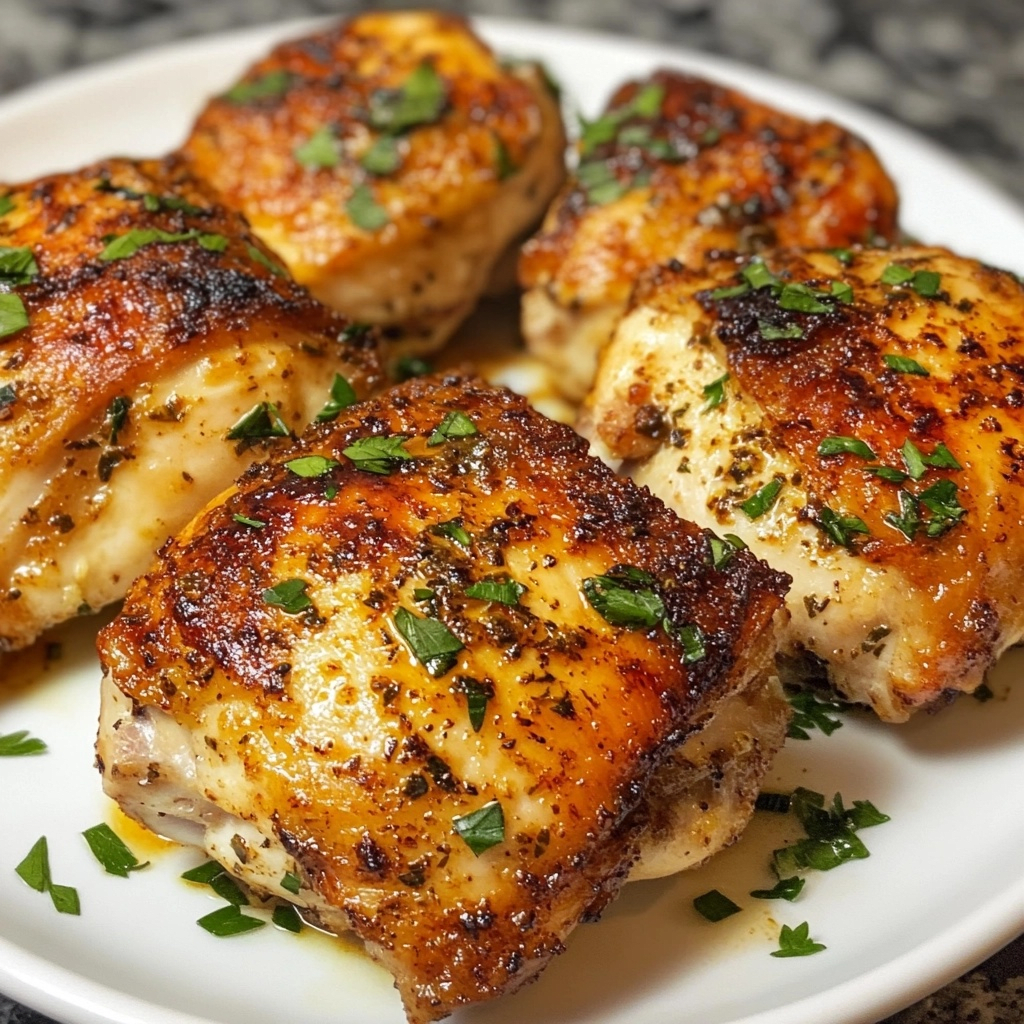
Now comes the exciting part—cooking! I carefully place the chicken thighs in the air fryer basket, skin side up. I make sure not to overcrowd them; I want each thigh to have its space to crisp up. If I have a smaller air fryer, I’ll cook in batches. I set the timer for 25-30 minutes and let the air fryer do its thing. Halfway through, I flip the thighs to ensure they cook evenly. The smell wafting through my kitchen is absolutely mouthwatering, and I can hardly wait to dig in!
Step 5: Checking for Doneness
As the timer counts down, I keep an eye on the chicken. Once the time is up, I grab my trusty meat thermometer to check for doneness. I insert it into the thickest part of the thigh, and it should read 165°F (75°C). If it’s not quite there, I pop them back in for a few more minutes. Once they’re perfectly cooked, I remove them from the air fryer and let them rest for about 5 minutes. This resting period is crucial; it allows the juices to redistribute, ensuring each bite is juicy and flavorful. I can hardly contain my excitement as I prepare to serve these golden, crispy delights!

Serving Suggestions for Air Fryer Skin-On Chicken Thighs
Now that my air fryer skin-on chicken thighs are perfectly cooked and resting, it’s time to think about how to serve them. This is one of my favorite parts of cooking! The way you present your dish can elevate the entire meal. I love to get creative with sides and sauces that complement the rich flavors of the chicken. Here are some of my go-to serving suggestions that never fail to impress!
Pairing with Sides
When it comes to sides, I like to keep things simple yet delicious. A fresh salad is always a hit! I often toss together mixed greens, cherry tomatoes, and a light vinaigrette. The crispness of the salad balances the richness of the chicken beautifully. Sometimes, I’ll add sliced avocado for creaminess or some nuts for a delightful crunch.
Another favorite side of mine is roasted vegetables. I love how easy they are to prepare! Just chop up some seasonal veggies like carrots, bell peppers, and zucchini, toss them with olive oil, salt, and pepper, and roast them in the oven. The caramelization adds a sweet depth that pairs perfectly with the savory chicken. I remember one dinner where I served these alongside my chicken thighs, and everyone went back for seconds!
If I’m in the mood for something heartier, I might whip up some creamy mashed potatoes or fluffy rice. The chicken’s juices drizzled over these sides create a flavor explosion that’s simply irresistible. I often find myself savoring every last bite, wishing I could relive the moment all over again!
Ideal Sauces and Dips
No meal is complete without a delicious sauce or dip to enhance the flavors! One of my all-time favorites is a zesty garlic aioli. It’s super easy to make—just mix mayonnaise, minced garlic, lemon juice, and a pinch of salt. The creaminess of the aioli complements the crispy chicken skin perfectly, creating a delightful contrast.
If I’m feeling adventurous, I might whip up a spicy sriracha sauce. Just a drizzle adds a kick that takes the dish to another level. I love how the heat from the sauce mingles with the savory chicken, creating a dance of flavors in my mouth. It’s a crowd-pleaser, and I often find my friends reaching for more!
For a fresh twist, I sometimes serve the chicken with a tangy chimichurri sauce. The vibrant herbs and garlic in the sauce brighten up the dish, making it feel light and refreshing. I remember serving this at a summer barbecue, and it was a huge hit! Everyone loved the burst of flavor it added to the chicken.
With these sides and sauces, my air fryer skin-on chicken thighs become a centerpiece that everyone enjoys. I love how each meal can be a new adventure, with endless possibilities for pairing and presentation. So, gather your loved ones, and let’s dig into this delicious feast!
Tips for Perfect Air Fryer Skin-On Chicken Thighs
As I’ve experimented with air fryer skin-on chicken thighs, I’ve learned a few tips that can make a world of difference. These little nuggets of wisdom have helped me achieve that perfect balance of crispy skin and juicy meat every time. Whether you’re a seasoned cook or just starting, these tips will elevate your chicken game!
Choosing the Right Chicken Thighs
When it comes to chicken thighs, not all are created equal! I always opt for bone-in, skin-on thighs for the best flavor and texture. The bone adds moisture during cooking, while the skin crisps up beautifully in the air fryer. I remember the first time I tried boneless thighs; they just didn’t have the same juicy goodness! If you can, look for thighs that are plump and have a nice layer of skin. Fresh, high-quality chicken makes all the difference in the final dish. I often visit my local butcher or farmer’s market to find the best options. Trust me, it’s worth the extra effort!
Adjusting Cooking Time for Different Sizes
Not all chicken thighs are the same size, and that’s where cooking time adjustments come into play. I’ve learned that larger thighs may need a bit more time in the air fryer, while smaller ones can cook faster. A good rule of thumb is to check the internal temperature with a meat thermometer. It should read 165°F (75°C) for perfectly cooked chicken. If you’re using particularly large thighs, I recommend adding an extra 5 minutes to the cooking time. On the flip side, if you’re using smaller pieces, start checking for doneness a few minutes earlier. This way, you’ll avoid overcooking and ensure that every bite is juicy and tender!
With these tips in your back pocket, you’ll be well on your way to mastering air fryer skin-on chicken thighs. I can’t wait for you to experience the joy of serving up this delicious dish to your family and friends. Happy cooking!
FAQs about Air Fryer Skin-On Chicken Thighs
How long does it take to cook skin-on chicken thighs in an air fryer?
When it comes to cooking skin-on chicken thighs in an air fryer, timing is everything! Typically, I find that it takes about 25 to 30 minutes at 400°F (200°C) for the thighs to reach that perfect golden brown and crispy texture. However, I always recommend checking the internal temperature with a meat thermometer. It should read 165°F (75°C) to ensure they’re fully cooked. I remember the first time I made these; I was so eager to dig in that I forgot to check the temperature! Now, I never skip this step, as it guarantees juicy, safe-to-eat chicken every time.
Can I use frozen chicken thighs in the air fryer?
Absolutely! Using frozen chicken thighs in the air fryer is a game-changer for busy weeknights. I often keep a stash of frozen thighs in my freezer for those last-minute dinner plans. Just remember, they will need a bit more time to cook. I usually add an extra 10 to 15 minutes to the cooking time. It’s important to check the internal temperature to ensure they reach 165°F (75°C). The air fryer does a fantastic job of cooking them evenly, and you’ll still get that crispy skin we all love!
What temperature should I set my air fryer for chicken thighs?
The sweet spot for cooking chicken thighs in the air fryer is 400°F (200°C). This high temperature helps achieve that crispy skin while keeping the meat juicy and tender. I’ve experimented with different temperatures, but this one consistently delivers the best results. It’s like finding the perfect rhythm in a dance; everything just clicks! So, set your air fryer to 400°F, and get ready for some delicious chicken thighs!
How do I make the skin extra crispy?
If you’re like me and love that extra crispy skin, there are a few tricks I’ve learned along the way. First, make sure to pat the chicken thighs dry before seasoning. This step is crucial for achieving that crunch! Additionally, using a bit of olive oil in your marinade helps the skin crisp up beautifully. I also recommend not overcrowding the air fryer basket; giving each thigh enough space allows the hot air to circulate properly. Lastly, flipping the thighs halfway through cooking ensures even crispiness. With these tips, you’ll be well on your way to serving up chicken thighs that are irresistibly crispy!
Conclusion on Air Fryer Skin-On Chicken Thighs
As I wrap up my culinary journey with air fryer skin-on chicken thighs, I can’t help but reflect on how this dish has become a staple in my kitchen. The combination of juicy meat and crispy skin is simply irresistible, and it never fails to impress my family and friends. Each time I prepare this dish, I’m reminded of the joy that comes from sharing a delicious meal with loved ones. It’s more than just food; it’s about creating memories around the dinner table.
Print
Air Fryer Skin-On Chicken Thighs: Discover Crispy Perfection!
- Total Time: 35-40 minutes
- Yield: 4 servings
- Diet: Gluten Free
Description
Crispy and juicy air fryer skin-on chicken thighs that are easy to prepare and packed with flavor.
Ingredients
- ???? Chicken Thighs: 4 pieces (bone-in, skin-on) – about 1.5 lbs or 680 g
- ????️ Olive Oil: 2 tablespoons
- ???? Garlic Powder: 1 teaspoon
- ????️ Paprika: 1 teaspoon
- ???? Salt: 1 teaspoon (or to taste)
- ???? Black Pepper: 1/2 teaspoon (or to taste)
Instructions
- Pat the chicken thighs dry with paper towels.
- In a mixing bowl, combine olive oil, garlic powder, paprika, salt, and black pepper. Rub the mixture all over the chicken thighs.
- Preheat the air fryer to 400°F (200°C) for about 5 minutes.
- Place the chicken thighs in the air fryer basket, skin side up, ensuring they are not overcrowded.
- Cook for 25-30 minutes, flipping halfway through, until the internal temperature reaches 165°F (75°C).
- Let the chicken rest for about 5 minutes before serving.
Notes
- For extra flavor, marinate the chicken for a few hours or overnight.
- Use a meat thermometer to ensure the chicken is cooked through.
- Adjust cooking time based on the size of the chicken thighs.
- Prep Time: 10 minutes
- Cook Time: 25-30 minutes
- Category: Main Course
- Method: Air Frying
- Cuisine: American
Nutrition
- Serving Size: 1 thigh
- Calories: 320
- Sugar: 0g
- Sodium: 600mg
- Fat: 20g
- Saturated Fat: 5g
- Unsaturated Fat: 15g
- Trans Fat: 0g
- Carbohydrates: 0g
- Fiber: 0g
- Protein: 30g
- Cholesterol: 120mg
Keywords: air fryer, chicken thighs, crispy chicken, easy recipe