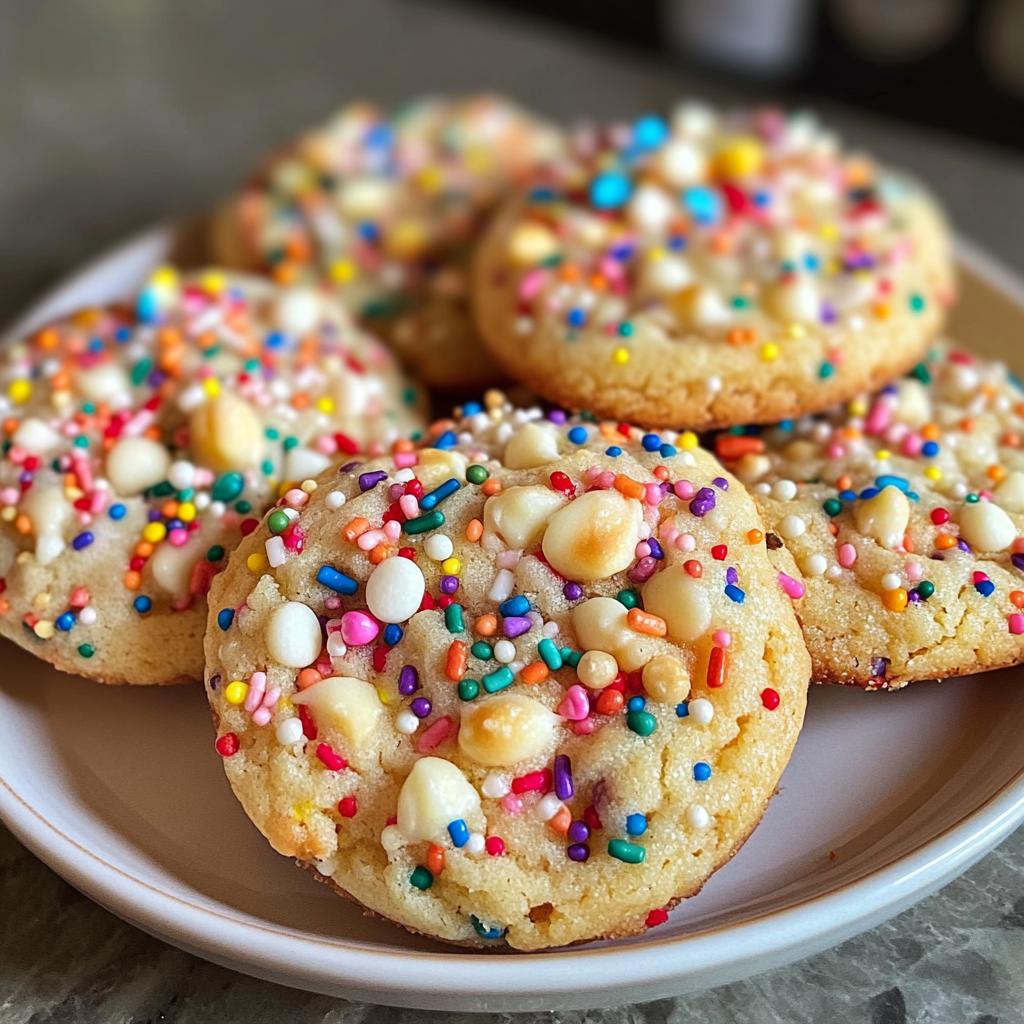
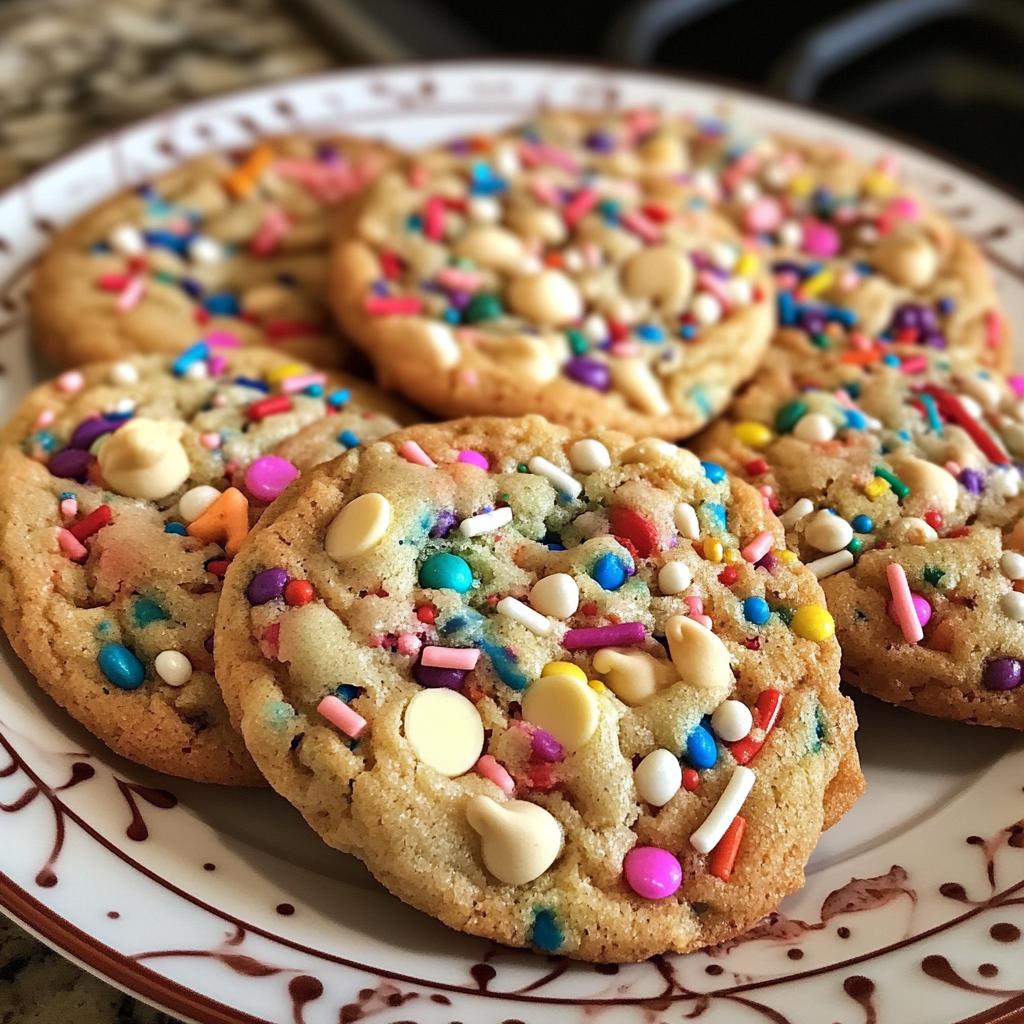
Oh my goodness, if you haven’t tried birthday cake cookies yet, you are in for a treat! These delightful little bites are like a party in your mouth, bursting with soft, chewy goodness. Picture this: it’s someone’s birthday, and instead of the classic cake, you whip up a batch of these cookies. The moment you take a bite, you’re greeted with creamy white chocolate chips melting in your mouth and the fun crunch of rainbow sprinkles. They’re pure happiness wrapped in cookie form!
Every year, I make these cookies for my friends’ birthdays, and they’ve become a delightful tradition. I can still remember the first time I brought them to a celebration; the room lit up with smiles as everyone dove into the cookie plate. It’s that joy of sharing something homemade that makes them extra special. The soft texture and buttery flavor, combined with a sprinkle of fun, make these birthday cake cookies the perfect festive treat. Trust me, once you make them, you’ll want to bake them for every celebration!
Ingredients for Birthday Cake Cookies
- 2 1/2 cups all-purpose flour
- 1 teaspoon baking soda
- 1/2 teaspoon salt
- 1 cup unsalted butter, softened
- 1 cup granulated sugar
- 1 cup brown sugar, packed
- 2 large eggs
- 2 teaspoons vanilla extract
- 1/2 cup rainbow sprinkles
- 1 cup white chocolate chips
How to Prepare Birthday Cake Cookies
Alright, let’s get down to the fun part—baking these fabulous birthday cake cookies! Follow my steps, and you’ll have a batch of deliciousness in no time.
Step 1: Preheat the Oven
First things first, you’ll want to preheat your oven to 350°F (175°C). Trust me, this step is crucial! Preheating ensures your cookies bake evenly and come out perfectly golden. Plus, it fills your kitchen with that warm, inviting aroma before you even start baking. Yum!
Step 2: Combine Dry Ingredients
Next, grab a medium-sized bowl and whisk together 2 1/2 cups of all-purpose flour, 1 teaspoon of baking soda, and 1/2 teaspoon of salt. This step is super important because it helps to evenly distribute the baking soda and salt throughout your flour, leading to a beautifully risen cookie. Just a quick whisk will do—no need to overthink it!
Step 3: Cream the Butters and Sugars
In a large bowl, beat 1 cup of softened unsalted butter, 1 cup of granulated sugar, and 1 cup of packed brown sugar together until it’s creamy and fluffy. I usually use a handheld mixer for this, but if you’re feeling adventurous, a wooden spoon works too! You want the mixture to turn lighter in color and fluffy—this is where the magic starts happening!
Step 4: Mix in Eggs and Vanilla
Now, it’s time to add in the good stuff! in 2 large eggs, and pour in 2 teaspoons of vanilla extract. Mix everything together until it’s just combined. The vanilla adds such a lovely flavor, which is key to making these cookies taste like a celebration!
Step 5: Combine Wet and Dry Ingredients
Gradually add the dry ingredients to your wet mixture. I like to do this in three parts. Start with about a third of the flour mixture, mix it in until you don’t see any dry flour, then repeat until everything is combined. Don’t overmix; it’s okay if a few streaks of flour remain!
Step 6: Add Fun Ingredients
Now for the best part—fold in 1/2 cup of rainbow sprinkles and 1 cup of white chocolate chips. Use a spatula for this part, and be gentle! You want to distribute the sprinkles and chips evenly without breaking them apart. This is where your cookies get that festive look!
Step 7: Baking the Cookies
Line your baking sheets with parchment paper (this helps with easy cleanup!). Using a cookie scoop or spoon, drop the dough onto the sheets, leaving some space between each dollop. Bake them in your preheated oven for about 10-12 minutes, or until the edges are golden. You want them to look slightly underbaked in the center because they’ll continue to cook while cooling!
Step 8: Cooling
Let the cookies cool on the baking sheet for about 5 minutes before transferring them to a wire rack. This little resting time helps them set up perfectly. And let me tell you, the smell wafting through your kitchen at this point will be absolutely mouthwatering!
Why You’ll Love This Recipe
- Quick to Make: With just 27 minutes total time from start to finish, you can whip these cookies up in no time, making them a perfect last-minute treat!
- Easy to Follow: The steps are straightforward, so whether you’re a seasoned baker or a newbie, you’ll feel confident creating these delicious cookies.
- Flavorful Goodness: The combination of white chocolate chips and rainbow sprinkles brings a delightful sweetness, making every bite a little celebration.
- Festive Touch: These cookies are bursting with color and joy, making them ideal for birthdays, holidays, or any occasion that calls for a sprinkle of fun!
- Perfect for Sharing: Bake a big batch and share them with friends and family. They’re guaranteed to bring smiles and brighten up any gathering!
Tips for Success with Birthday Cake Cookies
Let’s make sure your birthday cake cookies turn out absolutely perfect! I’ve gathered some handy tips that’ll help you avoid common pitfalls and ensure every batch is a hit.
Use Room Temperature Ingredients
Make sure your butter and eggs are at room temperature before you start. This helps them blend together more easily, creating that fluffy texture we all love. If you forget to take them out ahead of time, no worries! Just place the eggs in a bowl of warm water for about 10 minutes and let the butter sit in a warm spot in your kitchen.
Don’t Overmix the Dough
When combining your wet and dry ingredients, be cautious not to overmix. Overmixing can lead to tough cookies, and we definitely want soft and chewy! Stop mixing as soon as you don’t see any dry flour. Trust me, a few flour streaks are perfectly fine!
Chill the Dough for Extra Chewiness
If you have time, chill your cookie dough in the fridge for about 30 minutes before baking. This step is optional but can help your cookies hold their shape better and enhance that chewy texture. Plus, it’s a great way to prep ahead if you have a busy day!
Watch the Baking Time
Every oven is different, so keep an eye on your cookies as they bake. Remember, you want them to look slightly underbaked in the center. They’ll continue to firm up while cooling, giving you that perfect soft bite!
Experiment with Sprinkles and Chips
Feel free to mix things up! While rainbow sprinkles and white chocolate chips are my go-to, you can swap in chocolate chips, peanut butter chips, or even add some crushed nuts for a fun twist. Get creative and make these cookies your own!
Store Properly for Freshness
Store your cookies in an airtight container to keep them fresh and chewy. You can even throw in a slice of bread to help retain moisture—this little trick works wonders! Just be sure to replace the bread slice every few days.
With these tips in hand, you’re well on your way to baking the most amazing birthday cake cookies ever. Happy baking, friend! I can’t wait to hear how your cookies turn out!
Variations on Birthday Cake Cookies
One of the best parts about birthday cake cookies is their versatility! You can easily switch things up to create a whole new cookie experience. Here are some fun variations to try!
Chocolate Chip Twist
If you’re a chocolate lover, why not swap out the white chocolate chips for semi-sweet or dark chocolate chips? The rich chocolate flavor pairs beautifully with the sweetness of the cookies and gives them a delightful twist.
Funfetti Style
For a true funfetti experience, add more sprinkles! Instead of just 1/2 cup, try adding 3/4 cup for a colorful burst in every bite. This extra sprinkle surprise makes them feel even more festive!
Peanut Butter Delight
Mix in 1/2 cup of creamy peanut butter into the butter mixture for a nutty flavor that complements the sweetness perfectly. You could even throw in some chocolate chips for a classic peanut butter cup flavor!
Citrus Zing
Add a teaspoon of orange or lemon zest to the batter for a refreshing citrus kick. The zesty flavor brightens up the cookies and makes them extra special, perfect for summer celebrations!
Nutty Crunch
For a bit of crunch, consider folding in some chopped nuts like walnuts or pecans along with the chocolate chips and sprinkles. Not only do they add texture, but they also elevate the flavor profile of your cookies!
Seasonal Spices
Feel free to play with spices for a seasonal touch! Adding a pinch of cinnamon or nutmeg can give your birthday cake cookies a cozy vibe, especially around the holidays. Just remember to start small and adjust to your taste.
With these variations, you can make birthday cake cookies that cater to every palate and occasion. So go ahead, get creative, and have fun in the kitchen! Your friends and family will love whatever delicious twist you come up with!
Storage & Reheating Instructions
Once you’ve baked your delicious birthday cake cookies, you’ll want to make sure they stay fresh and tasty for as long as possible! Here’s how to store and reheat them to keep that soft and chewy texture intact.
Storing Your Cookies
To keep your cookies fresh, store them in an airtight container at room temperature. This will help maintain their moisture and softness. I often line the bottom of the container with parchment paper before adding the cookies—this little trick helps prevent sticking!
If you find you have a big batch (lucky you!), you can also freeze some for later. Just wrap each cookie individually in plastic wrap or place them in a freezer-safe bag. They’ll keep well in the freezer for up to three months. When you’re ready to enjoy them again, just let them thaw at room temperature for about 30 minutes, and they’ll taste just as good as fresh!
Reheating Tips
To reheat your cookies and bring back that warm, gooey goodness, I recommend using the oven. Preheat your oven to 350°F (175°C), and place the cookies on a baking sheet for about 5 minutes. This will warm them through without making them hard or overbaking them.
If you’re in a hurry, you can also pop them in the microwave. Just place a cookie on a microwave-safe plate and heat it for about 10-15 seconds. Make sure to check after each interval to avoid overheating, as microwaving can quickly turn them into little rocks if you’re not careful!
By following these storage and reheating tips, you’ll always have delightful birthday cake cookies ready to share or enjoy whenever the craving strikes. Happy snacking!
Nutritional Information
Here’s a quick look at the estimated nutritional information for each of these delightful birthday cake cookies. Keep in mind that these values are approximate and can vary based on the specific ingredients you use and any variations you make to the recipe.
- Calories: 150
- Fat: 7g
- Saturated Fat: 4g
- Unsaturated Fat: 2g
- Trans Fat: 0g
- Cholesterol: 20mg
- Sodium: 80mg
- Carbohydrates: 20g
- Fiber: 0g
- Sugar: 10g
- Protein: 2g
These cookies are not only a sweet treat but also a fun way to celebrate any special occasion. Just remember to enjoy them in moderation, especially with that sweet sugar content! Happy baking and indulging!
FAQ about Birthday Cake Cookies
Q1: Can I use different types of sprinkles in this recipe?
Absolutely! While I love rainbow sprinkles for their fun, festive look, you can use any type of sprinkles you like. Try using chocolate sprinkles for a rich twist, or even seasonal sprinkles for holidays. Get creative and make these cookies fit the occasion!
Q2: What can I substitute for white chocolate chips?
If white chocolate isn’t your thing, no problem! You can easily swap them for semi-sweet chocolate chips or even dark chocolate chips for a deeper flavor. You could also try peanut butter chips for a deliciously nutty twist!
Q3: How can I make these cookies gluten-free?
To make your birthday cake cookies gluten-free, you can substitute the all-purpose flour with a 1:1 gluten-free flour blend. Just make sure it’s a good quality blend that includes xanthan gum, which helps with texture. You won’t miss the gluten at all!
Q4: Can I make the dough ahead of time?
Yes, you can! If you want to prep ahead, feel free to make the dough and store it in the fridge for up to 2 days. Just remember to let it sit at room temperature for about 10-15 minutes before baking, so it’s easier to scoop!
Q5: What’s the best way to ensure my cookies stay soft?
To keep your birthday cake cookies soft, store them in an airtight container at room temperature. Adding a slice of bread in with the cookies can also help maintain moisture. And don’t forget to slightly underbake them; they’ll continue to set while cooling, keeping that chewy texture you love!
Birthday Cake Cookies: 7 Steps to Pure Joy
- Total Time: 27 minutes
- Yield: 24 cookies 1x
- Diet: Vegetarian
Description
Delicious birthday cake cookies with a soft and chewy texture.
Ingredients
- 2 1/2 cups all-purpose flour
- 1 teaspoon baking soda
- 1/2 teaspoon salt
- 1 cup unsalted butter, softened
- 1 cup granulated sugar
- 1 cup brown sugar, packed
- 2 large eggs
- 2 teaspoons vanilla extract
- 1/2 cup rainbow sprinkles
- 1 cup white chocolate chips
Instructions
- Preheat your oven to 350°F (175°C).
- In a bowl, whisk together flour, baking soda, and salt.
- In another bowl, beat butter, granulated sugar, and brown sugar until creamy.
- Add eggs and vanilla to the butter mixture, mixing well.
- Gradually add the flour mixture to the wet ingredients.
- Fold in sprinkles and white chocolate chips.
- Drop dough onto baking sheets.
- Bake for 10-12 minutes until edges are golden.
- Let cool on the baking sheet for a few minutes, then transfer to a wire rack.
Notes
- Store cookies in an airtight container.
- Replace sprinkles with chocolate chips for variation.
- Prep Time: 15 minutes
- Cook Time: 12 minutes
- Category: Dessert
- Method: Baking
- Cuisine: American
Nutrition
- Serving Size: 1 cookie
- Calories: 150
- Sugar: 10g
- Sodium: 80mg
- Fat: 7g
- Saturated Fat: 4g
- Unsaturated Fat: 2g
- Trans Fat: 0g
- Carbohydrates: 20g
- Fiber: 0g
- Protein: 2g
- Cholesterol: 20mg
Keywords: birthday cake cookies