Oh my goodness, let me tell you about this biscoff cheesecake! It’s like a dream come true in dessert form! Picture this: a rich and creamy filling that just melts in your mouth, all resting on a crunchy base made from those delicious Biscoff cookies. Seriously, every bite is an explosion of flavors that keeps you coming back for more.
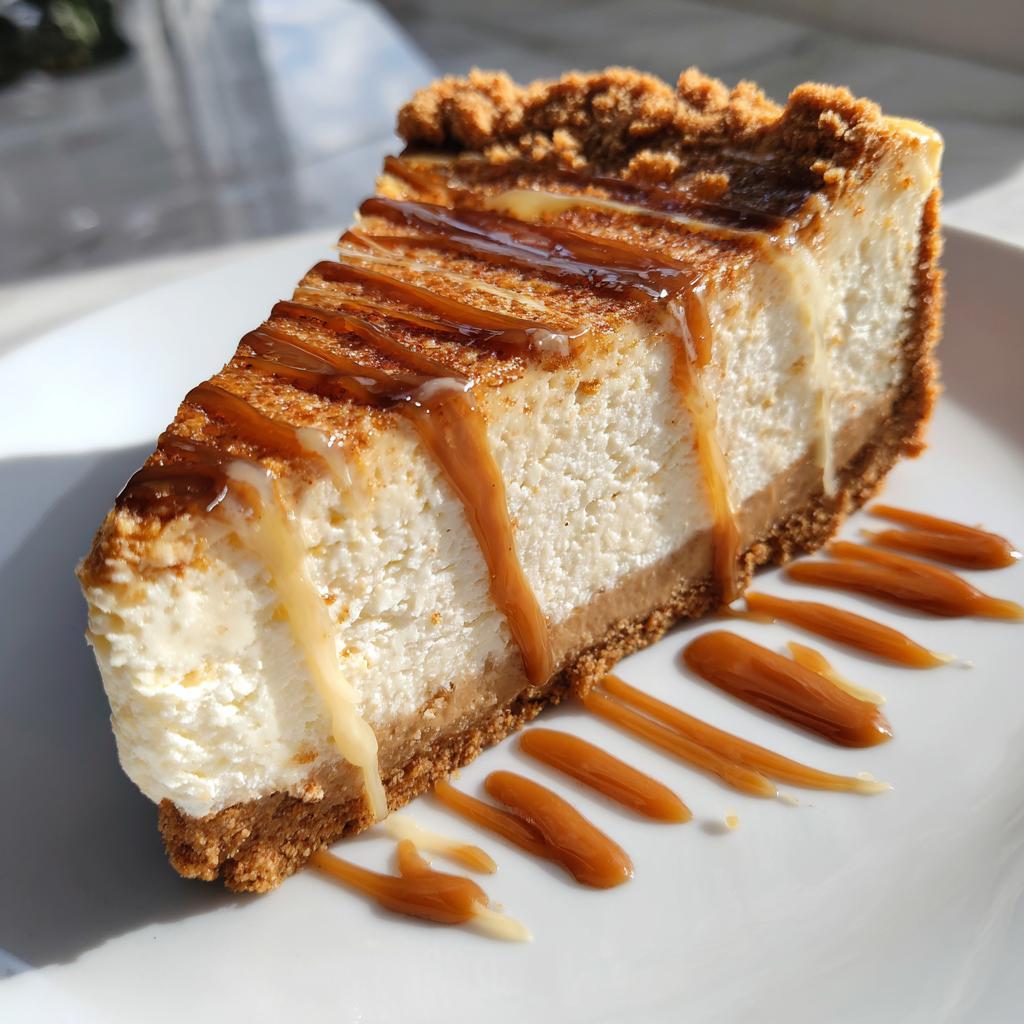
I remember the first time I tried making this cheesecake. I was hosting a dinner party, and I thought, “Why not impress my friends with something unique?” The moment they took their first bites, I knew I had struck gold. The combination of creamy cream cheese and that heavenly Biscoff spread creates a flavor that’s just out of this world! It’s sweet, but not overly so, and that little hint of spice from the cookies is just perfect.
Trust me, once you try this biscoff cheesecake, it’ll become a go-to dessert for all your special occasions. Whether it’s a birthday, holiday, or just a Tuesday night craving, this cheesecake fits right in! Let’s get started on making this scrumptious treat together!
Ingredients for Biscoff Cheesecake
Alright, let’s gather all the goodies you’ll need to whip up this delectable biscoff cheesecake! Here’s your shopping list:
- 250g Biscoff cookies – these will give us that amazing crunchy base.
- 100g unsalted butter – this will help bind the crust together beautifully.
- 400g cream cheese – make sure it’s at room temperature for that smooth texture!
- 100g powdered sugar – this adds just the right amount of sweetness.
- 200ml heavy cream – we’ll whip this up for a light and airy filling.
- 1 teaspoon vanilla extract – a splash of vanilla elevates the flavor.
- 4 tablespoons Biscoff spread – this is the star of the show, giving that iconic taste!
Make sure you grab these ingredients, and you’ll be all set to create something truly special. Trust me, it’ll be worth every bit of effort! Let’s move on to the fun part – preparing this cheesecake!
How to Prepare Biscoff Cheesecake
Now that we’ve got our ingredients ready, it’s time to dive into the fun part of making this biscoff cheesecake! Each step is simple, and I promise you’ll be rewarded with a dessert that will have everyone raving. Let’s break it down, shall we?
Preheat the Oven
First things first, you’ll want to preheat your oven to 180°C (350°F). This step is crucial because it sets the stage for baking your cheesecake evenly. While that’s heating up, you can get started on the crust!
Prepare the Cookie Crust
Grab those Biscoff cookies and crush them into fine crumbs. You can use a food processor for a quick job or pop them in a ziplock bag and go to town with a rolling pin—perfect for relieving stress, right? Once you’ve got those crumbs, melt your unsalted butter in a small saucepan or microwave, then mix the melted butter with the cookie crumbs until they’re thoroughly combined. This mixture will be your solid base, so make sure it’s nice and cohesive!
Next, press this mixture firmly into the bottom of a springform pan. I like to use the back of a measuring cup to get an even layer. You want it snug so it holds together once baked!
Make the Cheesecake Filling
In a large bowl, beat your cream cheese and powdered sugar together until it’s smooth and creamy. Remember, using room temperature cream cheese is key here! It makes mixing so much easier and helps avoid any lumps. Once that’s nice and smooth, add in the heavy cream, vanilla extract, and Biscoff spread. Mix everything until it’s well combined and you have that dreamy filling ready to go!
Assemble and Bake
Now it’s time to pour that luscious cheesecake filling over your prepared crust. Spread it out evenly with a spatula, making sure it reaches all the corners. Pop it in the oven and bake for 30 minutes. The cheesecake will puff up a little, but don’t worry; it’ll settle as it cools. Speaking of cooling, once the baking is done, let it cool in the pan for about 30 minutes before transferring it to the fridge to chill.
Chill Before Serving
This chilling step is super important! You’ll want to let your cheesecake chill in the refrigerator for at least 4 hours, but if you can wait overnight, that’s even better. This time allows the flavors to meld beautifully and gives the cheesecake that perfect texture. Trust me, the wait is worth it!
Why You’ll Love This Biscoff Cheesecake
Oh, where do I even begin? This biscoff cheesecake is an absolute showstopper, and here’s why you’re going to fall head over heels for it!
First off, the rich flavor is something truly special. The combination of creamy cheesecake with that signature Biscoff spread creates a taste sensation that’s sweet, slightly spiced, and oh-so-satisfying. Each bite is like a warm hug on a plate!
Plus, the preparation is a breeze! I love how simple the steps are, from crushing the cookies to mixing the filling. You don’t need to be a professional baker to pull this off—trust me, if I can do it, so can you!
And let’s not forget about that unique taste of Biscoff cookies. They bring this delightful crunch and a flavor profile that’s unlike anything else. It’s not just a cheesecake; it’s an experience that transports you to cookie paradise.
Whether it’s for a celebration or just a sweet treat at home, this cheesecake has the power to impress everyone at the table. Seriously, it’s bound to become a favorite in your dessert rotation. So, what are you waiting for? Let’s keep the fun going and get to those tips for success!
Tips for Success with Biscoff Cheesecake
Alright, let’s make sure your biscoff cheesecake turns out absolutely perfect! Here are some tried-and-true tips that I’ve gathered over the years to help you avoid common pitfalls and elevate your cheesecake game.
Use Room Temperature Ingredients
This is a game changer! Make sure your cream cheese and heavy cream are at room temperature before mixing. It helps everything blend together smoothly and keeps your cheesecake from being lumpy. No one wants a lumpy cheesecake, right?
Don’t Overmix the Filling
When you’re mixing your cheesecake filling, be gentle! Overmixing can incorporate too much air, leading to cracks during baking. Just mix until everything is combined and smooth; that’s all you need!
Check for Doneness Carefully
When you take your cheesecake out of the oven, it should be set around the edges but still have a slight jiggle in the center. This means it’ll continue to set as it cools. If it looks too firm, you may have overbaked it, so keep an eye on those last few minutes!
Cool Gradually
After baking, let your cheesecake cool in the pan for about 30 minutes before transferring it to the fridge. This gradual cooling helps prevent cracking. If you put it straight into the fridge, the sudden temperature change can cause issues!
Chill Overnight for Best Flavor
If you can resist, let your cheesecake chill overnight! This extra time helps the flavors develop and gives you that perfect, creamy texture. You’ll be rewarded with a slice that’s even more delicious!
Serve with a Twist
Want to take it up a notch? Top your biscoff cheesecake with an extra drizzle of Biscoff spread or sprinkle some crushed cookies on top just before serving. It adds that extra touch of decadence that everyone will love!
With these tips in your back pocket, you’re set up for success! Making this biscoff cheesecake is a joyous adventure, and I can’t wait for you to share it with your friends and family. Happy baking!
Nutritional Information for Biscoff Cheesecake
Let’s talk numbers! Knowing the nutritional info can be super helpful, especially when you’re sharing this delightful biscoff cheesecake with friends and family. Keep in mind that these values are estimates, but they give you a good idea of what you’re indulging in:
- Serving Size: 1 slice
- Calories: 450
- Fat: 30g
- Saturated Fat: 15g
- Trans Fat: 0g
- Cholesterol: 80mg
- Sodium: 200mg
- Carbohydrates: 40g
- Sugar: 30g
- Fiber: 1g
- Protein: 5g
This cheesecakey goodness is a sweet treat, so it’s perfect for special occasions or just when you need a little indulgence. Just remember to enjoy every delicious bite responsibly! Now, let’s keep the momentum going and dive into the FAQ section, where I’ll answer all your burning questions about this amazing dessert!
FAQ about Biscoff Cheesecake
Can I use other cookies for the crust?
Absolutely! While Biscoff cookies give that iconic flavor to this cheesecake, you can definitely experiment with other cookies. Graham crackers, Oreo cookies, or even chocolate wafers can make delicious alternatives. Just keep in mind that different cookies may slightly alter the taste and texture, but it’ll still be scrumptious! Just crush them up and follow the same steps for the crust—easy peasy!
How long will the cheesecake last in the fridge?
Your biscoff cheesecake will stay fresh in the fridge for about 4 to 5 days. Just be sure to cover it properly with plastic wrap or store it in an airtight container to keep it from drying out or absorbing any fridge odors. Trust me, it might be tempting to devour it all at once, but having some leftovers is a sweet treat for later!
Can I freeze the cheesecake?
Yes, you can freeze your biscoff cheesecake! Just make sure to let it chill completely in the fridge first. Once it’s cool, wrap it tightly in plastic wrap and then in aluminum foil to prevent freezer burn. It should last in the freezer for about 2 to 3 months. When you’re ready to enjoy it, let it thaw in the fridge overnight. Just know that freezing can slightly change the texture, but it’ll still be delicious!
Serving Suggestions for Biscoff Cheesecake
Now that you’ve created this stunning biscoff cheesecake, let’s talk about how to serve it up and take the experience to the next level! Trust me, the right accompaniments can make your dessert even more delightful.
First off, a hot cup of coffee pairs beautifully with the creamy texture and flavors of the cheesecake. The bitterness of the coffee balances out the sweetness perfectly. Whether you prefer a strong espresso or a smooth latte, you can’t go wrong here!
If you’re in the mood for something fruity, a side of fresh berries is a fantastic choice. Strawberries, raspberries, or blueberries add a lovely burst of freshness that complements the rich cheesecake. Plus, they look stunning on the plate!
For an extra touch of indulgence, consider drizzling a bit more Biscoff spread on top before serving. It adds a beautiful glossy finish and enhances that iconic flavor we all love. You could even add a dollop of whipped cream for some lightness and creaminess on top.
And let’s not forget about serving it with a scoop of vanilla ice cream! The cold creaminess contrasts wonderfully with the rich cheesecake, making each bite a heavenly experience.
Finally, if you’re feeling extra fancy, create a simple fruit compote by simmering some berries with a touch of sugar and lemon juice. Spoon this over each slice for a pop of color and flavor that will wow your guests!
With these suggestions, your biscoff cheesecake will not only shine but become a highlight of your gathering. Enjoy every moment of sharing this delicious treat with your loved ones!
Storage & Reheating Instructions for Biscoff Cheesecake
Let’s talk about how to properly store your biscoff cheesecake so it stays fresh and delicious! After all that hard work, you’ll want to enjoy every last slice without losing any of that amazing flavor and texture.
First things first, let your cheesecake cool completely in the fridge after it’s baked. Once it’s nice and chilled, wrap it tightly in plastic wrap or transfer it to an airtight container. This will help prevent it from drying out or absorbing any funky fridge odors. Your biscoff cheesecake can be stored in the fridge for about 4 to 5 days, which is perfect for those late-night cravings!
If you happen to have leftovers (which is always a win!), you can also freeze your cheesecake. Just make sure it’s completely chilled, then wrap it in plastic wrap followed by aluminum foil for extra protection. It should last in the freezer for about 2 to 3 months. When you’re ready to enjoy it again, simply transfer it to the fridge to thaw overnight. This slow thawing helps maintain its creamy texture.
Now, about reheating—most cheesecakes, including this biscoff beauty, are best served chilled, so there’s really no need to reheat it. Just slice a piece straight from the fridge and dig in! However, if you prefer it a bit warmer, you can let it sit at room temperature for about 15-20 minutes before serving. This little trick enhances the flavors and makes it even more delectable!
So, whether you’re storing it in the fridge or freezing it for later, you can rest easy knowing your biscoff cheesecake will be ready whenever you need a sweet treat. Enjoy every bite!
Print
Biscoff Cheesecake: 7 Reasons It’s Pure Dessert Bliss
- Total Time: 4 hours 50 minutes
- Yield: 8 servings 1x
- Diet: Vegetarian
Description
A rich and creamy biscoff cheesecake with a crunchy base.
Ingredients
- 250g Biscoff cookies
- 100g unsalted butter
- 400g cream cheese
- 100g powdered sugar
- 200ml heavy cream
- 1 teaspoon vanilla extract
- 4 tablespoons Biscoff spread
Instructions
- Preheat your oven to 180°C (350°F).
- Crush the Biscoff cookies into fine crumbs.
- Melt the butter and mix with the cookie crumbs.
- Press the mixture into the bottom of a springform pan.
- In a bowl, beat the cream cheese and powdered sugar until smooth.
- Add the heavy cream, vanilla extract, and Biscoff spread. Mix well.
- Pour the cheesecake mixture over the crust.
- Bake for 30 minutes and let it cool.
- Chill in the refrigerator for at least 4 hours before serving.
Notes
- Use room temperature cream cheese for a smoother texture.
- Top with extra Biscoff spread or cookie crumbs before serving.
- Prep Time: 20 minutes
- Cook Time: 30 minutes
- Category: Dessert
- Method: Baking
- Cuisine: American
Nutrition
- Serving Size: 1 slice
- Calories: 450
- Sugar: 30g
- Sodium: 200mg
- Fat: 30g
- Saturated Fat: 15g
- Unsaturated Fat: 10g
- Trans Fat: 0g
- Carbohydrates: 40g
- Fiber: 1g
- Protein: 5g
- Cholesterol: 80mg
Keywords: biscoff cheesecake, dessert, cheesecake recipe


