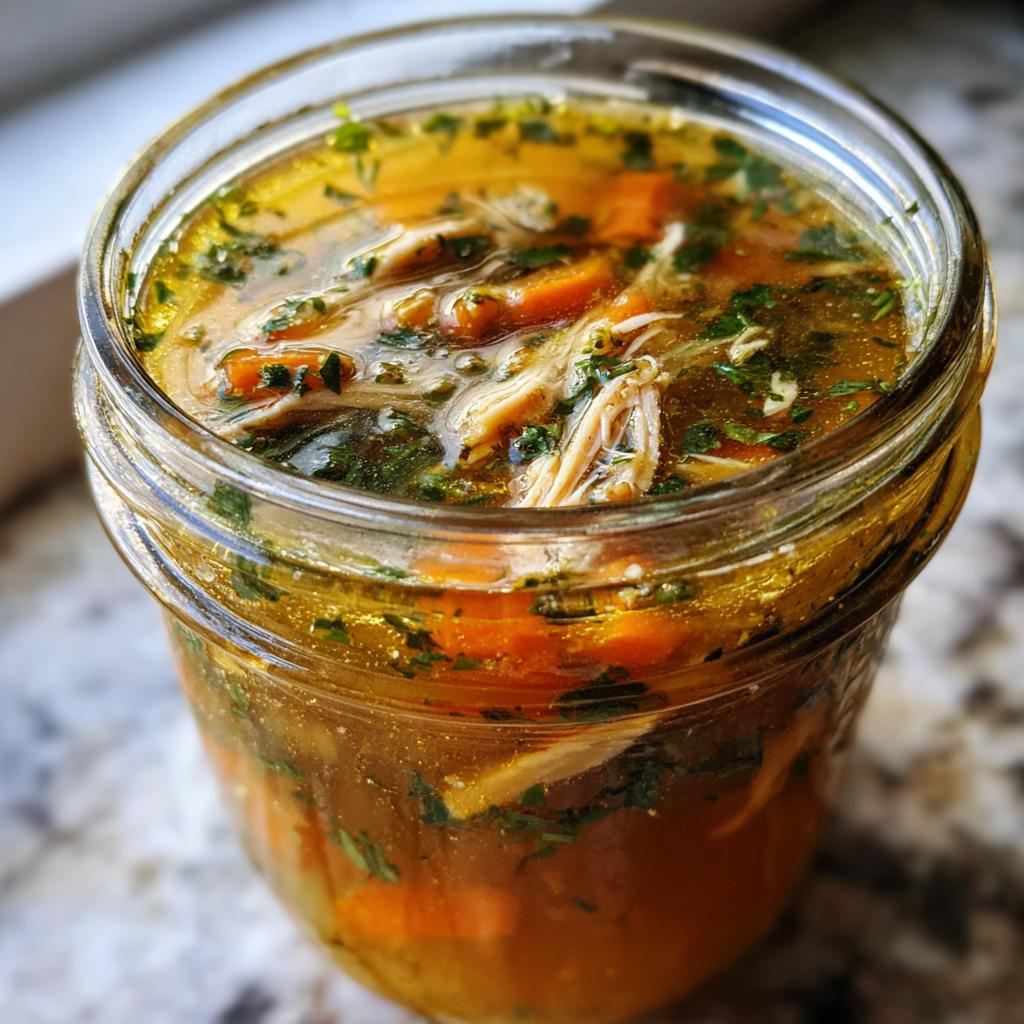
There’s something incredibly comforting about a pot of homemade chicken broth simmering on the stove. It fills your home with warmth and a rich aroma that just wraps around you like a cozy blanket. I remember my first attempt at making chicken broth; it was a chilly autumn day, and I had leftover rotisserie chickens from dinner. I thought, “Why not turn these into something beautiful and delicious?” And that’s how I discovered the joy of canning chicken broth recipes!
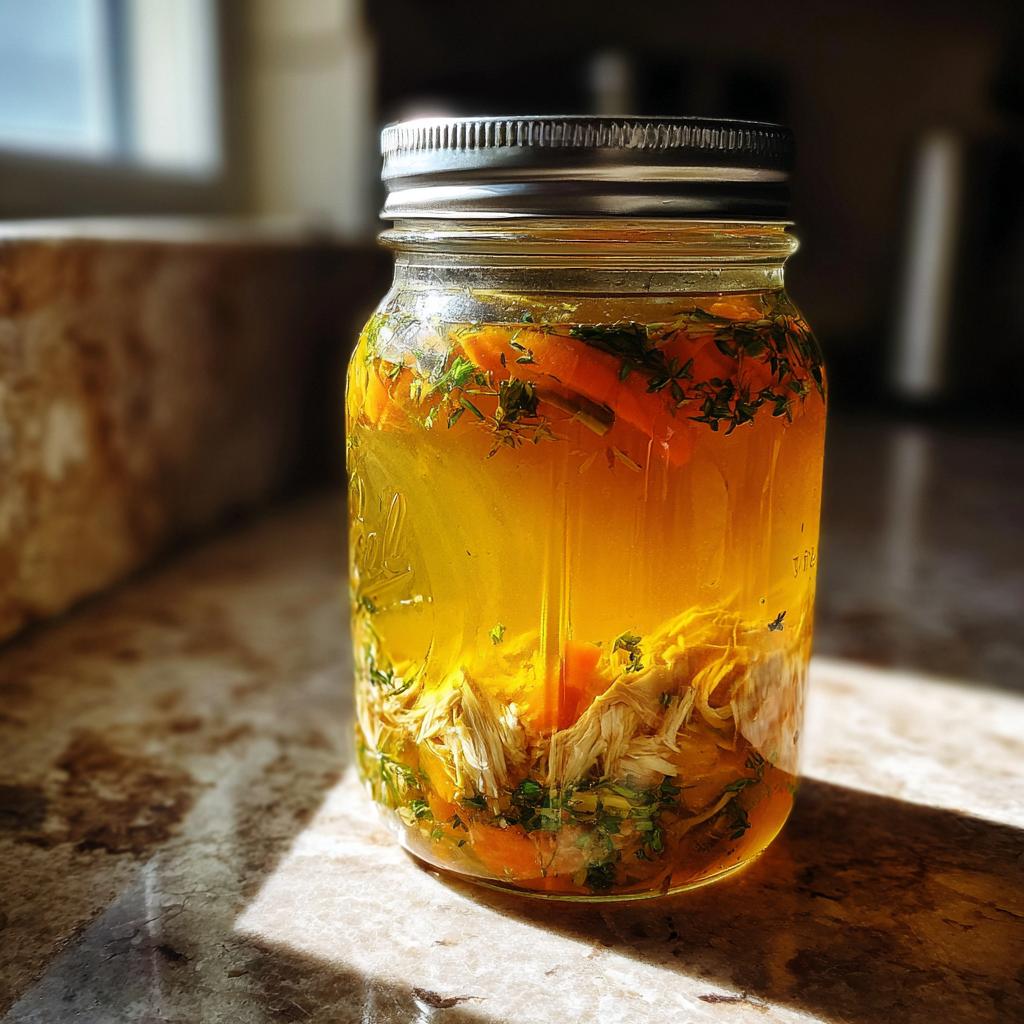
Homemade chicken broth is a game changer. Not only does it taste infinitely better than store-bought versions, but it’s also super easy to make, especially when you can it. Imagine having jars of rich, flavorful broth ready to go whenever you need them! It’s perfect for soups, stews, or even just sipping on a cold day. Plus, knowing exactly what goes into your broth gives you peace of mind and makes every bowl feel like a warm hug from the inside out.
So, let’s dive into this simple guide for making and canning chicken broth at home. Trust me, once you try this method, you’ll never look back!
Ingredients List
Here’s what you’ll need to create a delicious, homemade chicken broth that you can can and enjoy for months to come. Make sure your ingredients are fresh for the best flavor!
- 2 whole chickens (about 3-4 lbs each) – I love using organic chickens if I can find them. They add a depth of flavor that’s hard to beat!
- 12 cups water – This will be the base of your broth, so use filtered water if possible for a cleaner taste.
- 2 onions, quartered – No need to peel them; just chop them in half and toss them in. The skins actually add beautiful color and richness to the broth!
- 4 carrots, chopped – I like to leave the skins on for added nutrients, but give them a good scrub beforehand.
- 4 celery stalks, chopped – Celery adds that wonderful aromatic base; I usually include the leaves for extra flavor!
- 4 cloves garlic, smashed – Don’t worry about mincing; just give them a good smash to release their oils and flavor.
- 2 bay leaves – These guys add a subtle herbal note to your broth. Just remember to fish them out before canning!
- 1 teaspoon black peppercorns – They infuse a lovely warmth without making it spicy. You can adjust this based on your taste preference.
- Salt to taste – I usually wait until the broth is done cooking to season it, that way I can control the flavor better.
Gather these ingredients, and you’ll be well on your way to making some fantastic chicken broth that’s perfect for canning!
How to Prepare Canning Chicken Broth Recipes
Now that we’ve got our ingredients ready, it’s time to get cooking! I’m super excited to walk you through this step-by-step process for making and canning your very own chicken broth. Trust me, once you’ve got this down, you’ll feel like a pro in the kitchen!
Preparing the Ingredients
First things first, we need to prep our ingredients. This part is actually pretty fun! Here’s how to get everything ready:
- Whole Chickens: Rinse the chickens under cold water, removing any giblets if they’re included. Place them straight into your large pot once cleaned.
- Onions: Quarter the onions, skins and all! Just chop them in half and toss them in the pot. Those skins help give the broth a lovely golden hue.
- Carrots: Wash the carrots thoroughly, and if they’re organic, feel free to leave the skins on. Cut them into chunks and add them to the pot.
- Celery: Chop the celery into smaller pieces, including the leaves for extra flavor. Toss them right in with the other ingredients.
- Garlic: Smash the garlic cloves with the flat side of a knife or your palm. No need to chop – we want those flavors to infuse without fussing over tiny pieces.
- Bay Leaves and Peppercorns: Just grab those and set them aside for now; they’ll go in with the other ingredients later!
Once everything is prepped, you’re ready to move on to cooking the broth!
Cooking the Broth
Now, let’s get that broth simmering! This is where the magic happens. Here’s how to do it:
- Place the whole chickens in your large pot and pour in 12 cups of water, covering them completely.
- Next, add the quartered onions, chopped carrots, celery, smashed garlic, bay leaves, and black peppercorns. Give it a gentle stir to mix everything in.
- Bring the pot to a rolling boil over medium-high heat. This should take about 10-15 minutes. Once it starts boiling, reduce the heat to low and let it simmer.
- Let it simmer for about 2-3 hours. This is when you can really relax and enjoy the aroma filling your kitchen! You might want to check on it occasionally and skim off any foam that rises to the surface. Just use a ladle or spoon to scoop it out.
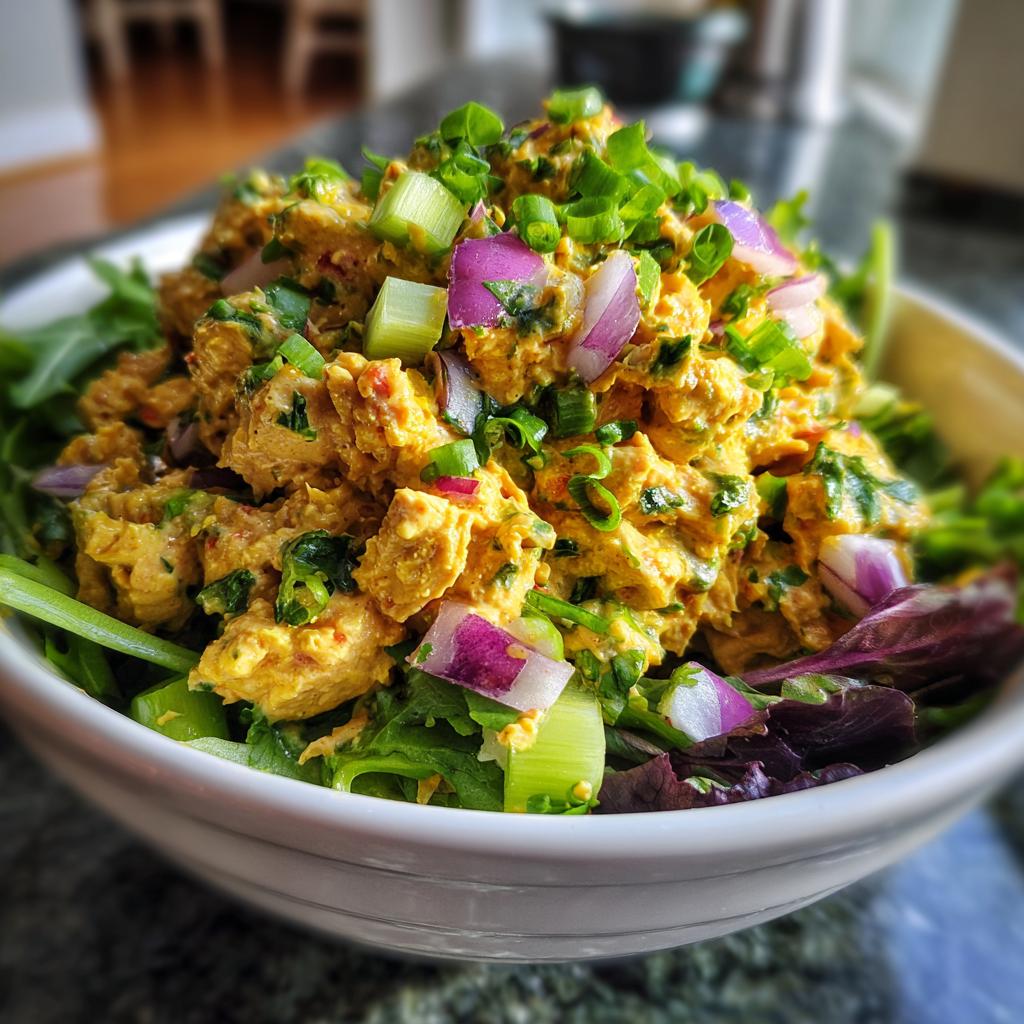
- After your time is up, carefully remove the chickens from the pot. I like to use tongs for this part. Let them cool for a bit before shredding the meat for another recipe or a comforting chicken salad.
- Now, strain the broth using a fine sieve into another large pot or bowl to remove all the solids. You want that beautiful, clear liquid!
- Let the broth cool slightly, then taste it and season with salt to your preference. I usually wait until this point to adjust the saltiness!
Canning the Broth
We’re almost there! Now comes the fun part: canning your delicious broth. Here’s how to do it safely and effectively:
- First, make sure your canning jars are sterilized. I like to run them through the dishwasher or place them in a hot oven. This step is crucial to prevent spoilage!
- Pour the hot broth into the sterilized jars, leaving about 1-inch headspace at the top. This space is important for the vacuum seal to form properly.
- Wipe the rims of the jars with a clean cloth to ensure there’s no broth residue, which can prevent a good seal.
- Carefully place the lids on the jars and screw on the metal bands until they’re fingertip-tight. Don’t over-tighten!
- Now, it’s time to process them in a pressure canner. Fill your canner with water according to the manufacturer’s instructions, then place the jars inside. Process the jars for 25 minutes at 10 lbs of pressure. This step is vital for safely preserving your broth.
- Once the time is up, allow the pressure canner to cool down naturally. When it’s safe to open, carefully remove the jars and let them cool completely on a clean kitchen towel or cooling rack.
And there you have it! Your homemade chicken broth is now safely canned and ready to be enjoyed anytime you need a warm bowl of comfort.
Tips for Success
Making and canning chicken broth is a delightful adventure, but a few handy tips can elevate your broth to the next level! Trust me, these little tricks will help you achieve that rich, flavorful broth you crave.
- Choose Quality Ingredients: Always opt for the best quality chickens you can find. Organic or free-range birds usually yield a more flavorful broth. Fresh vegetables will also make a noticeable difference, so hit up your local farmers’ market if you can!
- Don’t Skimp on the Simmering: Give your broth plenty of time to simmer. The longer it cooks, the more flavor you’ll extract from the bones and veggies. I like to aim for the full 3 hours if I can – it’s worth the wait!
- Adjust Seasoning Wisely: Seasoning your broth should be a careful process. Start with a pinch of salt and taste as you go. Remember, you can always add more, but you can’t take it out once it’s in!
- Mind Your Headspace: When filling your jars, don’t forget that 1-inch headspace! This is crucial for creating a proper seal and preventing any broth from bubbling over during processing.
- Label and Date Your Jars: Once your broth is canned and cooled, take a moment to label each jar with the date and contents. This simple step helps keep your pantry organized and ensures you use the older jars first.
- Experiment with Flavors: Feel free to play around with the ingredients! Adding herbs like thyme or parsley can give your broth a unique twist. Just remember, whatever you add should complement the chicken flavor rather than overpower it.
With these tips in your back pocket, you’re all set to make the most incredible chicken broth! Enjoy the process, and don’t forget to savor the fruits of your labor when it’s all done!
Nutritional Information
Now, let’s talk about the nutrition you’ll get from this homemade chicken broth! It’s always great to know what you’re putting into your body, right? Here are the estimated nutritional values per 1 cup serving:
- Calories: 40
- Fat: 1 g
- Saturated Fat: 0 g
- Unsaturated Fat: 0 g
- Trans Fat: 0 g
- Carbohydrates: 2 g
- Fiber: 0 g
- Sugar: 0 g
- Protein: 7 g
- Sodium: 50 mg
- Cholesterol: 30 mg
Keep in mind that these values are estimates and can vary based on the specific ingredients you use. But one thing’s for sure: this broth is a low-calorie, nutrient-packed addition to your meals! It’s perfect for adding flavor without all the extra calories. Enjoy knowing you’re making something healthy and wholesome!
FAQ Section
Got questions about canning chicken broth recipes? I’ve got you covered! Here are some of the most common questions I hear, along with my answers:
Can I use leftover chicken bones to make broth?
Absolutely! Using leftover chicken bones is a fantastic way to make broth. Just add them to your pot with the same ingredients, and you’ll get a rich flavor without wasting anything. It’s a great way to make the most of your meals!
How long will canned chicken broth last?
When properly canned and stored in a cool, dark place, your homemade chicken broth can last for up to a year. Just make sure to check the seals on your jars before using them. If the seal is broken or the lid pops when pressed, it’s best to toss it.
Can I freeze chicken broth instead of canning it?
Yes, you can definitely freeze chicken broth! Just pour it into freezer-safe containers or bags, leaving some space for expansion. It’s a great option if you don’t have a pressure canner. Just remember to label and date your containers!
What’s the best way to use canned chicken broth?
You can use your canned chicken broth in a variety of recipes! It’s perfect for soups, stews, risottos, or even as a base for sauces. You can also sip it warm on its own for a comforting treat. The possibilities are endless!
How do I know if my broth is safe to eat after canning?
Check the seals on your jars! If they’re tight and don’t pop when pressed, they’re good to go. Additionally, if the broth has a strange smell or appearance after opening, it’s better to err on the side of caution and discard it. Safety first!
Why You’ll Love This Recipe
Making and canning your own chicken broth is one of those kitchen adventures that’s absolutely worth it! Here are just a few reasons why you’ll fall head over heels for this recipe:
- Convenience: Having jars of homemade chicken broth on hand means you can whip up delicious soups or stews in no time. Just grab a jar, heat it up, and you’re set!
- Flavor: Nothing beats the rich, savory flavor of homemade broth. It’s customizable to your taste, allowing you to add your favorite herbs and spices for a unique twist.
- Health Benefits: Homemade chicken broth is packed with nutrients! It’s low in calories and full of protein, making it a wholesome addition to any meal.
- Cost-Effective: Making broth from scratch is a great way to save money. Instead of buying store-bought broth, you can use leftovers and kitchen scraps to create something delicious!
- Preservation Skills: Canning your broth is a fantastic way to learn and practice essential preservation techniques. Plus, it gives you a sense of accomplishment knowing you created something shelf-stable!
- Comforting Aroma: The smell of broth simmering on the stove is simply irresistible. It fills your home with warmth and coziness, making it the perfect remedy for chilly days.
Once you try this recipe, I promise you’ll wonder how you ever lived without it! It’s not just about making broth; it’s about creating a comforting staple that enhances so many meals.
Storage & Reheating Instructions
Now that you’ve got your delicious homemade chicken broth all canned and ready to go, let’s talk about how to store it properly and reheat it when you’re ready to enjoy it!
For storage, make sure your jars are kept in a cool, dark place – a pantry or a cupboard works perfectly. The ideal temperature is around 50-70°F. This helps maintain the quality of your broth for as long as possible. Just remember, it’s best to use your canned broth within a year for the best flavor and quality, although it can last longer if stored correctly.
Before you use your jars, always check the seals. If the lid pops up when pressed, it’s a sign that the seal is broken, and it’s best to discard that jar. Safety first, right?
When you’re ready to use your broth, reheating it is super simple! Just follow these steps:
- Stovetop Method: Pour the desired amount of broth into a pot and heat it over medium heat. Stir occasionally, and it should be ready in about 5-10 minutes. If you want to add any seasonings or herbs, now’s the time to do it!
- Microwave Method: You can also reheat your broth in the microwave. Pour it into a microwave-safe container and cover it loosely. Heat in 1-minute intervals, stirring in between, until it’s hot. Be careful, as it can get quite hot!
And there you have it! Your homemade chicken broth is now ready to be enjoyed in all its savory glory. Whether you’re using it in a soup or sipping it on its own, I guarantee it’ll warm you up from the inside out!
Serving Suggestions
Now that you have your delicious homemade chicken broth ready to go, let’s explore some fantastic ways to serve it! This broth is incredibly versatile and can elevate countless dishes. Here are some of my favorite serving suggestions:
- Classic Chicken Soup: The ultimate comfort food! Just add shredded chicken, noodles, and your favorite vegetables for a hearty bowl. A sprinkle of fresh herbs like parsley or thyme on top adds a lovely touch.
- Risottos: Use your broth as the base for creamy risottos. It adds depth of flavor to your Arborio rice, making every bite rich and satisfying. Try pairing it with mushrooms or asparagus for a delightful twist!
- Vegetable Stews: Simmer your favorite vegetables in the broth for a nourishing stew. Add in beans or lentils for a protein boost, and serve with crusty bread for a complete meal.
- Grain Bowls: Use the broth to cook quinoa, rice, or farro for added flavor. Top with roasted vegetables, greens, and a drizzle of olive oil for a wholesome and filling dish.
- Flavorful Sauces: Use the broth as a base for sauces or gravies. It’s perfect for deglazing pans after sautéing meats or vegetables, capturing all those delicious browned bits!
- Fancy Sipping Broth: For a cozy night in, heat your broth, add a sprinkle of sea salt, and maybe a dash of soy sauce or lemon juice for a gourmet sipping experience. It’s a comforting way to warm up on a chilly evening!
With these serving suggestions, you can enjoy your homemade chicken broth in so many delicious ways! Feel free to mix and match based on your cravings – the possibilities are endless! Trust me, once you start experimenting, you’ll find your favorite combinations in no time.
Print
Canning Chicken Broth Recipes: 7 Comforting Delights
- Total Time: 3 hours 30 minutes
- Yield: 8 quarts 1x
- Diet: Low Calorie
Description
A simple guide for making and canning chicken broth at home.
Ingredients
- 2 whole chickens (about 3–4 lbs each)
- 12 cups water
- 2 onions, quartered
- 4 carrots, chopped
- 4 celery stalks, chopped
- 4 cloves garlic, smashed
- 2 bay leaves
- 1 teaspoon black peppercorns
- Salt to taste
Instructions
- Place chickens in a large pot and cover with water.
- Add onions, carrots, celery, garlic, bay leaves, and peppercorns.
- Bring to a boil, then reduce to a simmer.
- Cook for 2-3 hours, skimming off foam as needed.
- Remove chickens and strain broth through a fine sieve.
- Let broth cool slightly and season with salt.
- Pour hot broth into sterilized jars, leaving 1-inch headspace.
- Seal jars with lids and process in a pressure canner for 25 minutes at 10 lbs pressure.
- Allow jars to cool completely before storing.
Notes
- Ensure jars are sterilized to prevent spoilage.
- Use fresh ingredients for the best flavor.
- Adjust seasoning to your preference.
- Prep Time: 30 minutes
- Cook Time: 3 hours
- Category: Soups and Broths
- Method: Canning
- Cuisine: American
Nutrition
- Serving Size: 1 cup
- Calories: 40
- Sugar: 0 g
- Sodium: 50 mg
- Fat: 1 g
- Saturated Fat: 0 g
- Unsaturated Fat: 0 g
- Trans Fat: 0 g
- Carbohydrates: 2 g
- Fiber: 0 g
- Protein: 7 g
- Cholesterol: 30 mg
Keywords: canning chicken broth, homemade chicken broth, chicken broth recipes


