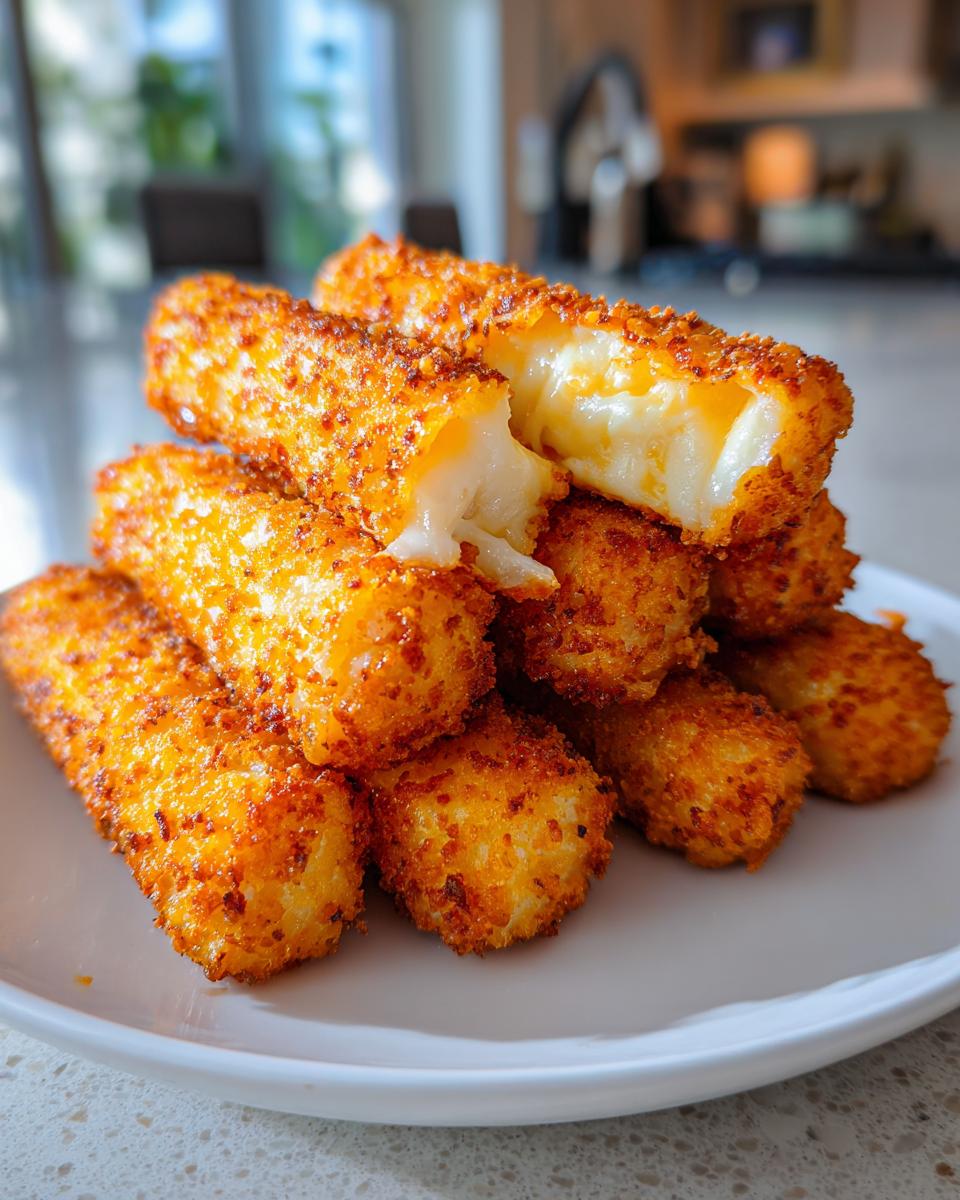
Oh, the joy of crispy snacks! There’s just something so satisfying about that crunch, isn’t there? And let me tell you, making cheese crisps in an air fryer is a game changer. It’s a quick and simple way to whip up a deliciously crispy treat that will have everyone coming back for more. With just a few ingredients, you’ll create these heavenly little bites that are bursting with flavor! The air fryer does all the heavy lifting, ensuring your cheese crisps turn out perfectly golden and oh-so crunchy every single time. Plus, they’re gluten-free, making them a fantastic snack option for everyone to enjoy. Trust me, once you take your first bite, you’ll understand why these cheese crisps are destined to become a staple in your snack rotation!
Ingredients for Cheese Crisps Air Fryer
To whip up these delightful cheese crisps, you’ll need just a few simple ingredients. Here’s what you’ll need:
- 1 cup shredded cheese (cheddar or parmesan)
- 1/4 teaspoon garlic powder
- 1/4 teaspoon paprika
Feel free to get creative with your cheese choice! While cheddar and parmesan are my go-to options, you can experiment with different varieties to find your perfect flavor. Just make sure the cheese is shredded so it melts beautifully and forms those irresistible crispy edges!
How to Prepare Cheese Crisps Air Fryer
Getting your cheese crisps just right is super easy, and I’m here to guide you through each step! Follow along, and you’ll have a delicious batch ready to enjoy in no time!
Preheat the Air Fryer
First things first, preheating your air fryer is essential! Set your air fryer to 400°F (200°C). This step ensures that the cheese crisps cook evenly and get that perfect golden brown color. Just a few minutes of preheating can make a big difference, so don’t skip this part!
Mix the Ingredients
Once your air fryer is heating up, grab a mixing bowl and combine the shredded cheese, garlic powder, and paprika. I like to use a fork to mix everything together thoroughly. You want the spices to be evenly distributed so every bite is packed with flavor! This only takes a minute or two, and it’s so worth it!
Shape the Cheese Mounds
Now comes the fun part! Line your air fryer basket with parchment paper – this helps prevent sticking. Using a tablespoon, scoop out small mounds of the cheese mixture and place them on the parchment paper, leaving enough space between each mound (about 1-2 inches). They’ll spread out a bit while cooking, so don’t crowd them!
Air Frying Process
Time to air fry! Carefully place the basket in your preheated air fryer and set the timer for 5-7 minutes. Keep an eye on them, especially after the 5-minute mark. You want them to be golden brown and crispy, so check for that beautiful color. If they’re not quite there, give them another minute or two. Every air fryer is a bit different, so just be sure to watch closely!
Cooling the Cheese Crisps
Once they’re done, carefully remove the basket and let the cheese crisps cool for a few minutes. This step is crucial for achieving that perfect crunch! They may seem a bit soft right out of the air fryer, but don’t worry – they’ll harden as they cool. Trust me, letting them cool will make all the difference in texture!
Why You’ll Love This Recipe
There are so many reasons to adore these cheese crisps! Let me share a few of the highlights that make this recipe a must-try:
- Quick Preparation: With just a handful of ingredients and minimal prep time, you’ll have these tasty snacks ready in under 20 minutes!
- Easy Cleanup: The air fryer means less mess compared to traditional frying methods. Plus, using parchment paper keeps your basket clean as a whistle!
- Crispy Texture: Say goodbye to soggy snacks! These cheese crisps deliver that satisfying crunch with every bite, making them perfect for munching.
- Gluten-Free Option: Whether you’re gluten-sensitive or just looking for a healthier snack, these cheese crisps fit the bill perfectly!
Honestly, once you try them, you’ll see how easy it is to fall in love with this recipe! Each bite is a delightful combination of flavor and crunch that will keep you coming back for more.
Tips for Success with Cheese Crisps Air Fryer
To ensure your cheese crisps turn out perfectly every time, I’ve got some handy tips to help you get the best results. Trust me, these little nuggets of cheesy goodness are worth a few extra pointers!
Choose the Right Cheese
While I love using cheddar and parmesan, don’t be afraid to get adventurous! Gouda, mozzarella, or even a spicy pepper jack can add exciting flavors to your crisps. Just remember that the cheese should be shredded; this helps it melt evenly and achieve that lovely crispiness!
Mind the Cooking Time
Every air fryer is a little different, so keep an eye on your cheese crisps as they cook. If your air fryer runs hot, start checking them around the 4-minute mark. If you’re using a lower wattage model, they might need the full 7 minutes. Adjusting the cooking time is key to getting that golden brown finish!
Don’t Skimp on Spacing
When placing your cheese mounds on the parchment paper, give them room to breathe! They’ll spread as they cook, and if they’re too close together, you might end up with a cheesy blob instead of crispy goodness. Aim for about 1-2 inches apart – trust me, it’s worth it!
Experiment with Spices
Feel free to jazz up your cheese crisps with different seasonings! A pinch of cayenne can add some heat, or you can sprinkle in some Italian herbs for a Mediterranean twist. Experimenting with flavors not only keeps things interesting but also helps you discover your perfect combination!
Store Properly for Crunch
If you happen to have leftovers (which is rare in my house!), make sure to store them in an airtight container. This keeps them fresh, but for that ultimate crunch, I recommend reheating them in the air fryer for a couple of minutes before serving. They’ll be just as crispy as the first time!
With these tips, you’ll have everyone raving about your cheese crisps! Enjoy the process and happy snacking!
Variations to Try
If you’re feeling adventurous, there are so many fun ways to mix things up with these cheese crisps! One of my favorite variations is to switch up the cheese. Try using a sharp cheddar for a bold flavor or creamy mozzarella for a milder taste. You could even experiment with a smoky gouda or a spicy pepper jack to kick things up a notch!
Don’t forget about spices! Adding a dash of cayenne pepper can bring some heat, while a sprinkle of Italian herbs like oregano or basil can give your crisps a delightful Mediterranean flair. For a zesty twist, why not mix in some grated Parmesan and a hint of lemon zest? The possibilities are endless, and it’s a great way to cater to your taste buds or impress guests with unexpected flavors!
So, don’t hesitate to get creative – your cheese crisps will always be a hit!
Storage & Reheating Instructions
If you find yourself with leftover cheese crisps (which is a rare treat in my house!), it’s important to store them properly to maintain that delightful crunch. First, let the crisps cool completely on a wire rack before transferring them to an airtight container. This prevents moisture from building up and keeps them crisp for longer. I usually store mine at room temperature, and they can last for about 2-3 days.
When you’re ready to enjoy them again, reheating is key! The best method is to pop them back into the air fryer for just a couple of minutes at 350°F (175°C). This will bring back their crispy texture and delicious flavor. If you don’t have an air fryer handy, you can also use your oven, but be sure to keep an eye on them to avoid over-baking. Trust me, a quick reheat is all they need to taste as good as fresh!
Nutritional Information
When it comes to snacking, knowing the nutritional breakdown of your favorite treats is always a good idea! Here’s what you can expect from a serving of these delicious cheese crisps:
- Calories: 150
- Fat: 12g
- Saturated Fat: 7g
- Unsaturated Fat: 4g
- Trans Fat: 0g
- Cholesterol: 30mg
- Sodium: 200mg
- Carbohydrates: 1g
- Fiber: 0g
- Protein: 10g
- Sugar: 0g
Please note that these values are estimates and can vary based on the specific ingredients you use and portion sizes. But with all that cheesy goodness packed into each serving, you can feel good about indulging in this crispy snack!
Frequently Asked Questions
Can I use different types of cheese?
Absolutely! One of the best parts about making cheese crisps is the flexibility with cheese choices. While I personally love cheddar and parmesan for their fantastic flavor and texture, feel free to experiment! Gouda adds a lovely creaminess, mozzarella gives a milder taste, and pepper jack can bring some spicy excitement to the mix. Just remember to keep the cheese shredded for even melting and that satisfying crunch!
How do I know when the cheese crisps are done?
Great question! You’ll want to look for that glorious golden brown color. When they’re perfectly cooked, the cheese crisps should be firm and crispy to the touch. I recommend checking them closely around the 5-minute mark. If they’re not there yet, give them an extra minute or two, but be careful – you don’t want them to burn. Trust your eyes here; they’ll tell you when they’re ready!
Can I make these cheese crisps in the oven instead?
Yes, you can definitely make these cheese crisps in the oven! Simply preheat your oven to 400°F (200°C) and line a baking sheet with parchment paper. Scoop the cheese mixture into small mounds, just like you would for the air fryer. Bake them for about 6-8 minutes, keeping a close eye on them until they turn that beautiful golden brown. Just remember, the texture might be a tad different, but they’ll still be delicious!
How should I store leftover cheese crisps?
If you happen to have any leftovers (which is rare in my kitchen!), make sure to let them cool completely first. Then, store them in an airtight container at room temperature. They should stay crispy for about 2-3 days. For the best crunch when you’re ready to enjoy them again, simply pop them back in the air fryer for a couple of minutes to reheat. It’s the perfect way to revive that delightful crunch!
Are these cheese crisps suitable for all diets?
Yes! These cheese crisps are a wonderful gluten-free snack option, making them suitable for those with gluten sensitivities. Just be sure to check your cheese labels to make sure they’re gluten-free, as some processed cheeses can have additives. Overall, these crispy bites are a tasty snack that fits well into various dietary preferences!
Print
Cheese Crisps Air Fryer: 5 Tempting Secrets to Crunchy Joy
- Total Time: 17 minutes
- Yield: 4 servings 1x
- Diet: Gluten Free
Description
Crispy cheese snacks made in an air fryer.
Ingredients
- 1 cup shredded cheese (cheddar or parmesan)
- 1/4 teaspoon garlic powder
- 1/4 teaspoon paprika
Instructions
- Preheat the air fryer to 400°F (200°C).
- Mix the shredded cheese, garlic powder, and paprika in a bowl.
- Place small mounds of the cheese mixture on parchment paper.
- Air fry for 5-7 minutes until golden brown.
- Let them cool before serving.
Notes
- Use parchment paper to prevent sticking.
- Experiment with different cheese types.
- Store leftovers in an airtight container.
- Prep Time: 10 minutes
- Cook Time: 7 minutes
- Category: Snack
- Method: Air Frying
- Cuisine: American
Nutrition
- Serving Size: 1 serving
- Calories: 150
- Sugar: 0g
- Sodium: 200mg
- Fat: 12g
- Saturated Fat: 7g
- Unsaturated Fat: 4g
- Trans Fat: 0g
- Carbohydrates: 1g
- Fiber: 0g
- Protein: 10g
- Cholesterol: 30mg
Keywords: cheese crisps air fryer