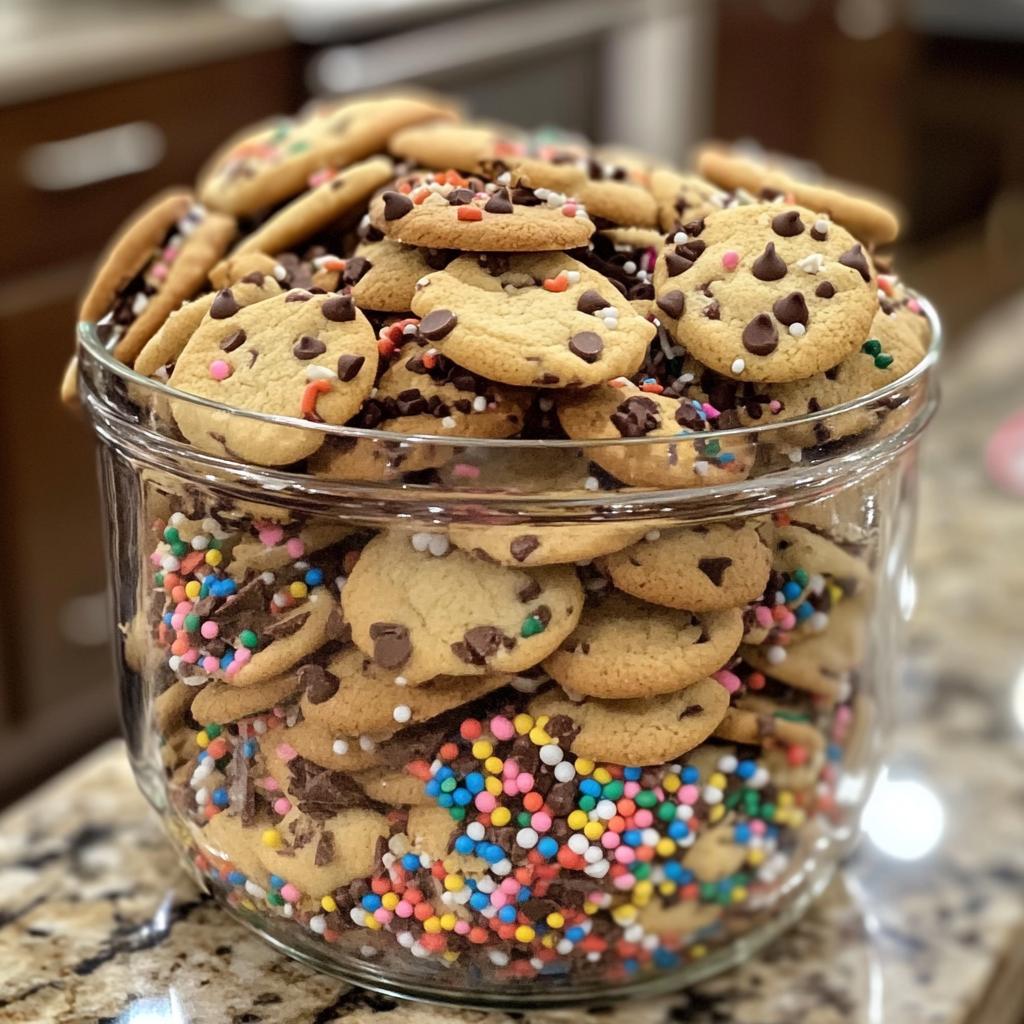
Oh, the magic of holiday baking! There’s just something about the aroma of freshly baked cookies wafting through the house that instantly brings warmth and cheer. I adore this time of year when the days are shorter, and the air is crisp, perfect for gathering in the kitchen to whip up a batch of delightful treats. One of my absolute favorite traditions is creating a *Christmas cookie jar* filled with an assortment of cookies! It’s like a treasure chest of festive flavors, each cookie lovingly made and waiting to be shared. The joy of mixing, measuring, and decorating together with loved ones makes the process even sweeter. Plus, there’s nothing quite like the thrill of gifting a beautifully packed jar to friends and family, inviting them into our own little holiday celebration. Trust me, this cookie jar will become a cherished part of your holiday traditions, so let’s dive into the delightful details of making it!
Ingredients List
Gathering your ingredients is half the fun of baking! Here’s what you’ll need to create your festive *Christmas cookie jar*:
- 2 cups all-purpose flour: This will be the foundation of your cookies, giving them structure and texture.
- 1 cup unsalted butter, softened: Make sure it’s at room temperature for easy creaming – it adds richness and flavor.
- 1 cup granulated sugar: This sweetener helps achieve that delightful crispiness on the outside.
- 1 cup brown sugar, packed: It brings moisture and a lovely caramel flavor to your cookies.
- 1 teaspoon vanilla extract: A must-have for that warm, sweet aroma that fills your kitchen.
- 1 teaspoon baking soda: This is your leavening agent, helping the cookies rise perfectly.
- 1/2 teaspoon salt: Just a pinch enhances the sweetness and balances the flavors.
- 1 cup chocolate chips: Choose semi-sweet or milk chocolate – they add the ultimate indulgence!
- 1 cup chopped nuts: I love using walnuts or pecans for a little crunch, but feel free to mix it up!
- 1/2 cup sprinkles: Because what’s a holiday cookie without a little sparkle? Use your favorite festive colors!
Be sure to have all these goodies ready, and let’s get baking! You’ll be on your way to creating a jar full of joy in no time.
How to Prepare Instructions
Now that we’ve got our ingredients lined up, it’s time to roll up our sleeves and get to baking! Follow these steps carefully, and you’ll have a mouthwatering *Christmas cookie jar* in no time.
Preheat the Oven
First things first, let’s preheat that oven to 350°F (175°C). Preheating is super important because it ensures that your cookies bake evenly and rise beautifully. No one wants flat cookies, right? Let that oven work its magic while we prepare the dough!
Creaming the Butter and Sugars
In a large mixing bowl, add your softened butter, granulated sugar, and brown sugar. Now, grab a hand mixer or a sturdy wooden spoon and cream them together until the mixture is light and fluffy. This usually takes about 2-3 minutes. You want it to look pale and airy, almost like whipped cream! This step is crucial for achieving that delightful texture we all crave in cookies.
Combining Dry Ingredients
In a separate bowl, whisk together the all-purpose flour, baking soda, and salt. This step is key! Whisking evenly distributes the baking soda and salt, ensuring that every bite of your cookies is perfectly balanced. Trust me, you don’t want a pocket of salt in one cookie—yikes!
Mixing and Folding in Add-ins
Now, it’s time to bring everything together! Gradually add the dry ingredients to the creamed mixture, mixing gently until just combined. Be careful not to overmix here; we want our cookies tender, not tough! Once combined, fold in the chocolate chips, chopped nuts, and sprinkles. Use a spatula for this—it’s gentle and helps keep the mix light.
Baking the Cookies
Drop spoonfuls of the dough onto a baking sheet lined with parchment paper, leaving enough space between each cookie for them to spread. Bake them in your preheated oven for about 10-12 minutes, or until they’re golden brown around the edges. Pro tip: they’ll continue to cook a little after you pull them out, so don’t worry if they look slightly underbaked in the center!
Cooling and Storing Cookies
Once baked, let the cookies cool on the baking sheet for about 5 minutes before transferring them to a wire rack to cool completely. This helps them firm up without crumbling. When they’re completely cool, store them in an airtight jar to keep them fresh and delicious! I promise, the joy of opening that jar and sharing them is worth every minute of baking!
Why You’ll Love This Recipe
This *Christmas cookie jar* recipe is a festive delight that brings joy and flavor to your holiday season! Here are just a few reasons why you’ll adore it:
- Quick Prep: With just 15 minutes of prep time, you can whip up these cookies before you know it!
- Festive Flavors: The combination of chocolate chips, nuts, and sprinkles creates a symphony of flavors that’s perfect for the holidays.
- Customizable Options: Feel free to swap in your favorite add-ins—think dried fruits or flavored chocolate—to make it truly your own!
- Great for Gifting: A beautifully packed jar of these cookies makes for a heartfelt gift that friends and family will cherish.
- Fun for Everyone: Baking together is a wonderful way to create lasting memories with loved ones during the holiday season.
Trust me, once you try this recipe, it’ll become a cherished part of your holiday traditions, filling your home with warmth and sweetness!
Tips for Success
Now that you’re all set to bake your *Christmas cookie jar*, let’s talk about some tips to ensure those cookies turn out perfect every time! Trust me, a few little tricks can make a world of difference.
- Don’t Overbake: Keep a close eye on your cookies as they bake. They should be golden brown around the edges but still soft in the center. Remember, they’ll firm up as they cool!
- Use Fresh Ingredients: Always check the expiration dates on your baking soda and flour. Fresh ingredients yield the best results and enhance flavor.
- Customize with Add-ins: Feel free to get creative! Swap chocolate chips for white chocolate, or add in some dried cranberries or coconut flakes for a festive twist. The options are endless!
- Chill the Dough: If you have time, chilling the cookie dough for about 30 minutes before baking can help prevent spreading and enhance the flavors.
- Keep Pans Cool: If you’re baking multiple batches, let your baking sheets cool between batches. This helps cookies maintain their shape and prevents them from spreading too much.
- Invest in Quality Baking Sheets: Heavy-duty, non-stick baking sheets work wonders! They help cookies bake evenly and release easily.
- Measure Ingredients Accurately: Use the spoon and level method for dry ingredients like flour. Scoop flour directly from the bag with a measuring cup can pack it down, resulting in too much flour!
With these handy tips, you’re well on your way to baking up a storm and creating the most delightful *Christmas cookie jar* ever. Happy baking!
Variations
Now that you’ve mastered the classic *Christmas cookie jar* recipe, let’s have some fun with variations! The beauty of this jar is its versatility, and I love experimenting with flavors and decorations to keep things exciting. Here are some creative ideas to inspire your next batch:
- Chocolate Mint Cookies: Swap out half of the chocolate chips for mint chocolate chips for a refreshing twist. You can even add a few drops of peppermint extract to the dough for that extra holiday zing!
- Spiced Ginger Cookies: Incorporate a teaspoon of ground ginger and cinnamon into the dough for a warm, spiced flavor. You could even roll them in sugar before baking for a lovely sparkle.
- Nutty Joy: Replace the chocolate chips with your favorite chopped nuts and dried fruits like cranberries or cherries. This version is perfect for those who love a chewy, fruity cookie!
- Caramel Surprise: Add caramel bits instead of chocolate chips for a gooey, sweet surprise in every bite. Trust me, it’s a delightful change of pace!
- Decorative Icing: Once your cookies cool, let your creativity shine by decorating them with royal icing or melted chocolate. You can create festive designs, snowflakes, or even cute holiday characters!
- Holiday Sprinkles Galore: Experiment with different types of sprinkles—use red and green for Christmas or gold and silver for a New Year’s Eve party. They add a pop of color and cheer to your cookie jar!
With these variations, you can mix and match to create a *Christmas cookie jar* that reflects your personality and holiday spirit. Have fun exploring new flavors and remember, the best part is sharing these delicious treats with loved ones!
Nutritional Information Section
When indulging in your delightful *Christmas cookie jar*, it’s always good to know what you’re enjoying! Here’s a breakdown of the typical nutritional values for each cookie:
- Calories: 150
- Fat: 7g
- Saturated Fat: 4g
- Unsaturated Fat: 2g
- Trans Fat: 0g
- Cholesterol: 20mg
- Sodium: 80mg
- Carbohydrates: 20g
- Fiber: 1g
- Protein: 2g
- Sugar: 10g
Please note that these values are estimates and can vary based on the specific ingredients you use. But rest assured, each cookie is packed with joy and deliciousness, making them a perfect treat for the holidays!
FAQ Section
Got questions about the *Christmas cookie jar*? Don’t worry, I’ve got you covered! Here are some common queries and my tips to make your baking experience even better:
How should I store my cookies?
To keep your cookies fresh, always store them in an airtight jar. This will help maintain their softness and flavor. If you’ve made a batch ahead of time, you can also freeze them! Just make sure they’re completely cool before placing them in a freezer-safe container. They can last up to three months in the freezer.
Can I swap out ingredients in the recipe?
Absolutely! The *Christmas cookie jar* is super versatile. You can substitute the chocolate chips for white chocolate or even butterscotch chips. If you’re not a fan of nuts, feel free to leave them out or replace them with more chocolate chips or dried fruit. Just remember to adjust the measurements to keep the right balance!
What’s the best way to ensure my cookies don’t spread too much?
If you find your cookies spread too much while baking, it’s a good idea to chill the dough for about 30 minutes before scooping and baking. This helps them hold their shape better. Also, make sure your butter is softened, not melted, when you start creaming it with the sugars. Melted butter can lead to flat cookies!
Can I make these cookies gluten-free?
You can definitely make a gluten-free version! Just swap the all-purpose flour for a 1:1 gluten-free baking flour blend. Be sure to check for any additional ingredients that may contain gluten, like certain chocolate chips or sprinkles.
How long do these cookies last?
Stored properly in an airtight container, these cookies can stay fresh for about a week. If you want to enjoy them longer, consider freezing them as mentioned earlier. Trust me, they’ll taste just as good when you pull them out for a cozy treat later on!
If you have any other questions, feel free to reach out! I love sharing the joy of baking and am here to help you create the perfect *Christmas cookie jar* this holiday season!
Print
Christmas Cookie Jar: 5 Festive Flavors to Warm Hearts
- Total Time: 27 minutes
- Yield: 24 cookies 1x
- Diet: Vegetarian
Description
A festive jar filled with assorted Christmas cookies.
Ingredients
- 2 cups all-purpose flour
- 1 cup unsalted butter, softened
- 1 cup granulated sugar
- 1 cup brown sugar, packed
- 1 teaspoon vanilla extract
- 1 teaspoon baking soda
- 1/2 teaspoon salt
- 1 cup chocolate chips
- 1 cup chopped nuts
- 1/2 cup sprinkles
Instructions
- Preheat your oven to 350°F (175°C).
- In a large bowl, cream together the butter, granulated sugar, and brown sugar.
- Add the vanilla extract and mix well.
- In another bowl, whisk together flour, baking soda, and salt.
- Gradually add the dry ingredients to the wet ingredients and mix until combined.
- Fold in chocolate chips, nuts, and sprinkles.
- Drop spoonfuls of dough onto a baking sheet.
- Bake for 10-12 minutes or until golden brown.
- Let cookies cool on the baking sheet for 5 minutes before transferring to a wire rack.
Notes
- Store cookies in an airtight jar.
- For a softer cookie, do not overbake.
- Customize with your favorite add-ins.
- Prep Time: 15 minutes
- Cook Time: 12 minutes
- Category: Dessert
- Method: Baking
- Cuisine: American
Nutrition
- Serving Size: 1 cookie
- Calories: 150
- Sugar: 10g
- Sodium: 80mg
- Fat: 7g
- Saturated Fat: 4g
- Unsaturated Fat: 2g
- Trans Fat: 0g
- Carbohydrates: 20g
- Fiber: 1g
- Protein: 2g
- Cholesterol: 20mg
Keywords: christmas cookie, holiday baking, cookie jar