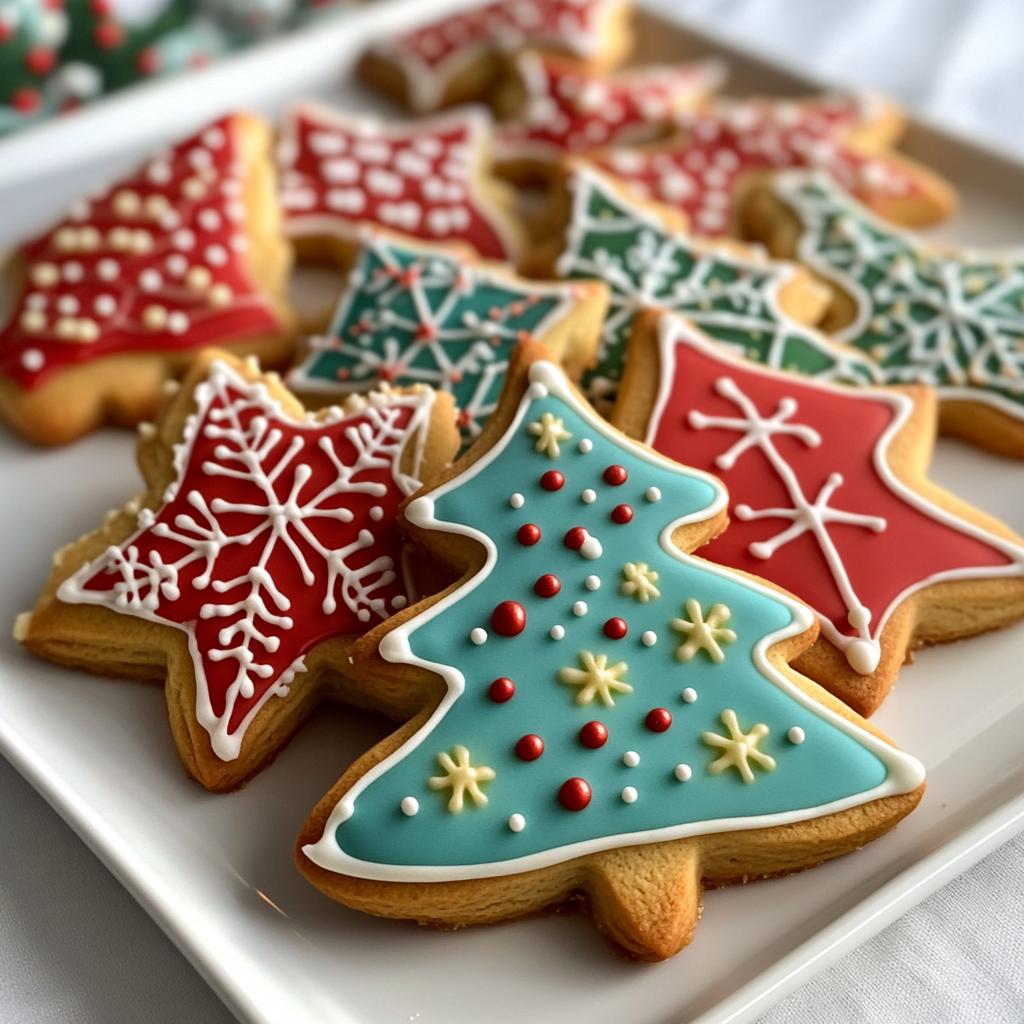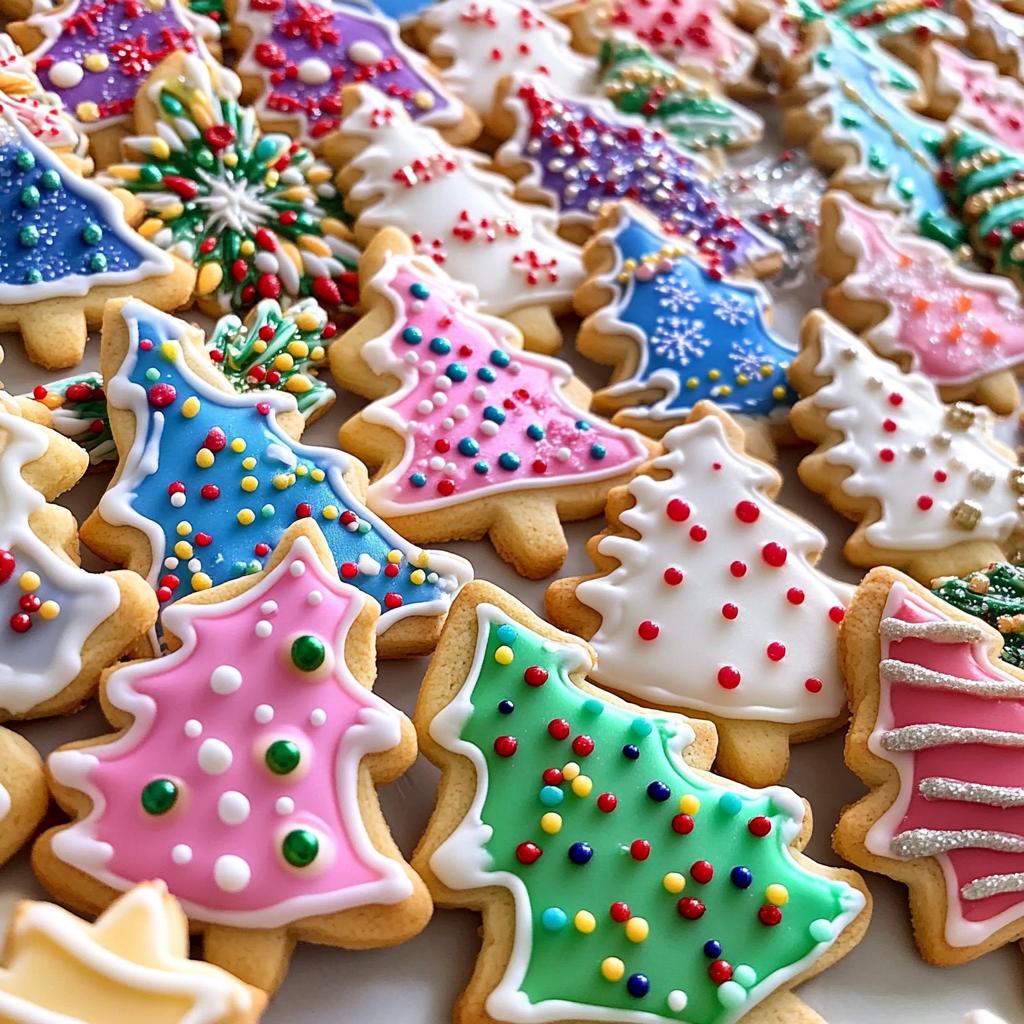
There’s an undeniable magic that fills the air when the holiday season rolls around, and for me, that magic often takes the form of Christmas cookies decorated with colorful icing and sprinkles! I can still remember the excitement in my kitchen as a child, rolling out dough and cutting out festive shapes, all the while giggling with my siblings and sneaking bites of raw cookie dough. There’s something so special about gathering together to create these delicious treats, each one a canvas for our creativity. The best part? You can let your imagination run wild with Christmas cookies decorated ideas! Whether it’s a classic snowman, a sparkling star, or a cheerful Santa, the options are endless, and each cookie tells a story of love and tradition. I cherish the moments spent decorating with my family, each swirl of icing and sprinkle of color bringing us closer together. So, grab your favorite cookie cutters and let’s dive into this delightful holiday tradition that fills our homes with warmth, laughter, and the sweet scent of freshly baked cookies!
Ingredients List
Gathering the right ingredients is the first step to creating these delightful Christmas cookies. Here’s what you’ll need:
- 2 3/4 cups all-purpose flour: This forms the base of your cookie dough, giving it structure and texture.
- 1 teaspoon baking soda: This helps the cookies rise slightly, making them light and fluffy.
- 1/2 teaspoon baking powder: Another leavening agent that ensures your cookies don’t end up too dense.
- 1 cup unsalted butter, softened: Softened butter is crucial for creaming with sugar, creating that lovely, tender crumb.
- 1 1/2 cups white sugar: This sweetener not only adds sweetness but also helps with the cookies’ texture.
- 1 egg: Acts as a binding agent, bringing all the ingredients together.
- 1 teaspoon vanilla extract: For that warm, inviting flavor that makes these cookies taste like home.
- 3 to 4 tablespoons milk: This helps to soften the dough and make it easier to roll out.
- Royal icing for decoration: This icing hardens beautifully, making it perfect for intricate designs.
- Food coloring: To add vibrant hues to your royal icing and make your cookies pop!
- Sprinkles: A fun finishing touch that adds a festive sparkle to your cookies.
With these ingredients in hand, you’re on your way to baking up a storm of deliciously decorated Christmas cookies!
How to Prepare Christmas Cookies Decorated Ideas
Now that you’ve gathered your ingredients, it’s time to dive into the delightful process of preparing your Christmas cookies! Trust me, the joy of baking these cookies is only matched by the fun of decorating them, so let’s get started!
Prepping the Dough
The first step in this cookie-making adventure is mixing your dry ingredients. In a large bowl, whisk together 2 3/4 cups of all-purpose flour, 1 teaspoon of baking soda, and 1/2 teaspoon of baking powder. This combination is crucial, as it sets the foundation for your cookies to rise just right.
Next, let’s talk about the butter! You’ll want to use 1 cup of unsalted butter, softened. Softened butter is essential here; it’s the magic ingredient that allows you to cream it smoothly with 1 1/2 cups of white sugar. This step is all about creating that airy texture we love in cookies. You can use a mixer or a wooden spoon, but if you’re like me and prefer a little workout, a good old-fashioned spoon will do! Cream them together until the mixture is light and fluffy—about 2-3 minutes. It should look pale and inviting, almost like whipped honey!
Once that’s ready, beat in 1 egg and 1 teaspoon of vanilla extract. The egg acts as a binder, while the vanilla adds that warm, homey flavor. After these are well combined, gradually mix in your dry ingredients. Don’t rush this part; take your time to blend everything until just combined. If the dough feels a bit stiff, add 3 to 4 tablespoons of milk to help soften it up.
Shaping the Cookies
Now comes the fun part—shaping your cookies! Flour your countertop lightly and roll out the dough to about 1/4 inch thick. It’s always a good idea to keep a little flour handy to dust your rolling pin and prevent sticking. Feel free to use various cookie cutters to create a festive array of shapes! Christmas trees, snowflakes, and gingerbread men are all fantastic options, and they make decorating even more enjoyable.
As you cut out each shape, place them on a baking sheet lined with parchment paper. Make sure to leave some space between each cookie since they’ll spread a little while baking. If you want to add a whimsical touch, try using a toothpick to create small holes at the top of the cookies—they’ll make great ornaments when decorated!
Baking Instructions
Preheat your oven to 375°F (190°C). Once your cookies are all shaped and on the baking sheet, it’s time to bake! Slide them into the oven and let them bake for 8 to 10 minutes. You’ll know they’re ready when the edges start to turn a light golden brown. But here’s the important part: let them cool completely on a wire rack before you even think about decorating. This step is crucial—if you ice them too soon, your beautiful decorations will melt right off!
Decorating Your Cookies
Once your cookies are cool, it’s time to unleash your creativity with royal icing! Prepare your icing according to the package instructions, adding food coloring to achieve those vibrant hues. I love to keep a few bowls of different colors handy so I can mix and match! When icing the cookies, use a piping bag (or a zip-top bag with the corner snipped off) for finer details. You can start with a base layer, let it dry, and then go back in for more intricate designs.
Don’t forget the sprinkles! They’re the cherry on top of your festive creations, adding that extra sparkle. Just sprinkle them on before the icing dries to make sure they stick well. And there you have it! A batch of beautifully decorated Christmas cookies, ready to be shared with loved ones and enjoyed with a warm cup of cocoa.
Why You’ll Love This Recipe
- Festive Fun: These Christmas cookies are perfect for getting everyone in the holiday spirit. The cheerful shapes and colors bring joy to any gathering!
- Customizable Creations: You can let your imagination run wild with decorations! From elegant snowflakes to playful reindeer, every cookie can be uniquely designed.
- Great for Sharing: These cookies make wonderful gifts! Package them up in festive boxes or tins, and you’ll have a delightful homemade gift that friends and family will love.
- Fun for All Ages: Baking and decorating cookies is an activity everyone can enjoy, from little ones who love to sprinkle to adults who appreciate the art of icing.
- Deliciously Tasty: Beyond their beautiful appearance, these cookies are soft, sweet, and simply irresistible. Trust me, once you take a bite, you’ll want to share them with everyone!
- Tradition in Every Bite: Creating and decorating cookies together can become a cherished family tradition, passing down the joy of baking from one generation to the next.
Tips for Success
To ensure your Christmas cookies turn out absolutely perfect, here are some tried-and-true tips that I’ve gathered over the years. Trust me, these little tricks can make a world of difference!
Achieving the Right Icing Consistency
When it comes to royal icing, consistency is key! You want it to be smooth and spreadable but not so runny that it just drips off your cookies. A good rule of thumb is to aim for a consistency similar to toothpaste. To check if it’s perfect, you can do the “ribbon test”: drizzle a bit of icing from a spoon, and if it holds its shape for about 10 seconds before disappearing back into the bowl, you’re good to go!
If your icing is too thick, just add a few drops of water until you reach the desired consistency. Conversely, if it’s too thin, mix in a bit more powdered sugar. Easy peasy!
Cool Cookies Are Key
As tempting as it is to dive into decorating right after baking, remember to let your cookies cool completely. If they’re even slightly warm, the icing will melt and slide right off. I usually set them on a wire rack and let them chill out for at least 20-30 minutes. This ensures your hard work doesn’t go to waste!
Storing Your Cookies
Once you’ve decorated your cookies, storing them properly is vital to keep them fresh and delicious. If you’ve used royal icing, let it dry completely before stacking them. I recommend placing parchment paper between layers to avoid sticking. Store your cookies in an airtight container at room temperature, and they’ll stay fresh for about a week. If you want to save them longer, consider freezing the undecorated cookies. Just wrap them tightly in plastic wrap and place them in a freezer bag. When you’re ready to use them, let them thaw at room temperature before decorating!
Let the Kids Help!
And one last tip—don’t hesitate to enlist your little helpers! Decorating cookies is a fantastic way to bond with family. Just prepare for some delightful chaos and maybe a sprinkle or two on the floor! The laughter and creativity that come from working together make the experience even more special.
With these tips in your baking arsenal, you’re set for a successful cookie-making adventure that will fill your home with joy and deliciousness this holiday season!
Variations
One of the best things about Christmas cookies is how versatile they are! Once you’ve mastered the basic dough, feel free to get creative and try out some fun variations. Here are a few ideas to inspire your holiday baking!
Flavor Twists
- Chocolate Chip Delight: Add 1 cup of semi-sweet chocolate chips to the dough for a delightful twist. They pair wonderfully with the sweetness of the icing and add a rich flavor that everyone loves.
- Spiced Gingerbread: Swap out 1 teaspoon of vanilla extract for 1 tablespoon of ground ginger, and add 1 teaspoon of cinnamon and 1/2 teaspoon of ground cloves to the dry ingredients. This will give your cookies that warm, cozy flavor that screams holiday cheer.
- Almond Joy: Replace vanilla with almond extract for a nutty flavor. You can also add chopped almonds to the dough for an extra crunch!
Colorful & Themed Decor
- Winter Wonderland: Use shades of blue and white icing to create snowflakes and icicles. Add edible glitter for that magical touch that sparkles like fresh snow!
- Classic Christmas: Decorate with red and green icing, and use cookie cutters to create Christmas trees, ornaments, and candy canes. Don’t forget to sprinkle on some festive red and green sprinkles!
- Valentine’s Day Twist: Change the shape to hearts and use pink and red icing for a sweet treat that’s perfect for February. Add conversation hearts or tiny edible roses as decorations.
Fun Shapes & Sizes
- Mini Cookies: Roll out your dough thinner to create mini-sized cookies. They’re perfect for bite-sized treats and great for sharing!
- Cookie Sandwiches: Make two cookies and sandwich a layer of frosting or jam in between. These are not only delicious but also eye-catching!
With these variations, you can create a cookie platter that’s not only beautiful but also caters to different tastes and occasions. The possibilities are endless, so don’t hesitate to experiment and find your favorite combinations. Happy baking!
Storage & Reheating Instructions
Once you’ve crafted your beautiful Christmas cookies, proper storage is key to keeping them fresh and delicious. Here’s how to make sure your sweet creations stay delightful for as long as possible!
First, if you’ve used royal icing for decoration, let it dry completely before stacking your cookies. This step is crucial! If you try to stack them too soon, you’ll end up with a gooey mess instead of lovely layers of cookies. I usually let mine sit out for about 1-2 hours to harden nicely.
Once the icing is set, store your cookies in an airtight container at room temperature. I love to use a tin with parchment paper between the layers to prevent sticking. This way, they can stay fresh for about a week. Just be sure to keep them out of direct sunlight, as heat can cause the icing to melt!
If you find yourself with leftover cookies (which is a rare treat!), you can also freeze them for longer storage. Simply wrap the undecorated cookies tightly in plastic wrap and place them in a freezer-safe bag. They can last for up to three months in the freezer! When you’re ready to enjoy them, simply remove them from the freezer and let them thaw at room temperature. Once they’re soft again, you can decorate them fresh or enjoy them as is.
As for reheating, it’s not usually necessary for decorated cookies, but if you’re looking to warm up plain cookies, pop them in a preheated oven at 300°F (150°C) for about 5-8 minutes. This will bring back that fresh-baked aroma and soft texture. Just keep an eye on them to ensure they don’t get too crispy!
With these storage and reheating tips, your Christmas cookies will remain as delightful as the day you baked them, ready to share with friends and family whenever the holiday spirit strikes!
Nutritional Information Section
When it comes to enjoying these festive Christmas cookies, it’s always good to be aware of the nutritional content. However, please keep in mind that nutrition can vary based on the specific ingredients and brands you use, and the values provided here are typical estimates and not exact figures.
- Calories: 150 per cookie
- Fat: 7g
- Saturated Fat: 4g
- Unsaturated Fat: 2g
- Trans Fat: 0g
- Cholesterol: 20mg
- Sodium: 50mg
- Carbohydrates: 20g
- Fiber: 0g
- Sugar: 10g
- Protein: 1g
These delicious cookies can be enjoyed as part of your holiday festivities, and knowing the nutritional information allows you to indulge mindfully. Happy baking and munching!
FAQ Section
Q1: How can I make my royal icing thicker?
If you find that your royal icing is too runny for decorating, don’t worry! To thicken it, simply add more powdered sugar a tablespoon at a time until you reach your desired consistency. Remember, you want it to hold its shape when piped. If it’s too thick, add a tiny bit of water to loosen it up. It’s all about finding that perfect balance!
Q2: Can I make these cookies ahead of time?
Absolutely! These Christmas cookies can be made ahead of time, which is fantastic for planning your holiday baking. You can prepare the dough and refrigerate it for up to a week, or freeze it for even longer. Just make sure to wrap it tightly in plastic wrap. Once baked, the cookies also store well for about a week in an airtight container, or you can freeze the undecorated cookies for up to three months!
Q3: What are some alternative decorations for my cookies?
The fun part about making Christmas cookies is the decorating! Beyond royal icing, you can use melted chocolate for drizzling, colored sugar, or even candy melts for a vibrant touch. Consider using edible glitter for a festive sparkle or creating a simple glaze with powdered sugar and milk. Also, try using fresh fruits or nuts for a unique twist that adds both flavor and beauty!
Q4: Can I use different flavors in the cookie dough?
Absolutely! The beauty of this cookie recipe is its versatility. You can swap out the vanilla extract for almond or peppermint extract for a fun holiday twist. Adding spices like cinnamon or nutmeg can also elevate the flavor profile, making your cookies even more festive and delicious.
Q5: How do I prevent my cookies from spreading too much while baking?
To prevent your cookies from spreading too much, make sure your butter is softened but not melted when you cream it with the sugar. Additionally, chilling the dough for about 30 minutes before rolling it out can help keep the shape intact during baking. This little trick is a game-changer for achieving perfectly shaped Christmas cookies!

Christmas Cookies Decorated Ideas: 7 Heartwarming Tips
- Total Time: 30 minutes
- Yield: 24 cookies 1x
- Diet: Vegetarian
Description
Delicious and festive Christmas cookies decorated in various styles.
Ingredients
- 2 3/4 cups all-purpose flour
- 1 teaspoon baking soda
- 1/2 teaspoon baking powder
- 1 cup unsalted butter, softened
- 1 1/2 cups white sugar
- 1 egg
- 1 teaspoon vanilla extract
- 3 to 4 tablespoons milk
- Royal icing for decoration
- Food coloring
- Sprinkles
Instructions
- Preheat oven to 375°F (190°C).
- In a bowl, mix flour, baking soda, and baking powder.
- In another bowl, cream butter and sugar until smooth.
- Beat in egg and vanilla.
- Gradually blend in the dry ingredients.
- Add milk until dough is soft.
- Roll out dough and cut into desired shapes.
- Bake for 8 to 10 minutes.
- Let cookies cool completely.
- Decorate with royal icing and sprinkles.
Notes
- Use different cookie cutters for variety.
- Let icing dry completely before stacking cookies.
- Store in an airtight container.
- Prep Time: 20 minutes
- Cook Time: 10 minutes
- Category: Dessert
- Method: Baking
- Cuisine: American
Nutrition
- Serving Size: 1 cookie
- Calories: 150
- Sugar: 10g
- Sodium: 50mg
- Fat: 7g
- Saturated Fat: 4g
- Unsaturated Fat: 2g
- Trans Fat: 0g
- Carbohydrates: 20g
- Fiber: 0g
- Protein: 1g
- Cholesterol: 20mg
Keywords: christmas cookies, decorated cookies, holiday recipes