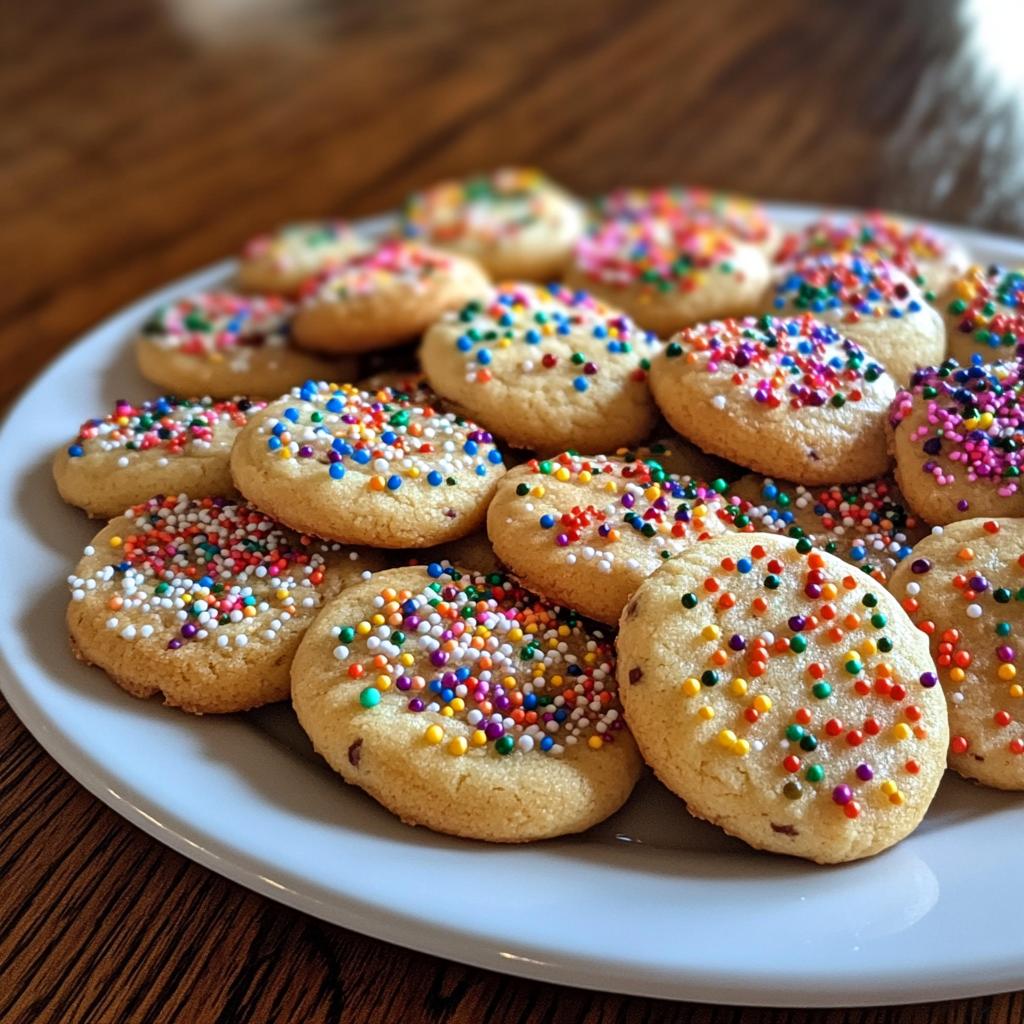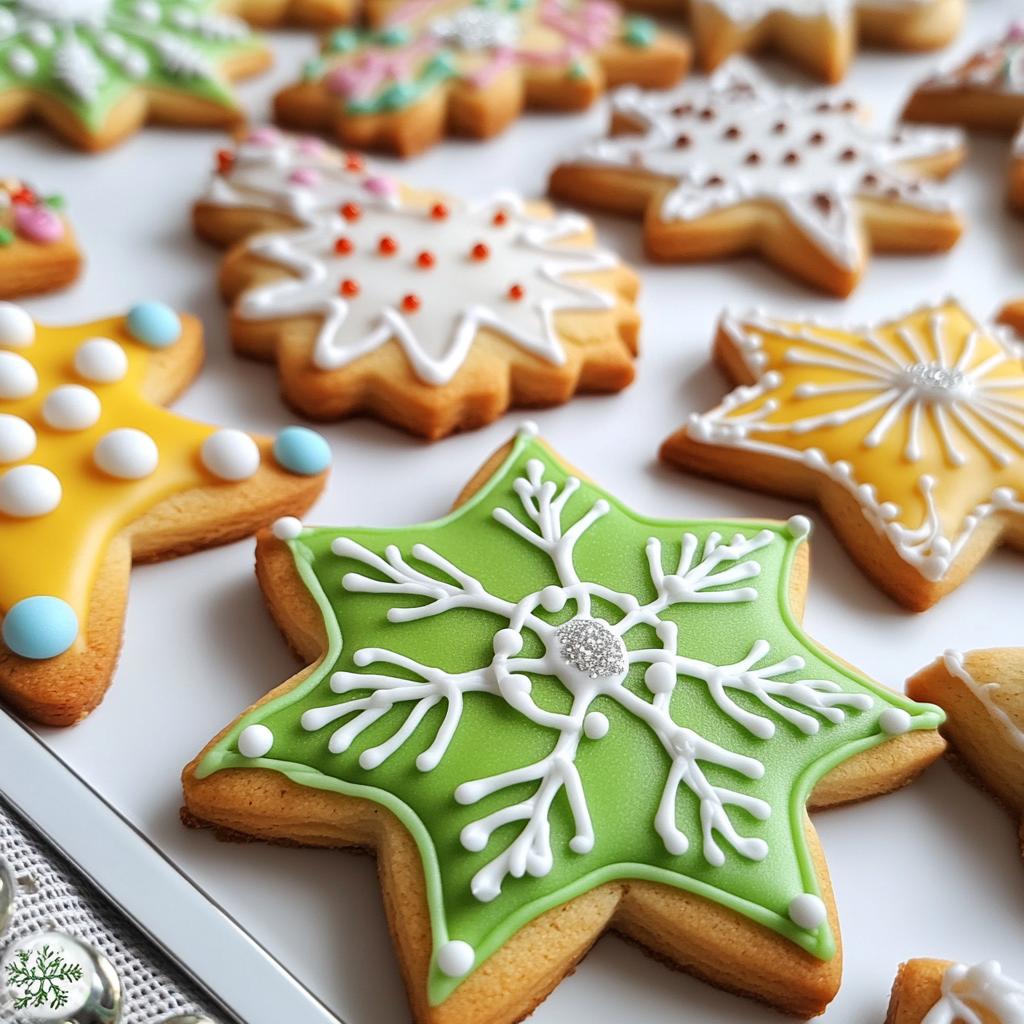
Ah, Christmas cookies! There’s something truly magical about baking during the holiday season, isn’t there? The kitchen fills with warmth and the sweet scent of vanilla and butter, transporting me back to my childhood. I can still hear the laughter of family and friends as we gathered around the table, rolling out dough and cutting it into festive shapes. My favorite part? Decorating those cookies with royal icing! It’s like painting, but edible. The joy of transforming a simple cookie into a work of art is unmatched. Each time I pipe on a swirl of icing or sprinkle on some colorful decorations, I feel that holiday spirit come alive. Plus, it’s such a fun activity to share with loved ones, creating memories that last far beyond the season. Trust me, once you dive into this delicious adventure, you’ll be looking forward to it every year!
Ingredients List
Here’s everything you’ll need to whip up these delightful Christmas cookies with royal icing. I promise you won’t be disappointed with this lineup!
- 2 ¾ cups all-purpose flour
- 1 teaspoon baking powder
- ½ teaspoon salt
- 1 cup unsalted butter, softened
- 1 ½ cups granulated sugar
- 1 large egg
- 2 teaspoons vanilla extract
- 4 cups powdered sugar
- 2 tablespoons meringue powder
- 6 tablespoons water
- Food coloring (optional)
Make sure your butter is nice and soft—this is key for that light and fluffy texture. And if you decide to add some fun colors to your icing, go for it! It’s all about making those cookies as festive as possible. Happy baking!
How to Prepare Instructions
Preparing the Cookie Dough
Let’s kick things off with making that delicious cookie dough! Start by grabbing a large mixing bowl. In it, combine the flour, baking powder, and salt. Just whisk it together until it’s nicely blended. Now, in another bowl, cream your softened butter and granulated sugar together until it’s light and fluffy—this usually takes about 3-5 minutes. You want it to look pale and inviting!
Next, add in your egg and vanilla extract, mixing well until everything is fully combined. Now comes the fun part—gradually add your dry mixture to the wet ingredients, stirring until just combined. Don’t overmix; we want that dough to be tender and ready for rolling!
Baking the Cookies
Now that your dough is ready, it’s time to get that oven preheated to 350°F (175°C). Roll out the dough on a floured surface to about ¼ inch thick, then use your favorite cookie cutters to create festive shapes. Place those cut-out cookies onto a baking sheet lined with parchment paper and bake them for 8-10 minutes. Keep an eye out for a slight golden edge—this is when they’re perfect! Once they’re done, take them out and let them cool completely on a wire rack before you even think about decorating. Trust me, icing warm cookies is a recipe for disaster!
Making the Royal Icing
While those cookies cool, let’s whip up the royal icing! In a mixing bowl, combine the powdered sugar, meringue powder, and water. Beat it until the mixture is smooth and glossy—this usually takes about 5 minutes. If you want to add some color, now’s the time! Just drop in your food coloring and mix until you achieve your desired shade. Remember, the icing should hold its shape but still be spreadable.
Decorating the Cookies
Now comes the best part—decorating! I love using a piping bag for precision, but if you don’t have one, a plastic sandwich bag with a small corner snipped off works just as well. Start by outlining your cookies, then fill them in with icing. Don’t forget to get creative! You can add sprinkles or edible glitter for that extra sparkle. Just make sure the icing dries completely before stacking those cookies up. It’s all about patience, but oh, is it worth it when you see the final result!
Why You’ll Love This Recipe
Making these Christmas cookies with royal icing is not just about baking; it’s about creating joyful memories and delicious treats! Here’s why this recipe will become a holiday favorite:
- Delicious Flavor: The buttery, sweet cookie base pairs perfectly with the smooth, sweet royal icing. Each bite is a delightful mix of flavors that will have everyone reaching for seconds!
- Endless Customization: With royal icing, you can let your creativity shine! From intricate designs to simple festive patterns, the options are endless, making each cookie unique.
- Perfect for All Ages: Baking and decorating these cookies is a fun activity for the whole family. Kids and adults alike can enjoy rolling dough, cutting shapes, and icing their creations together.
- Great for Gifting: These cookies make wonderful gifts! Package them in festive boxes or tins to share with friends, neighbors, or coworkers during the holiday season.
- Tradition in the Making: Start a new holiday tradition by baking these cookies each year. They’ll become a beloved part of your family’s festive celebrations for generations to come.
So, roll up your sleeves and get ready to spread some cheer with these delightful Christmas cookies and their stunning royal icing! You won’t regret it!
Tips for Success
Getting the perfect Christmas cookies with royal icing is all about the little details! Here are some of my favorite tips to ensure your baking adventure is a sweet success:
- Dough Consistency: When mixing your cookie dough, aim for a consistency that’s soft but not sticky. If it feels too sticky, don’t hesitate to add a little extra flour, one tablespoon at a time. This will help you roll it out easily without it sticking to your countertop.
- Chill the Dough: If your dough seems too soft after mixing, pop it in the refrigerator for 30 minutes. This makes it easier to handle and helps the cookies maintain their shape while baking. Trust me, it’s worth the wait!
- Icing Consistency: For your royal icing, you want a consistency that’s smooth but holds its shape. If it’s too runny, add a bit more powdered sugar. If it’s too thick, add a teaspoon of water at a time until you reach that perfect piping consistency. It should flow smoothly but stay put when you pipe it!
- Piping Techniques: When decorating, practice makes perfect! Start with outlining your cookies first, then fill in with icing. If you’re using a piping bag, keep the tip just above the cookie surface to avoid air bubbles. And don’t forget to shake gently to help the icing settle!
- Storage Tips: Once your cookies are decorated, store them in an airtight container at room temperature. This keeps the icing from getting sticky. If you need to stack them, place parchment paper between layers to protect those beautiful designs!
- Give It Time: Allow your decorated cookies to dry completely before packaging or stacking them. I usually let mine sit out for at least 24 hours—this ensures the icing hardens perfectly!
With these tips in your back pocket, you’re all set to create some stunning and delicious Christmas cookies with royal icing. Enjoy every moment of the process, and don’t forget to have fun!
Storage & Reheating Instructions
Once you’ve decorated your beautiful Christmas cookies with royal icing, you’ll want to store them properly to keep them fresh and delicious! Here’s how to do it:
First off, make sure your cookies are completely dry before storing. I usually let mine sit out for at least 24 hours to ensure the icing hardens fully. This prevents any smudging or sticking when you pack them away!
To store, place your cookies in an airtight container. If you’re stacking them, be sure to add a layer of parchment paper between each layer of cookies. This protects those lovely decorations and keeps them looking picture-perfect.
Keep the container in a cool, dry place away from direct sunlight. Your cookies can last for up to two weeks this way, though they’re usually gobbled up long before that!
If you find yourself with leftover cookies and want to enjoy them later, you can reheat them gently. Just pop them in a preheated oven at 300°F (150°C) for about 5-7 minutes to warm them up without melting the icing. Keep an eye on them to make sure they don’t get too warm or lose their shape.
And there you have it! With these simple storage and reheating tips, your Christmas cookies will stay fresh and beautiful, ready to delight everyone who gets to enjoy them!
Nutritional Information Section
As you dive into the deliciousness of these Christmas cookies with royal icing, it’s important to keep in mind that nutrition can vary based on the specific ingredients and brands you choose. Here’s a typical breakdown of the nutritional values for one cookie:
- Calories: 150
- Fat: 7g
- Saturated Fat: 4g
- Unsaturated Fat: 2g
- Trans Fat: 0g
- Cholesterol: 20mg
- Sodium: 50mg
- Carbohydrates: 20g
- Fiber: 0g
- Sugar: 10g
- Protein: 2g
Enjoy these cookies guilt-free, but remember, moderation is key! They’re meant to be a delightful treat during the holidays, so savor each bite and share the joy with your loved ones!
FAQ Section
Got questions about making Christmas cookies with royal icing? Don’t worry, I’ve got you covered! Here are some of the most common queries I get, along with my best tips and tricks:
What consistency should my royal icing be?
Great question! The ideal royal icing consistency should be smooth and glossy, able to hold its shape but still spread easily. You want it to flow off a spoon but not be too runny. If it’s too thick, add a tiny bit of water; if it’s too thin, mix in more powdered sugar until you reach that perfect balance!
How do I prevent my cookies from getting sticky after decorating?
The key to keeping your cookies from getting sticky is to let the royal icing dry completely. I recommend giving your cookies at least 24 hours to set before you store them. Once they’re dry, place them in an airtight container, and if you’re stacking them, use parchment paper between layers to protect those beautiful decorations!
Can I use different colors for my royal icing?
Absolutely! Food coloring is a fantastic way to jazz up your icing and make those cookies festive. Just add a few drops of gel or liquid food coloring to your royal icing and mix until you achieve your desired shade. Play around with colors to match your holiday theme!
What’s the best way to decorate with royal icing?
For decorating, I highly recommend using a piping bag for precision. But if you don’t have one, a plastic sandwich bag with a small corner snipped off works just as well! Start by outlining your cookie shapes and then fill them in with icing. Don’t be afraid to get creative—use sprinkles or edible glitter to make your cookies shine!
Can I freeze my decorated cookies?
Yes, you can freeze your decorated cookies! Just make sure the icing is completely dry first. Place them in a single layer in an airtight container or wrap them tightly in plastic wrap before freezing. When you’re ready to enjoy them, let them thaw at room temperature, and they’ll be good to go!
Print
Christmas Cookies Royal Icing: 5 Tips for Festive Perfection
- Total Time: 40 minutes
- Yield: 24 cookies 1x
- Diet: Vegetarian
Description
Delicious Christmas cookies decorated with royal icing.
Ingredients
- 2 ¾ cups all-purpose flour
- 1 teaspoon baking powder
- ½ teaspoon salt
- 1 cup unsalted butter, softened
- 1 ½ cups granulated sugar
- 1 large egg
- 2 teaspoons vanilla extract
- 4 cups powdered sugar
- 2 tablespoons meringue powder
- 6 tablespoons water
- Food coloring (optional)
Instructions
- Preheat your oven to 350°F (175°C).
- In a bowl, mix flour, baking powder, and salt.
- In another bowl, cream butter and sugar until light and fluffy.
- Add egg and vanilla to the butter mixture, then mix well.
- Gradually add the flour mixture to the wet ingredients, mixing until combined.
- Roll out the dough on a floured surface and cut into desired shapes.
- Place cookies on a baking sheet and bake for 8-10 minutes.
- Let cookies cool completely before decorating.
- For royal icing, beat powdered sugar, meringue powder, and water until smooth.
- Add food coloring if desired, then decorate cooled cookies.
Notes
- Store decorated cookies in an airtight container.
- Use a piping bag for more precise icing designs.
- Allow icing to dry completely before stacking cookies.
- Prep Time: 30 minutes
- Cook Time: 10 minutes
- Category: Dessert
- Method: Baking
- Cuisine: American
Nutrition
- Serving Size: 1 cookie
- Calories: 150
- Sugar: 10g
- Sodium: 50mg
- Fat: 7g
- Saturated Fat: 4g
- Unsaturated Fat: 2g
- Trans Fat: 0g
- Carbohydrates: 20g
- Fiber: 0g
- Protein: 2g
- Cholesterol: 20mg
Keywords: christmas cookies, royal icing, holiday baking