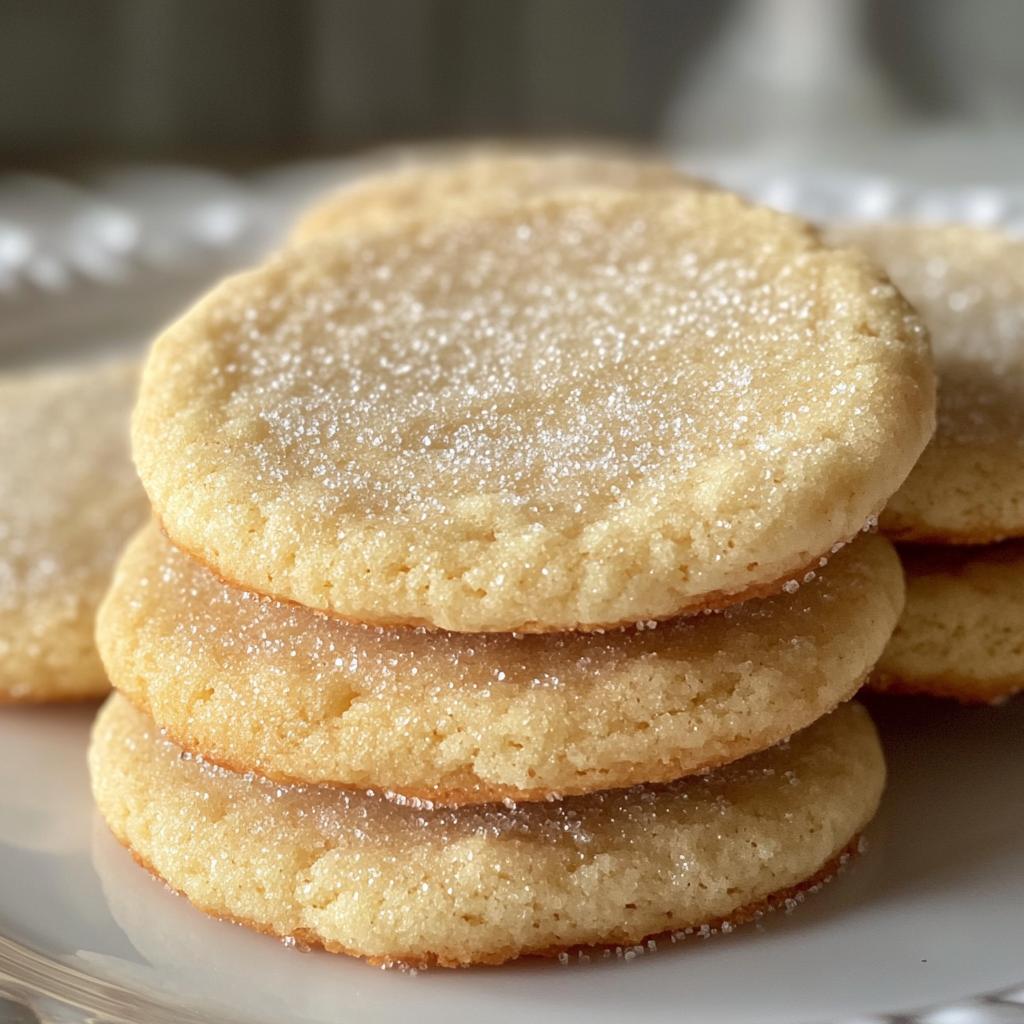
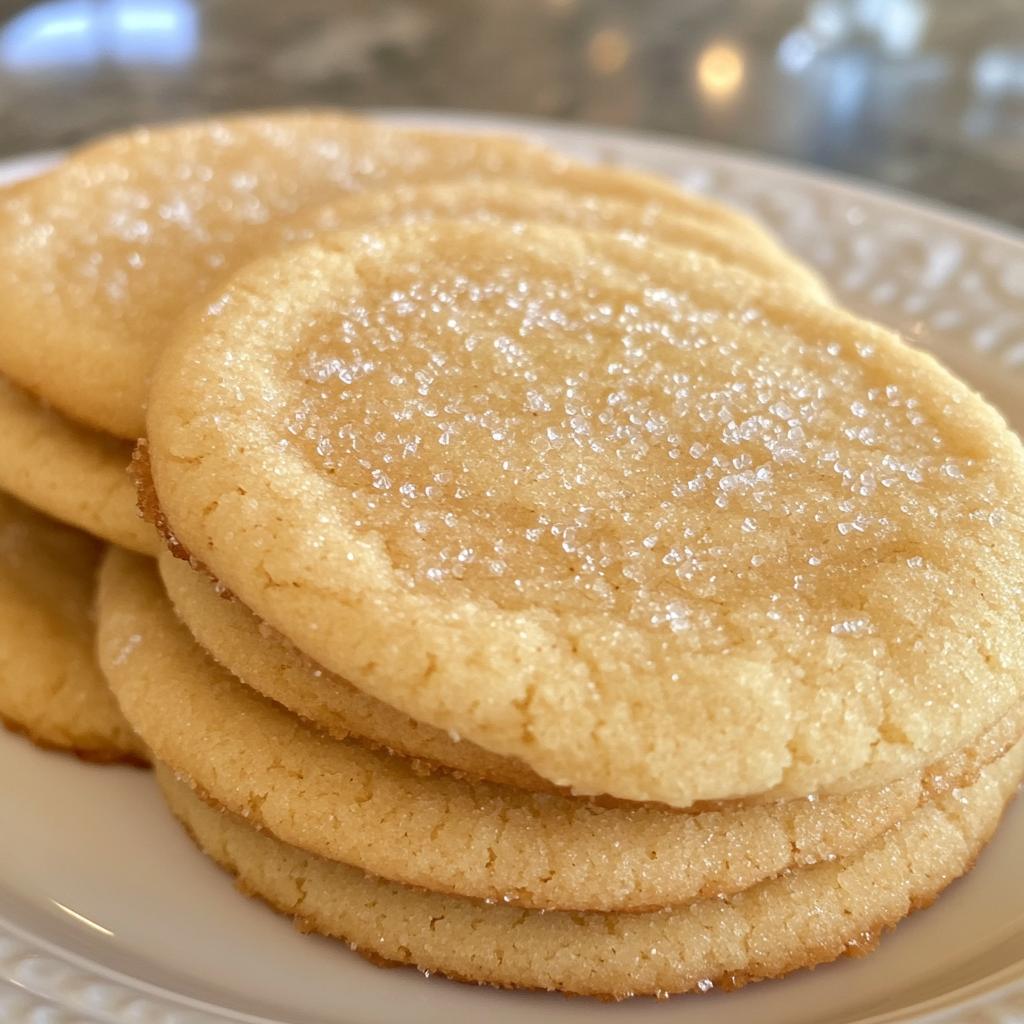
Classic sugar cookies are truly the epitome of comfort baking! Soft, sweet, and irresistibly delicious, they have a way of making any occasion feel special. I remember baking these with my mom every holiday season, the kitchen filled with laughter and the warm scent of vanilla wafting through the air. It’s hard to believe that something so simple can bring back such wonderful memories, right? The beauty of classic sugar cookies lies in their versatility – you can enjoy them plain, sprinkle some colorful sugar on top, or even glaze them for a festive touch. They’re perfect for cookie exchanges, birthday parties, or just a cozy afternoon treat with a cup of tea. Trust me, there’s nothing quite like biting into a freshly baked sugar cookie, with its slightly crisp edges and soft, chewy center. It’s pure bliss! So, let’s dive into this recipe and create some sweet memories together – because every batch of classic sugar cookies tells a story!
Ingredients List
To whip up a delightful batch of classic sugar cookies, you’ll need the following ingredients:
- 2 3/4 cups all-purpose flour – This is the base that gives our cookies structure.
- 1 teaspoon baking soda – It helps the cookies rise just right for that perfect texture.
- 1/2 teaspoon baking powder – This works alongside the baking soda to ensure a light, fluffy cookie.
- 1 cup unsalted butter, softened – Make sure it’s nice and soft to create that creamy, dreamy dough.
- 1 1/2 cups white sugar – This sweetens our cookies and contributes to that lovely golden color.
- 1 egg – This binds everything together and adds richness.
- 1 teaspoon vanilla extract – For a hint of warmth and sweetness; it’s a must!
- 3/4 teaspoon salt – Just a pinch to balance the sweetness and enhance the flavors.
Gather these ingredients, and you’ll be well on your way to creating the best classic sugar cookies! Remember, fresh ingredients make a world of difference in flavor, so choose wisely. Happy baking!
How to Prepare Classic Sugar Cookies
Getting ready to bake classic sugar cookies is a delightful process, and I can’t wait to share my step-by-step guide with you! Follow along, and soon your kitchen will be filled with the amazing aroma of freshly baked cookies. Let’s get started!
Step-by-Step Instructions
Preheat the Oven
First things first, you’ll want to preheat your oven to 375°F (190°C). This is a crucial step because having the right temperature ensures your cookies bake evenly. If you skip this, you might end up with cookies that are too soft or overcooked. So, set that oven to work while you prepare the dough!
Mix Dry Ingredients
In a medium-sized bowl, combine 2 3/4 cups all-purpose flour, 1 teaspoon baking soda, and 1/2 teaspoon baking powder. Whisk them together until they’re nicely blended. This step is important because it ensures that the leavening agents are evenly distributed throughout the flour, which will help your cookies rise beautifully!
Cream Butter and Sugar
Now it’s time to cream together 1 cup of softened unsalted butter and 1 1/2 cups white sugar in a large bowl. Use a hand mixer or stand mixer to beat them until the mixture is light and fluffy – think whipped cream! This process takes about 2-3 minutes. Achieving this texture is crucial because it creates tiny air pockets that will make your cookies tender and soft. Trust me, this is where the magic begins!
Combine Wet Ingredients
Next, add 1 egg and 1 teaspoon vanilla extract to the butter and sugar mixture. Beat everything together until it’s well combined. You want to ensure that the egg and vanilla are fully incorporated, adding richness and that lovely sweet aroma we all adore.
Blend Dry Ingredients into the Mixture
Now, it’s time to gradually blend the dry ingredients from your earlier bowl into the wet mixture. I like to do this in batches, adding a little flour mixture at a time while mixing on low speed. This helps prevent any flour clouds and ensures a smooth dough! You’ll know it’s ready when everything is just combined; you don’t want to overmix it.
Shape and Flatten Cookies
With your dough ready, grab rounded teaspoonfuls and roll them into balls. Place them onto ungreased cookie sheets, leaving some space in between each ball. Here’s a fun tip: flatten each ball gently with the bottom of a glass dipped in sugar. This not only adds a delightful crunch but also gives your cookies that classic sugar cookie look!
Baking Time
Pop those cookie sheets into your preheated oven and bake for about 8 to 10 minutes. Keep an eye on them – you want the edges to be lightly golden while the centers remain soft. They may look a little underdone when you take them out, but don’t worry! They’ll continue to firm up as they cool on the baking sheet. Let them cool for a few minutes before transferring them to a wire rack to finish cooling completely. And just like that, you’ve got a batch of gorgeous classic sugar cookies ready to enjoy!
Nutritional Information Disclaimer
It’s important to note that the nutritional information for these classic sugar cookies can vary based on the specific ingredients and brands you use. While I strive to provide accurate values, keep in mind that factors like butter type, sugar brand, and even variations in egg sizes can all affect the final numbers. So, while I can give you a general idea, I can’t guarantee precise values. Always feel free to adjust according to your dietary needs and preferences. Happy baking and enjoy those cookies!
Tips for Success with Classic Sugar Cookies
Now that you’ve got the basics down, let me share some of my favorite tips to ensure your classic sugar cookies turn out absolutely perfect every time! These little insights have made all the difference in my baking adventures, and I can’t wait for you to try them out!
Chill the Dough for Firmer Cookies
If you want your cookies to hold their shape better, especially when decorating, chill the dough for at least 30 minutes before rolling it out. It firms up nicely, making it easier to handle and shape. Plus, chilled dough results in a slightly thicker cookie that’s oh-so-satisfying!
Experiment with Flavorings
Feeling adventurous? You can easily switch things up by adding different extracts! Almond extract adds a lovely twist, while a hint of lemon zest can brighten up the flavor profile. Just remember, a little goes a long way, so start with half the amount of vanilla!
Decorating Options Galore!
Classic sugar cookies are a blank canvas, so let your creativity flow! After baking, you can decorate them with royal icing or a simple glaze for a fun touch. Sprinkles are always a hit, too! Just dip the tops of the cookies in icing and sprinkle away before it sets. It’s a fun way to add color and festivity!
Keep a Close Eye on Baking Time
Every oven is a little different, so keep an eye on your cookies as they bake. The moment you see the edges turning golden is your cue to take them out. They might look a tad underbaked in the middle, but trust me, that’s how they’ll stay soft and chewy!
Store Them Right
To keep your lovely cookies fresh, store them in an airtight container at room temperature. If you want to keep them even longer, consider freezing them! Just make sure they’re well wrapped to avoid freezer burn. You can enjoy them later, and they’ll taste just as delightful!
With these tips in your back pocket, you’re ready to create the most scrumptious classic sugar cookies ever! Happy baking, and enjoy the sweet moments that come with every bite!
Variations on Classic Sugar Cookies
Once you’ve mastered the classic sugar cookie, the fun really begins! These cookies are so versatile, and you can easily put your own spin on them. Here are some delightful variations to consider that will elevate your baking game and impress your friends and family!
Add Different Extracts
Why not play around with different extracts to give your cookies a unique flavor twist? Almond extract is a fantastic option, adding a lovely nutty sweetness. Or, if you’re in the mood for something refreshing, try adding a splash of lemon or orange extract. Just remember to adjust the quantities accordingly – a little goes a long way!
Spice It Up
If you’re a fan of warm spices, you can incorporate a teaspoon of ground cinnamon or nutmeg into the flour mixture. This little addition will give your classic sugar cookies a cozy, aromatic twist that’s perfect for the holidays or chilly evenings. Trust me, your kitchen will smell heavenly!
Fun Mix-Ins
Consider folding in some mix-ins to give your cookies extra texture and flavor. Mini chocolate chips, sprinkles, or even chopped nuts can add a delightful crunch and sweetness. If you’re feeling adventurous, try incorporating dried cranberries or cherries for a fruity surprise!
Decorative Icing and Toppings
Get creative with decorations! Once your cookies are baked and cooled, you can decorate them with royal icing, glaze, or even colored sugar. Try using different piping tips to create fun designs or patterns. If you’re in a festive mood, go ahead and add some edible glitter or themed sprinkles to match any occasion!
Sandwich Cookies
For a fun twist, why not turn your classic sugar cookies into sandwich cookies? Simply bake your cookies as usual, and once they’re cooled, spread a layer of frosting or your favorite filling between two cookies. It’s a delightful way to turn a simple treat into something extra special!
With these variations, your classic sugar cookies will never get boring! So go ahead, mix things up, and let your creativity shine in the kitchen. Each batch will tell a new story and create delicious memories!
Storage & Reheating Instructions
To keep your classic sugar cookies fresh and delicious, proper storage is key! After they’ve cooled completely, I recommend placing them in an airtight container at room temperature. This will help maintain their soft texture and sweet flavor for several days.
If you want to keep your cookies for a longer period, consider freezing them. Just wrap each cookie individually in plastic wrap or place them in a freezer-safe bag, squeezing out any excess air. They can last up to three months in the freezer without losing their delightful taste!
When you’re ready to enjoy a cookie from the freezer, simply let it sit at room temperature for about 10-15 minutes to thaw. If you prefer them warm, you can pop them in the microwave for about 10 seconds. Just be careful not to overheat them, as they can become too soft! Alternatively, you can reheat them in a preheated oven at 350°F (175°C) for about 5 minutes. This will help restore that lovely freshness and softness.
With these storage and reheating tips, you’ll always have delicious classic sugar cookies on hand to satisfy your sweet tooth. Enjoy every bite, whether fresh out of the oven or from the freezer!
FAQ Section
Q1. Can I use whole wheat flour instead of all-purpose flour for classic sugar cookies?
While you can substitute whole wheat flour, it might change the texture and flavor of your classic sugar cookies. I recommend starting with half whole wheat and half all-purpose flour to see how you like it. This way, you’ll still get that classic taste while adding some whole grains!
Q2. How can I make my sugar cookies more flavorful?
Great question! To boost the flavor, you can add a teaspoon of almond extract or a sprinkle of citrus zest, like lemon or orange. These additions will elevate your classic sugar cookies and give them a delightful twist. Just remember to adjust the amounts so they don’t overpower the base flavors!
Q3. What’s the best way to decorate classic sugar cookies?
Decorating is where the fun really begins! You can use royal icing for detailed designs or a simple glaze for a quicker option. Sprinkles, edible glitter, or colored sugar can add a festive touch. Just make sure to decorate your cookies once they’ve cooled completely to keep everything looking perfect!
Q4. How do I know when my sugar cookies are done baking?
The best way to tell if your classic sugar cookies are done is to look for lightly golden edges while the centers should still look a bit soft. They’ll continue to firm up as they cool, so don’t worry if they seem a tad underbaked when you take them out. Trust your instincts!
Q5. Can I freeze my classic sugar cookies?
Absolutely! Freezing your cookies is a fantastic way to enjoy them later. Just wrap them individually in plastic wrap or store them in a freezer-safe container. When you’re ready to enjoy, let them thaw at room temperature or pop them in the microwave for a quick warm-up!

Classic Sugar Cookies: 5 Steps to Sweet Nostalgia
- Total Time: 25 minutes
- Yield: 3 dozen cookies 1x
- Diet: Vegetarian
Description
Classic sugar cookies are soft and sweet, perfect for any occasion.
Ingredients
- 2 3/4 cups all-purpose flour
- 1 teaspoon baking soda
- 1/2 teaspoon baking powder
- 1 cup unsalted butter, softened
- 1 1/2 cups white sugar
- 1 egg
- 1 teaspoon vanilla extract
- 3/4 teaspoon salt
Instructions
- Preheat the oven to 375°F (190°C).
- In a bowl, mix flour, baking soda, and baking powder.
- In another bowl, cream together the butter and sugar until smooth.
- Beat in the egg and vanilla.
- Gradually blend in the dry ingredients.
- Roll rounded teaspoonfuls of dough into balls, and place onto ungreased cookie sheets.
- Flatten each ball with a glass dipped in sugar.
- Bake 8 to 10 minutes in the preheated oven.
Notes
- Store in an airtight container.
- Decorate with icing or sprinkles if desired.
- Chill the dough for firmer cookies.
- Prep Time: 15 minutes
- Cook Time: 10 minutes
- Category: Dessert
- Method: Baking
- Cuisine: American
Nutrition
- Serving Size: 1 cookie
- Calories: 150
- Sugar: 10g
- Sodium: 50mg
- Fat: 7g
- Saturated Fat: 4g
- Unsaturated Fat: 2g
- Trans Fat: 0g
- Carbohydrates: 20g
- Fiber: 0g
- Protein: 1g
- Cholesterol: 20mg
Keywords: Classic Sugar Cookies