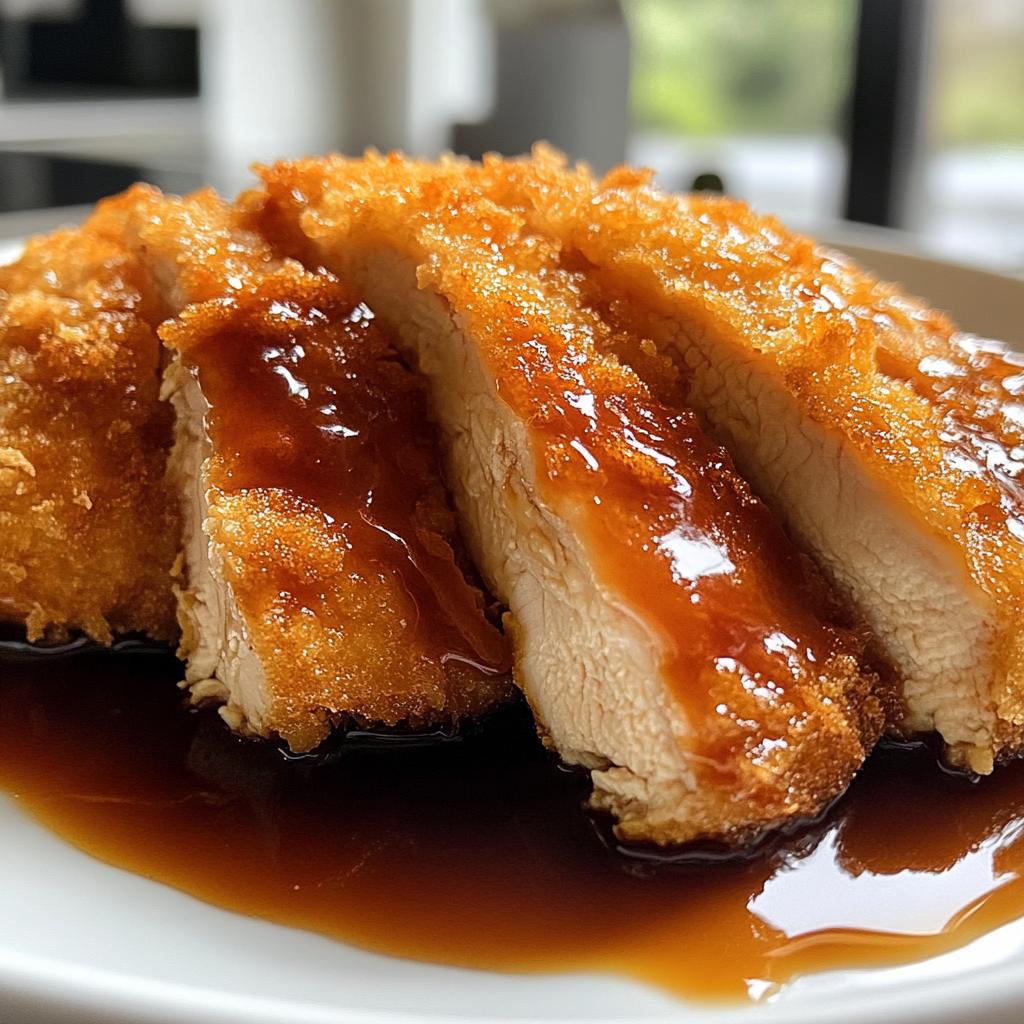
Oh, crispy chicken katsu! Just saying it makes my heart flutter a bit. This Japanese dish, with its perfectly breaded and fried chicken cutlets, is a true crowd-pleaser. The first time I tried it was at a little mom-and-pop restaurant in Tokyo, and wow, I was hooked instantly. The crunch of the panko breadcrumbs gives it that delightful texture, while the savory tonkatsu sauce adds a rich, tangy flavor that just pulls everything together. I remember savoring each bite, feeling the warmth of the meal and the joy of discovering something new.
Back home, I couldn’t shake off that experience. I had to recreate it! This dish quickly became a staple in my kitchen. It’s not just about the taste; it’s the whole experience—watching the chicken transform in the pan, the inviting aroma that fills the air, and the smiles it brings to my family’s faces. Whether it’s a weeknight dinner or a special occasion, crispy chicken katsu always finds its way to our table. Trust me, once you’ve had a bite, you’ll understand why it’s beloved not just in Japan, but all over the world!
Ingredients for Crispy Chicken Katsu
To whip up some delicious crispy chicken katsu, you’ll need just a handful of ingredients. Here’s what you’ll want to gather:
- 2 boneless chicken breasts, pounded to an even thickness for consistent cooking
- 1 cup panko breadcrumbs, fresh for the best crunchy texture
- 1/2 cup flour, all-purpose works wonders
- 1 large egg, beaten for that perfect binding
- 1/2 teaspoon salt, to enhance the flavor
- 1/4 teaspoon black pepper, for a subtle kick
- 1/2 cup vegetable oil, for frying until golden and crispy
- tonkatsu sauce for serving, adding that savory, tangy finish
These ingredients come together to create a dish that’s not only satisfying but also easy to prepare. Trust me, each one plays a crucial role in achieving that perfect crispy, juicy chicken cutlet that you’ll be craving!
How to Prepare Crispy Chicken Katsu
Preparing crispy chicken katsu is a delightful journey that starts with a few simple steps. Let’s dive right in and get that delicious chicken sizzling!
Prepping the Chicken
First things first, you’ll want to butterfly those chicken breasts. This means slicing them horizontally without going all the way through, so you can open them like a book. This technique helps them cook evenly. Once you’ve done that, grab a meat mallet or rolling pin and gently pound the chicken to an even thickness of about half an inch. This step is key for ensuring your chicken is tender and cooks through evenly—trust me, nobody likes a tough bite! Aim for about 1-2 minutes of gentle pounding, and don’t be shy; just let out some of that kitchen energy!
Breading Process
Now that your chicken is prepped, it’s time to bread those beauties! Start by seasoning your flour with salt and pepper. This little step packs flavor right into the coating. Next, take each chicken piece and dredge it in the flour, making sure to coat it well. Shake off the excess flour before moving on to the egg wash. Dip it into the beaten egg, letting any extra drip off, then it’s time for the star of the show—panko breadcrumbs! Make sure your panko is fresh; it really makes a difference in achieving that ultra-crispy texture. Press the breadcrumbs onto the chicken, so they stick well. You want a nice, even coating here!
Cooking the Chicken
Heat up your vegetable oil in a frying pan over medium heat. You’ll want enough oil to cover the bottom of the pan, about 1/2 inch deep. To test if the oil is hot enough, drop in a small piece of bread; if it sizzles, you’re good to go! Carefully place the breaded chicken into the hot oil, making sure not to overcrowd the pan—this ensures even cooking and that perfect crispiness. Fry the chicken for about 5-7 minutes on each side, or until it turns a beautiful golden brown. To check for doneness, use a meat thermometer; the internal temperature should reach 165°F (75°C). If you don’t have one, just make sure the juices run clear when you cut into it!
Serving Suggestions
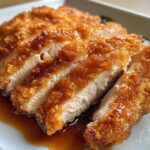
Once your chicken is cooked to perfection, let it drain on paper towels for a minute or two. Then, slice it into strips—this makes it easier to serve and eat! Drizzle some tonkatsu sauce over the top for that signature flavor, and if you like, serve it alongside a scoop of fluffy rice and a fresh salad. The combination is simply irresistible! Enjoy your crispy chicken katsu with family or friends, and watch how quickly it disappears from the table!
Tips for Success
Perfecting crispy chicken katsu is all about those little details! Here are my top tips to ensure your dish turns out absolutely delicious every time:
- Watch the Oil Temperature: Make sure your oil is hot enough before frying. If it’s too cool, the chicken will absorb the oil and become greasy. If it’s too hot, the breadcrumbs will burn before the chicken cooks through. A sweet spot is around 350°F (175°C).
- Don’t Overcrowd the Pan: Fry in batches if necessary! Overcrowding the pan lowers the oil temperature and leads to soggy chicken. Give each piece plenty of space to crisp up beautifully.
- Let the Chicken Rest: After frying, let the chicken rest on paper towels for a minute. This will help it stay crispy by allowing excess oil to drain off.
- Use Fresh Panko: Trust me, fresh panko breadcrumbs make a world of difference! They’re lighter and crispier than those that have been sitting around for a while.
- Season at Every Step: Don’t forget to season your flour! Each step of the cooking process adds layers of flavor, so sprinkle a bit of salt and pepper into your flour for a tasty coating.
- Experiment with Dipping Sauces: While tonkatsu sauce is traditional, feel free to try other dipping sauces like a spicy mayo or even a sweet chili sauce for a fun twist!
With these tips, your crispy chicken katsu will be a hit at the dinner table, leaving everyone asking for seconds!
Nutritional Information
When you’re whipping up crispy chicken katsu, it’s always good to know what you’re putting on the table. Here’s a rough estimate of the nutritional values per serving—just keep in mind that these can vary based on portion sizes and specific ingredients used:
- Calories: 350
- Fat: 20g
- Saturated Fat: 3g
- Unsaturated Fat: 15g
- Trans Fat: 0g
- Cholesterol: 70mg
- Sodium: 600mg
- Carbohydrates: 25g
- Fiber: 1g
- Sugar: 1g
- Protein: 20g
This dish is a great balance of protein and carbs, perfect for a satisfying meal. Just remember, while it’s delicious, moderation is key! Enjoy every crispy bite while keeping these numbers in mind!
FAQ Section
Can I use chicken thighs instead of breasts?
Absolutely! Chicken thighs are a fantastic alternative to chicken breasts in crispy chicken katsu. They tend to be juicier and have a richer flavor, which can make your katsu even more delicious. Just keep in mind that thighs may take a minute or two longer to cook through due to their slightly thicker texture. As long as you ensure they reach an internal temperature of 165°F (75°C), you’ll end up with a wonderfully tender and flavorful katsu!
What can I substitute for panko breadcrumbs?
If you can’t find panko breadcrumbs, don’t worry! There are a few great substitutes. Regular breadcrumbs will work, but they might not give you that same light, crispy texture. If you’re looking for something crunchier, crushed cornflakes or even crushed puffed rice can be a fun alternative! Just remember, the goal is to achieve that delightful crunch, so whatever you choose, make sure it’s something that will hold up well during frying.
How do I reheat leftover crispy chicken katsu?
Reheating crispy chicken katsu can be tricky if you want to keep that crunch, but I’ve got you covered! The best way is to place the chicken on a wire rack in a baking sheet and pop it in a preheated oven at 375°F (190°C) for about 10-15 minutes. This method allows the heat to circulate around the chicken, keeping it crispy. Avoid using the microwave, as it tends to make the coating soggy. With this technique, you’ll enjoy your leftovers as if they were freshly made!
Why You’ll Love This Recipe
- Quick to Prepare: With just 30 minutes from start to finish, you can whip up this delicious meal even on the busiest of weeknights!
- Easy to Customize: Feel free to play around with the seasonings or try different dipping sauces to suit your taste. The possibilities are endless!
- Deliciously Crispy: The fresh panko breadcrumbs create an irresistible crunch that makes every bite a delight. You won’t be able to stop at just one piece!
- Kid-Friendly: This dish is a hit with kids and adults alike, making it a perfect family meal that everyone will enjoy.
- Perfect for Leftovers: Crispy chicken katsu reheats beautifully, so you can enjoy it again the next day without losing that delightful crunch.
- Versatile Serving Options: Serve it with rice, salad, or even in a sandwich for a fun twist. It’s a dish that adapts to any occasion!
Equipment Needed
Gathering the right equipment can make all the difference when preparing crispy chicken katsu. Here’s what you’ll need to ensure your cooking experience is smooth and successful:
- Frying Pan: A heavy-bottomed frying pan is essential for even heat distribution. This helps prevent hot spots that can burn your chicken. A cast iron skillet or a non-stick pan works beautifully for frying.
- Meat Mallet or Rolling Pin: You’ll want a good meat mallet to pound the chicken evenly. This step is crucial for ensuring tenderness and consistent cooking. If you don’t have a mallet, a rolling pin can do the trick in a pinch!
- Cooking Thermometer: A reliable cooking thermometer is your best friend for checking the internal temperature of the chicken. Ensuring it reaches 165°F (75°C) guarantees it’s cooked through while remaining juicy.
- Mixing Bowls: You’ll need a couple of mixing bowls for dredging and breading the chicken. One for the flour mixture and another for the egg wash will keep things organized and make the process smoother.
- Slotted Spoon or Tongs: A slotted spoon or a pair of tongs will help you safely turn the chicken in the hot oil and remove it once it’s perfectly golden brown. This keeps your hands safe from splatters!
- Paper Towels: You’ll want plenty of paper towels on hand to drain the fried chicken and absorb excess oil. This step is key to keeping your katsu crispy!
Having these tools ready will set you up for success in making that mouthwatering crispy chicken katsu you’re craving. Happy cooking!
Storage & Reheating Instructions
Storing leftover crispy chicken katsu is super simple, and with the right techniques, you can maintain that delightful crunch for your next meal!
First, let the chicken cool completely at room temperature. Once it’s cooled, wrap each piece loosely in parchment paper or place them in an airtight container. If you use a container, I recommend placing paper towels at the bottom to absorb any moisture that might make the chicken soggy. You can also layer paper towels between the pieces to help keep them crisp. Store it in the refrigerator, where it will stay fresh for up to three days.
When it comes to reheating, the oven is your best friend for preserving that crispy texture. Preheat your oven to 375°F (190°C) and place the chicken on a wire rack set over a baking sheet. This allows the hot air to circulate around the chicken, keeping it crisp. Heat for about 10-15 minutes, or until heated through. If you don’t have a wire rack, simply place the chicken directly on the baking sheet, but keep an eye on it to ensure it doesn’t get too soggy.
Avoid using the microwave if you can—while it’s quick, it tends to steam the chicken, resulting in a less-than-crispy coating. By following these storage and reheating tips, you’ll enjoy your crispy chicken katsu just as much as when it was freshly made!
Personal Touch
Ah, the first time I had crispy chicken katsu—it was a game changer! I still remember it like it was yesterday. I was on a trip to Japan with some friends, and we stumbled upon this little izakaya tucked away in a bustling alley. The moment we walked in, the aroma of sizzling chicken and savory sauces enveloped us. It was like a warm hug from the kitchen! We ordered a plate of chicken katsu, and when it arrived, I was mesmerized by its golden-brown crust. My heart raced as I took my first bite, and the crunch was absolutely heavenly! The tender chicken paired with the rich tonkatsu sauce was a match made in culinary heaven.
Since then, I’ve made it a tradition to recreate that moment at home. Whenever I prepare crispy chicken katsu, I can’t help but share the story with my family. It’s like transporting us back to that cozy izakaya in Japan. My kids love helping me in the kitchen, dipping the chicken in egg and coating it with panko, giggling as they make a mess. It’s become a family affair, and we often enjoy it with rice and a fresh salad just like I did in Japan. Every time I serve it, that familiar crunch brings back memories, connecting us to the flavors and experiences that make life so rich and beautiful. Trust me, there’s nothing quite like sharing a beloved dish with the people you love!
Crispy Chicken Katsu: 7 Steps to Irresistible Flavor
- Total Time: 30 minutes
- Yield: 2 servings 1x
- Diet: Gluten Free
Description
Crispy chicken katsu is a Japanese dish featuring breaded and fried chicken cutlets served with a savory sauce.
Ingredients
- 2 boneless chicken breasts
- 1 cup panko breadcrumbs
- 1/2 cup flour
- 1 large egg
- 1/2 teaspoon salt
- 1/4 teaspoon black pepper
- 1/2 cup vegetable oil
- tonkatsu sauce for serving
Instructions
- Preheat the oil in a frying pan over medium heat.
- Butterfly the chicken breasts and pound them to an even thickness.
- Season flour with salt and pepper.
- Dredge each chicken piece in flour, then dip in egg, and coat with panko breadcrumbs.
- Fry the chicken in hot oil until golden brown and cooked through, about 5-7 minutes per side.
- Drain on paper towels and slice before serving.
- Serve with tonkatsu sauce.
Notes
- Use fresh panko for the best texture.
- Adjust the oil temperature to avoid burning.
- Pair with rice and salad for a complete meal.
- Prep Time: 15 minutes
- Cook Time: 15 minutes
- Category: Main Course
- Method: Frying
- Cuisine: Japanese
Nutrition
- Serving Size: 1 piece
- Calories: 350
- Sugar: 1g
- Sodium: 600mg
- Fat: 20g
- Saturated Fat: 3g
- Unsaturated Fat: 15g
- Trans Fat: 0g
- Carbohydrates: 25g
- Fiber: 1g
- Protein: 20g
- Cholesterol: 70mg
Keywords: crispy chicken katsu, katsu, chicken cutlet