Ah, the allure of French pastries! There’s just something magical about them, isn’t there? I remember my first taste of Paris Brest during a little café visit in Paris. I was sitting outside, sipping a café au lait, when the waiter brought out this stunning ring of choux pastry, filled to the brim with luscious cream. Wow! I was instantly transported to pastry heaven. The way the light danced on that golden-brown crown, the sweet aroma wafting through the air—it was a moment I’ll never forget.
Paris Brest isn’t just a dessert; it’s a tribute to the famous bicycle race from Paris to Brest, celebrating the journey and the joy of indulgence. This delightful pastry, with its rich cream filling and airy choux dough, has become a symbol of celebration in French culture. It’s often shared during special occasions and gatherings, bringing friends and family together around the table. Trust me, once you take a bite of this heavenly creation, you’ll understand why it holds such a cherished place in the hearts of so many. Ready to learn how to make your own? Let’s dive in!
Ingredients for Paris Brest
Let’s gather everything we need to create this stunning pastry! Each ingredient plays a vital role in making your Paris Brest truly delicious.
- 1 cup water: This is the base for your choux pastry. Use filtered water for the best results!
- 1/2 cup unsalted butter: Real butter gives the pastry its rich flavor. Make sure it’s at room temperature for easy mixing.
- 1 cup all-purpose flour: This is what gives structure to your choux. Sift it before measuring to avoid any lumps!
- 1/4 teaspoon salt: Just a pinch to enhance the flavors. Trust me, it makes a difference!
- 4 large eggs: These add moisture and help the pastry rise beautifully. Bring them to room temperature for best mixing.
- 1 cup pastry cream: This is the star filling! You can make it from scratch or buy it pre-made, but homemade is so worth it!
- Powdered sugar for dusting: A light dusting adds a lovely finish and makes everything look fancy!
Gather these ingredients, and you’re ready to embark on your Paris Brest adventure! Each one contributes to that perfect combination of flavors and textures. Let’s get started!
How to Prepare Paris Brest
Now that we’ve got our ingredients ready, it’s time to transform them into the glorious Paris Brest! Don’t worry; I’ll walk you through each step. Trust me, the results are totally worth it!
Preheat and Prepare the Dough
First things first, let’s get that oven preheating to 400°F (200°C). It’s like warming up for a race—so crucial! While that’s happening, grab a medium saucepan and combine your water, unsalted butter, and salt. Bring it to a gentle boil over medium heat, stirring occasionally. The butter should melt completely into the water, creating a beautiful mixture.
Once it’s bubbling away, remove the saucepan from heat and add in the all-purpose flour all at once. This is where the magic starts! Stir vigorously with a wooden spoon until a dough forms that pulls away from the sides of the pan. You want a smooth, cohesive ball of dough—no lumps allowed! Let it cool for about 5 minutes before moving on to the next step. This cooling period is important because it prevents the eggs from scrambling when you add them in!
Baking the Choux Pastry
Now, it’s time to introduce the eggs! Add them one at a time, stirring well after each addition until fully incorporated. You’ll know the dough is ready when it becomes smooth and shiny—almost like a thick batter. Scoop this heavenly mixture into a piping bag fitted with a large round tip. Get excited; we’re almost there!
Line a baking sheet with parchment paper, and pipe a generous ring of dough, about 2 inches wide. Don’t worry about making it perfect; a little rustic charm adds character! Bake in your preheated oven for 25-30 minutes. You’ll want to keep an eye on them as they rise and turn a glorious golden-brown. The best part? The kitchen will smell divine! To check for doneness, gently press the top of the pastry; it should feel firm and spring back slightly. If it’s still soft, give it a few more minutes.
Filling the Paris Brest
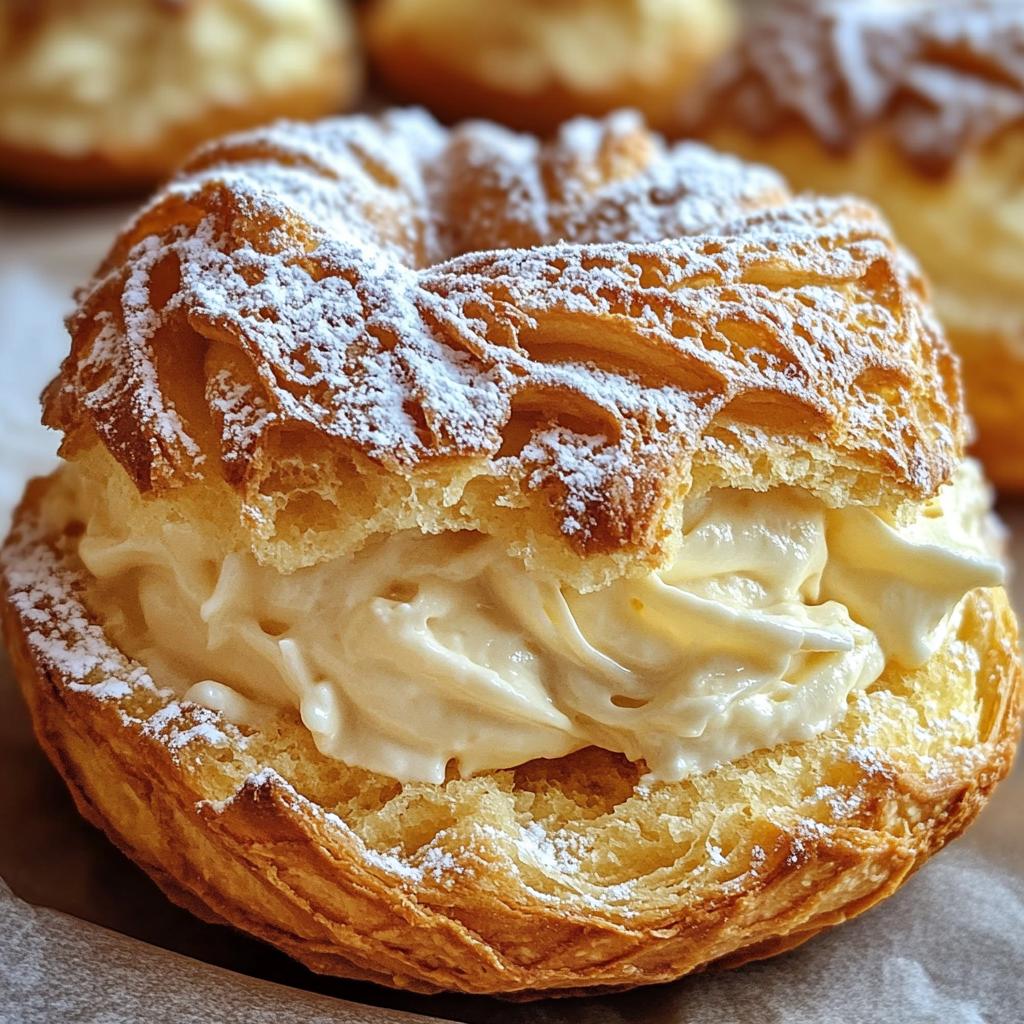
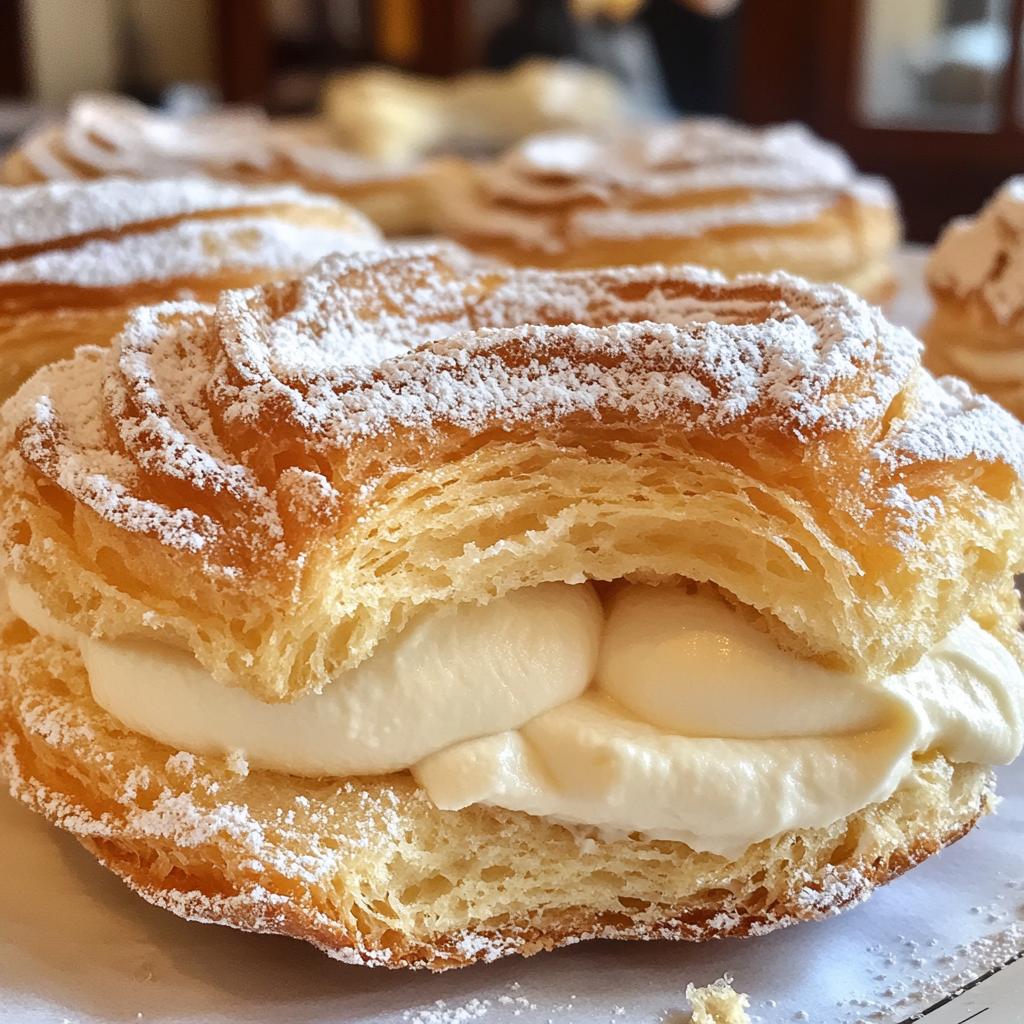
Once those beauties are out of the oven, let them cool completely on a wire rack. Patience is key here, my friend! When they’re cool, carefully slice each ring in half horizontally. This is where the fun begins! Use a piping bag fitted with a star tip to fill the bottom half of the pastry with that luscious pastry cream. Don’t be shy—fill it generously! Place the top back on, and finish with a light dusting of powdered sugar for that elegant touch.
And voilà! You’ve just created a stunning Paris Brest that’s sure to impress anyone who takes a bite. The delicate choux pastry filled with rich cream is a match made in dessert heaven. Get ready to enjoy every delicious moment of this classic French treat!
Why You’ll Love This Recipe
There are so many reasons to fall in love with making Paris Brest! Here are just a few that I think you’ll appreciate:
- Quick Preparation: With just a few simple steps, you can whip up this impressive pastry in under an hour. Perfect for when you’re short on time but want to wow your guests!
- Delightful Taste: The combination of airy choux pastry and rich pastry cream creates a heavenly flavor experience. Each bite melts in your mouth—trust me, it’s incredible!
- Impressive Presentation: This pastry looks stunning on any dessert table. The beautiful ring shape and dusting of powdered sugar make it a showstopper, perfect for celebrations or special occasions.
- Customizable: You can easily switch up the filling! Whether you want to add chocolate ganache, fruit preserves, or even flavored creams, the possibilities are endless!
- Fun to Make: There’s something magical about piping dough and watching it puff up in the oven. You’ll feel like a true pastry chef in your own kitchen!
Once you make this Paris Brest, you’ll understand why it’s a beloved classic in French pastry culture. Ready to impress your friends and family? Let’s keep going!
Equipment Needed
Before you dive into making your beautiful Paris Brest, let’s gather the essential kitchen tools you’ll need. Having everything ready will make the process smoother and more enjoyable!
- Medium saucepan: For boiling the water and butter mixture. A sturdy one will make sure everything heats evenly.
- Wooden spoon: You’ll use this to mix your dough. A classic choice that gives you control while stirring!
- Piping bag: This is crucial for shaping your choux pastry. If you don’t have one, a resealable plastic bag with the corner snipped off works too!
- Large round piping tip: For piping the ring shape of your Paris Brest. If you’re feeling fancy, a star tip can add a lovely decorative touch!
- Baking sheet: You’ll need a sturdy one to hold your choux pastry while it bakes. Lining it with parchment paper helps with easy removal.
- Wire rack: This is perfect for cooling your baked pastries evenly. It prevents them from getting soggy on the bottom.
- Sharp knife or serrated knife: For slicing the cooled pastry in half. A sharp edge will make this step easy and clean.
- Dusting sieve: For a lovely, even dusting of powdered sugar on top—because presentation is everything!
With these tools at your side, you’re all set to create a stunning Paris Brest that’ll have everyone raving! Happy baking!
Tips for Success
Making Paris Brest is an exciting adventure, but there are a few tips I’ve learned along the way that can help you achieve that perfect pastry! Trust me, these little nuggets of wisdom will make a world of difference.
- Don’t skip the cooling time: After you mix your choux dough, let it cool for the recommended time. This step is crucial to prevent the eggs from scrambling when added. Patience pays off here!
- Check your oven temperature: Every oven is different, and baking can be finicky! If you have an oven thermometer, use it to ensure your oven is at the right temperature. An oven that’s too hot can cause your pastry to brown too quickly without cooking through.
- Piping technique matters: When you pipe the dough, keep the tip close to the baking sheet and apply even pressure for a consistent ring shape. Don’t worry if it’s not perfect; a little rustic charm adds character!
- Monitor baking closely: Keep an eye on your Paris Brest while it bakes. You want it to puff up and turn golden brown. If you notice it browning too quickly, you can gently place a piece of foil on top to prevent it from burning.
- Fill just before serving: For the best texture, fill your Paris Brest with pastry cream right before you plan to serve it. This helps maintain that delightful crunch of the choux pastry!
- Customize your fillings: Don’t hesitate to experiment with different fillings! Whether it’s a chocolate pastry cream, fruit, or even a flavored whipped cream, the options are endless. Just remember to adjust your flavors to balance with the sweetness of the pastry!
With these tips in your back pocket, you’re well on your way to mastering Paris Brest. Enjoy the process, and savor every delicious bite!
Variations of Paris Brest
One of the best things about Paris Brest is how versatile it is! While the classic version is absolutely delightful, you can easily switch things up and create your own unique flavor combinations. Here are some fun variations to inspire your creativity:
- Chocolate Paris Brest: For chocolate lovers, simply add cocoa powder to your choux pastry dough for a rich flavor. Fill it with chocolate pastry cream or even a silky chocolate ganache for an indulgent twist!
- Fruit-Infused Cream: Mix in some fresh fruit puree or zest into your pastry cream. Think raspberry, lemon, or even passion fruit! This will give your filling a refreshing zing that pairs beautifully with the airy pastry.
- Nutty Delight: Incorporate finely ground nuts, such as almonds or hazelnuts, into your pastry cream for added texture and flavor. You could also sprinkle chopped nuts on top before dusting with powdered sugar for a delightful crunch!
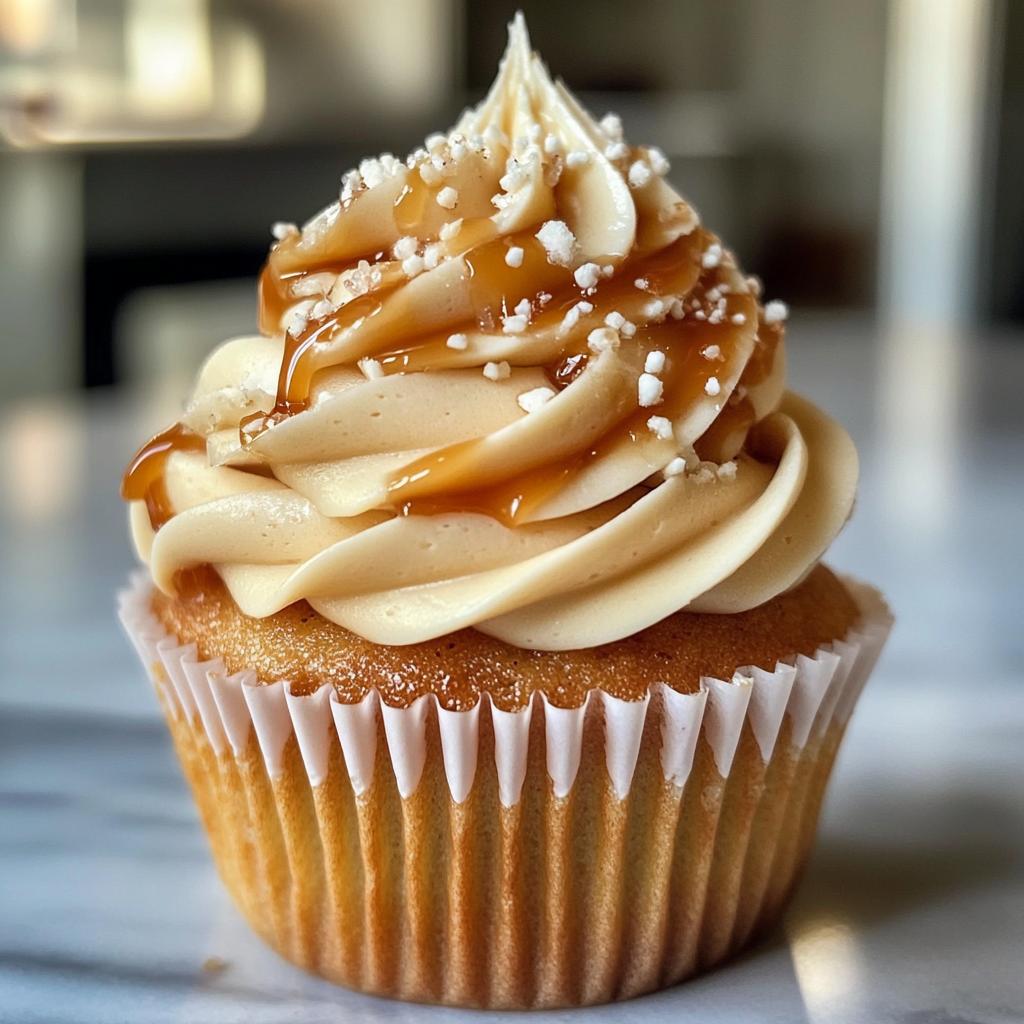
- Caramel Drizzle: After filling your Paris Brest, drizzle it with homemade caramel sauce. The sweet, buttery flavor adds a delicious contrast to the cream, making every bite even more tempting.
- Matcha Magic: For a unique twist, incorporate matcha powder into your pastry cream. The earthy flavor of matcha combined with the sweetness of the cream makes for a sophisticated and trendy dessert!
- Savory Paris Brest: Why not venture into savory territory? Fill your choux pastry with a creamy cheese filling or herbed whipped cream. This makes for a fantastic appetizer that will surprise your guests!
Feel free to mix and match these ideas or even come up with your own signature filling. The possibilities are endless, and that’s what makes making Paris Brest so much fun! Get creative, and enjoy experimenting with flavors that excite your palate!
Storage & Reheating Instructions
After all your hard work creating this stunning Paris Brest, you might find yourself with some leftovers—if you’re lucky! Storing them properly will ensure they stay delicious for as long as possible.
To store your Paris Brest, simply place it in an airtight container. If you’ve filled it with pastry cream, it’s best to keep it in the fridge. This will help maintain that lovely creaminess and prevent any spoilage. Just make sure to consume it within 2-3 days for the best flavor and texture! If you plan to make it ahead of time, consider storing the choux pastry and pastry cream separately. This way, you can fill it just before serving, keeping that delightful crunch intact.
If you have any leftover filled pastries, but you’d like to enjoy them warm again, here’s how to reheat them without losing that beautiful texture:
- Oven Method: Preheat your oven to 350°F (175°C). Place the Paris Brest on a baking sheet and warm it in the oven for about 5-10 minutes. This will help crisp up the choux pastry while gently warming the cream inside.
- Microwave Method: If you’re short on time, you can use the microwave. Place the Paris Brest on a microwave-safe plate and heat it in 10-15 second intervals. Be cautious, though! You want to warm it up without making it soggy.
Enjoy every last bite of your Paris Brest, whether freshly made or reheated. Trust me, it’s so worth it! Happy indulging!
Nutritional Information
Understanding the nutritional content of your delicious Paris Brest can help you appreciate this indulgence even more! Here’s the estimated nutritional data per serving, keeping in mind that values can vary based on specific ingredients and portion sizes:
- Serving Size: 1 piece
- Calories: 300
- Sugar: 15g
- Sodium: 150mg
- Fat: 20g
- Saturated Fat: 10g
- Unsaturated Fat: 8g
- Trans Fat: 0g
- Carbohydrates: 25g
- Fiber: 1g
- Protein: 4g
- Cholesterol: 100mg
Remember, this delightful pastry is best enjoyed in moderation, especially considering its rich flavors and textures. Savor every bite, and don’t forget to share it with loved ones—you’ll want to spread the joy of Paris Brest! Enjoy your baking adventure!
Share Your Experience
I’d absolutely love to hear about your journey making Paris Brest! Whether you’re a seasoned pro or a first-time pastry adventurer, your stories and experiences are what make this community so special. Did you try a fun variation? Maybe you added a twist to the filling or decorated it in a unique way? I want to know!
Feel free to leave a comment below with any tips, tricks, or questions you might have. And please, share your photos! There’s nothing more delightful than seeing your beautiful creations. Each Paris Brest is a reflection of your creativity and hard work, and I’d be thrilled to celebrate your success with you!
So, let’s connect! Let me know how your pastry turned out, and if there’s anything I can help with as you continue your baking adventures. Happy baking, and can’t wait to see your delicious masterpieces!
Print
french pastry paris brest: 7 Tips for Perfecting Heaven
- Total Time: 50 minutes
- Yield: 8 servings 1x
- Diet: Vegetarian
Description
Paris Brest is a classic French pastry made of choux dough filled with cream.
Ingredients
- 1 cup water
- 1/2 cup unsalted butter
- 1 cup all-purpose flour
- 1/4 teaspoon salt
- 4 large eggs
- 1 cup pastry cream
- Powdered sugar for dusting
Instructions
- Preheat the oven to 400°F (200°C).
- In a saucepan, combine water, butter, and salt. Bring to a boil.
- Remove from heat and stir in flour until a dough forms.
- Let cool slightly, then add eggs one at a time, mixing well after each addition.
- Scoop the dough into a piping bag and pipe a ring on a baking sheet.
- Bake for 25-30 minutes until golden brown.
- Let cool completely and slice in half.
- Fill with pastry cream and dust with powdered sugar.
Notes
- Ensure the choux pastry is baked until dry to prevent sogginess.
- Use a pastry bag for neat filling.
- Prep Time: 20 minutes
- Cook Time: 30 minutes
- Category: Dessert
- Method: Baking
- Cuisine: French
Nutrition
- Serving Size: 1 piece
- Calories: 300
- Sugar: 15g
- Sodium: 150mg
- Fat: 20g
- Saturated Fat: 10g
- Unsaturated Fat: 8g
- Trans Fat: 0g
- Carbohydrates: 25g
- Fiber: 1g
- Protein: 4g
- Cholesterol: 100mg
Keywords: french pastry, paris brest, choux pastry, dessert