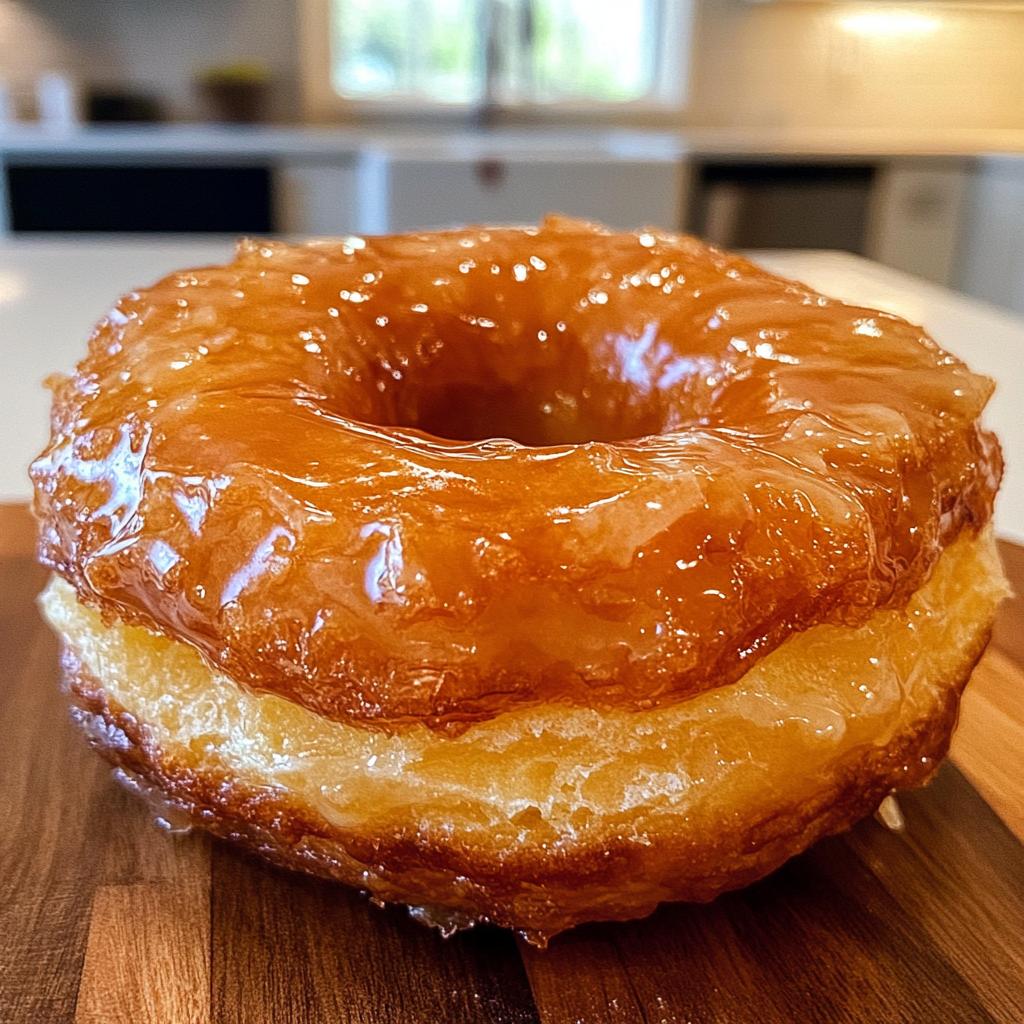
Oh my goodness, let me tell you about the first time I made homemade cronuts! It was one of those rainy weekends when I was feeling adventurous in the kitchen. I had this wild idea to combine my love for donuts and croissants, and wow, did it turn out to be a delicious experiment! The moment those flaky, golden beauties came out of the fryer, my kitchen was filled with the most irresistible aroma. There’s something magical about biting into a cronut – the outer layer is perfectly crisp while the inside is oh-so-soft and buttery. And don’t even get me started on the sweet glaze! Just a dip, and you get that glossy finish that takes these treats to another level. Trust me, once you try making homemade cronuts, you’ll never want to go back to store-bought! They’re a delightful way to impress your friends and family, or just to treat yourself on a cozy Sunday morning.
Ingredients List
Gather these simple yet essential ingredients to whip up the most delightful homemade cronuts. Each one plays a vital role in creating that flaky texture and sweet glaze you’ll adore:
- 1 cup all-purpose flour: This is the base for your cronuts, giving them structure and that perfect bite.
- 1/4 cup sugar: Adds sweetness to the dough, making every bite a treat.
- 1/2 teaspoon salt: Just a pinch to balance the sweetness and enhance flavors.
- 1/2 teaspoon yeast: This little helper makes your cronuts rise and gives them that delightful fluffiness.
- 1/4 cup milk: Brings moisture to the dough and helps everything come together beautifully.
- 1/4 cup butter, softened: The secret to rich flavor and that flaky texture we crave.
- 1 egg: Adds richness and helps bind the dough for a perfect consistency.
- Vegetable oil for frying: You’ll need enough to submerge your cronuts for that golden, crispy finish.
- 1 cup powdered sugar for glaze: The sweet, sugary coating that makes these treats irresistible.
- 2 tablespoons water for glaze: Just enough to achieve the right consistency for dipping.
With these ingredients at hand, you’re well on your way to creating homemade cronuts that will have everyone coming back for seconds!
How to Prepare Homemade Cronuts
Now that you’ve got your ingredients ready, let’s dive into the delightful process of making homemade cronuts! Trust me, each step is so rewarding, and I promise you’ll be in love with the results.
Step 1: Mixing the Dough
Start by grabbing a large mixing bowl. Combine the 1 cup of all-purpose flour, 1/4 cup of sugar, 1/2 teaspoon of salt, and 1/2 teaspoon of yeast. Mix these dry ingredients together until well blended. Next, it’s time to add the wet ingredients! Pour in the 1/4 cup of milk, 1/4 cup of softened butter, and crack in that 1 egg. Use a spatula or your hands to mix everything together until a dough starts to form. You want a soft, slightly sticky texture—perfect for kneading!
Step 2: Kneading and Rising
Once your dough is mixed, it’s time to knead! Lightly flour your countertop and turn out the dough. Knead it for about 5 minutes, adding a touch more flour if it’s too sticky. You’re looking for a smooth, elastic consistency that feels great in your hands. After the kneading, place the dough in a lightly greased bowl, cover it with a clean kitchen towel, and let it rise in a warm spot for about 1 hour. This is where the magic happens! You want it to double in size, so be patient—it’s worth it!
Step 3: Rolling and Folding
Once your dough has risen beautifully, it’s time to roll it out. Flour your surface again and gently roll the dough into a rectangle, about 1/4 inch thick. Now comes the fun part: folding! Fold the dough into thirds, like you’re folding a letter. This technique helps create those lovely layers we crave in a flaky cronut. Roll it out again to the same thickness and repeat the folding process one more time. This will give you that signature flaky texture!
Step 4: Cutting the Cronuts
Now it’s time to cut your cronuts! Use a sharp knife or a donut cutter to cut out your shapes. You’ll want to create circles of about 3 inches in diameter. If you have a smaller cutter, you can cut out the center to form the hole. Don’t worry if they don’t look perfect—each one will still taste amazing! Once cut, place them on a parchment-lined baking sheet and let them rest for a few minutes while you heat the oil.
Step 5: Frying the Cronuts
Heat up your vegetable oil in a deep frying pan over medium heat. You’ll want enough oil to submerge the cronuts completely. To check if the oil is hot enough, drop a small piece of dough in—if it sizzles and bubbles, you’re good to go! Carefully add a few cronuts at a time, frying them for about 2-3 minutes on each side until they’re golden brown. Use a slotted spoon to remove them and let them drain on paper towels. Oh, the aroma is going to be heavenly!
Step 6: Glazing the Cronuts
While your cronuts cool slightly, it’s time to make that sweet glaze! In a bowl, whisk together 1 cup of powdered sugar and 2 tablespoons of water until smooth. You want it to be thick but pourable. Now for the fun part—take each warm cronut and dip the top into the glaze, letting any excess drip off. Place them on a wire rack to let the glaze set. Trust me, this step elevates your homemade cronuts to a whole new level of deliciousness!
Nutritional Information
Let’s talk about the nutritional goodness of these homemade cronuts! Each one is a delightful treat, and while they’re definitely indulgent, I think it’s nice to be aware of what we’re enjoying. Here’s a rough estimate of the nutritional data for a single cronut:
- Calories: 200
- Sugar: 10g
- Fat: 10g
- Saturated Fat: 5g
- Unsaturated Fat: 3g
- Trans Fat: 0g
- Carbohydrates: 25g
- Fiber: 1g
- Protein: 2g
- Cholesterol: 30mg
- Sodium: 150mg
Keep in mind that these numbers are just estimates, as different ingredients and portion sizes can vary. Enjoy your cronuts in moderation, and don’t forget to savor every flaky, sweet bite!
Tips for Success
Before you dive into making your homemade cronuts, let me share some of my favorite tips to ensure that they turn out absolutely perfect every time! These little nuggets of wisdom will help you navigate the process with ease and confidence.
Pay Attention to Dough Rising
Getting that rise just right is crucial for flaky cronuts! Make sure you find a warm spot in your kitchen for the dough to rise. If you’re in a cooler environment, consider placing the bowl in your oven (turned off, of course!) with the light on. The gentle warmth will help it grow to double its size. And remember, patience is key—don’t rush the rising time!
Check Your Oil Temperature
Frying can be a bit tricky, but it’s all about the oil temperature! Use a thermometer if you have one, aiming for around 350°F (175°C). If you don’t have a thermometer, the dough test works just fine—drop a small piece of dough into the oil, and if it sizzles and rises to the surface, you’re ready to go! Keeping the oil at the right temperature prevents greasy cronuts and ensures they fry up nice and golden.
Don’t Overcrowd the Pan
When frying your cronuts, resist the urge to toss too many in at once! Overcrowding can lower the oil temperature, leading to soggy treats. Fry just a few at a time to give them space to cook evenly and achieve that beautiful crispiness. Trust me, a little patience here goes a long way!
Glazing While Warm
For that perfect glaze, dip your cronuts while they’re still warm but not scalding hot. This allows the glaze to stick beautifully without melting away. If you find the glaze too thick, just add a drop more water to reach that ideal consistency for dipping. A quick swirl in the glaze and letting the excess drip off will give you that beautiful glossy finish!
Let Them Cool on a Wire Rack
After glazing, place your cronuts on a wire rack instead of a plate. This prevents them from getting soggy by allowing any excess glaze to drip off and air to circulate. Plus, it makes for a lovely presentation when you’re ready to serve!
With these tips, you’ll be well on your way to making scrumptious homemade cronuts that will impress everyone. Enjoy the process, and happy frying!
Variations on Homemade Cronuts
Now that you’ve mastered the art of homemade cronuts, why not get a little creative? There are so many fun ways to switch things up and make these treats uniquely yours! Here are some delicious variations that can bring a new twist to your cronuts:
Different Glazes
While the classic glaze is fantastic, experimenting with flavors can add a whole new dimension. Try:
- Chocolate Glaze: Melt some semisweet chocolate and mix in a splash of cream for a rich, decadent glaze that’s hard to resist.
- Cinnamon Sugar: After frying, toss your cronuts in a mixture of cinnamon and granulated sugar for a delightful twist on the traditional glaze.
- Maple Glaze: Substitute the water in your glaze with pure maple syrup for a sweet, earthy flavor that pairs perfectly with the buttery dough.
Fillings to Surprise
Why not take your cronuts to the next level with some delicious fillings? Consider:
- Pastry Cream: Pipe in a rich vanilla or chocolate pastry cream for a creamy surprise in every bite.
- Fruit Preserves: Fill your cronuts with homemade or store-bought fruit preserves like raspberry or lemon for a fruity burst of flavor.
- Nutella: If you’re a chocolate lover, a generous dollop of Nutella inside will make your cronuts absolutely divine!
Fun Toppings
Don’t forget about toppings! A little crunch or extra sweetness can elevate your cronuts even further:
- Chopped Nuts: Sprinkle some chopped pistachios or almonds on top of the glaze for a delightful crunch.
- Shredded Coconut: For a tropical twist, add toasted coconut flakes on top of your glaze.
- Edible Glitter: If you’re feeling fancy, a sprinkle of edible glitter can make your cronuts a showstopper at any gathering!
With these variations, you can turn your homemade cronuts into a creative canvas that reflects your personal taste. Whether you stick to the classic or go adventurous, each bite will be a delightful treat!
Storage & Reheating Instructions
So, you’ve made a batch of delicious homemade cronuts, and now you’re wondering how to store those delightful treats for later. I totally get it—no one wants to waste any of that flaky goodness! Here’s how to keep your cronuts fresh and tasty:
First, let your cronuts cool completely on a wire rack. This helps prevent any moisture buildup that could make them soggy. Once they’re cool, you can store them in an airtight container. Just make sure to layer them with parchment paper to keep them from sticking together. They’ll stay fresh at room temperature for about 1-2 days, but trust me, they’re best enjoyed fresh!
If you want to keep them longer, consider freezing them. Wrap each cronut tightly in plastic wrap, then place them in a freezer-safe bag. They can last up to 1 month in the freezer. When you’re ready to enjoy, simply take them out and let them thaw at room temperature for a few hours.
Now, let’s talk reheating! To bring back that crispy texture, avoid the microwave—nobody wants a soggy cronut! Instead, preheat your oven to 350°F (175°C), and place the cronuts on a baking sheet. Heat them for about 5-7 minutes until they’re warm and slightly crispy again. If you’ve got a toaster oven, that works great too!
With these storage and reheating tips, you can savor your homemade cronuts whenever the craving strikes. Enjoy every last flaky bite!
FAQ Section
Got questions about homemade cronuts? Don’t worry, I’ve got you covered! Here are some of the most common queries I hear, along with my best answers to help you navigate your cronut-making adventure.
Can I use whole wheat flour instead of all-purpose flour?
While you can definitely experiment with whole wheat flour, keep in mind that it may change the texture of your cronuts. They might turn out denser than when using all-purpose flour. If you want to try it, I recommend using a mix of half whole wheat and half all-purpose for a lighter result.
What if I don’t have vegetable oil for frying?
If vegetable oil isn’t available, you can use canola oil or even coconut oil for frying. Just make sure whatever oil you choose has a high smoke point to achieve that perfect golden brown without burning!
How can I tell when the cronuts are done frying?
Great question! You’ll want to keep an eye on them as they fry. They should take about 2-3 minutes on each side until they’re golden brown. You can also use a slotted spoon to gently lift one and peek underneath. If it’s a lovely golden color, they’re ready! Just be careful not to overcook them!
Can I make the dough ahead of time?
Absolutely! If you want to save some time, you can prepare the dough and let it rise, then refrigerate it for up to 24 hours. Just remember to let it come back to room temperature before rolling and frying. This makes it a breeze when you’re ready to make homemade cronuts!
Are homemade cronuts difficult to make?
Not at all! While they might seem a bit intimidating at first, I promise the process is quite straightforward. Just take your time with each step, especially the rising and frying. Once you get the hang of it, you’ll be whipping up cronuts like a pro in no time!
With these FAQs, I hope I’ve eased some of your concerns and inspired you to dive into making your own homemade cronuts. Enjoy the adventure and all the deliciousness that comes with it!
Print
Homemade Cronuts: 5 Reasons You’ll Love This Sweet Treat
- Total Time: 1 hour 45 minutes
- Yield: 12 cronuts 1x
- Diet: Vegetarian
Description
Delicious homemade cronuts with a flaky texture and sweet glaze.
Ingredients
- 1 cup all-purpose flour
- 1/4 cup sugar
- 1/2 teaspoon salt
- 1/2 teaspoon yeast
- 1/4 cup milk
- 1/4 cup butter, softened
- 1 egg
- Vegetable oil for frying
- 1 cup powdered sugar for glaze
- 2 tablespoons water for glaze
Instructions
- In a bowl, mix flour, sugar, salt, and yeast.
- Add milk, butter, and egg. Mix until dough forms.
- Knead the dough for 5 minutes.
- Let the dough rise for 1 hour.
- Roll the dough into a rectangle and fold it multiple times.
- Cut into donut shapes.
- Heat oil in a pan and fry the cronuts until golden brown.
- Mix powdered sugar and water to make glaze.
- Dip fried cronuts into the glaze.
- Serve warm.
Notes
- Allow dough to rise in a warm place.
- Ensure oil is hot enough before frying.
- Experiment with different glazes if desired.
- Prep Time: 30 minutes
- Cook Time: 15 minutes
- Category: Dessert
- Method: Frying
- Cuisine: French
Nutrition
- Serving Size: 1 cronut
- Calories: 200
- Sugar: 10g
- Sodium: 150mg
- Fat: 10g
- Saturated Fat: 5g
- Unsaturated Fat: 3g
- Trans Fat: 0g
- Carbohydrates: 25g
- Fiber: 1g
- Protein: 2g
- Cholesterol: 30mg
Keywords: homemade cronuts