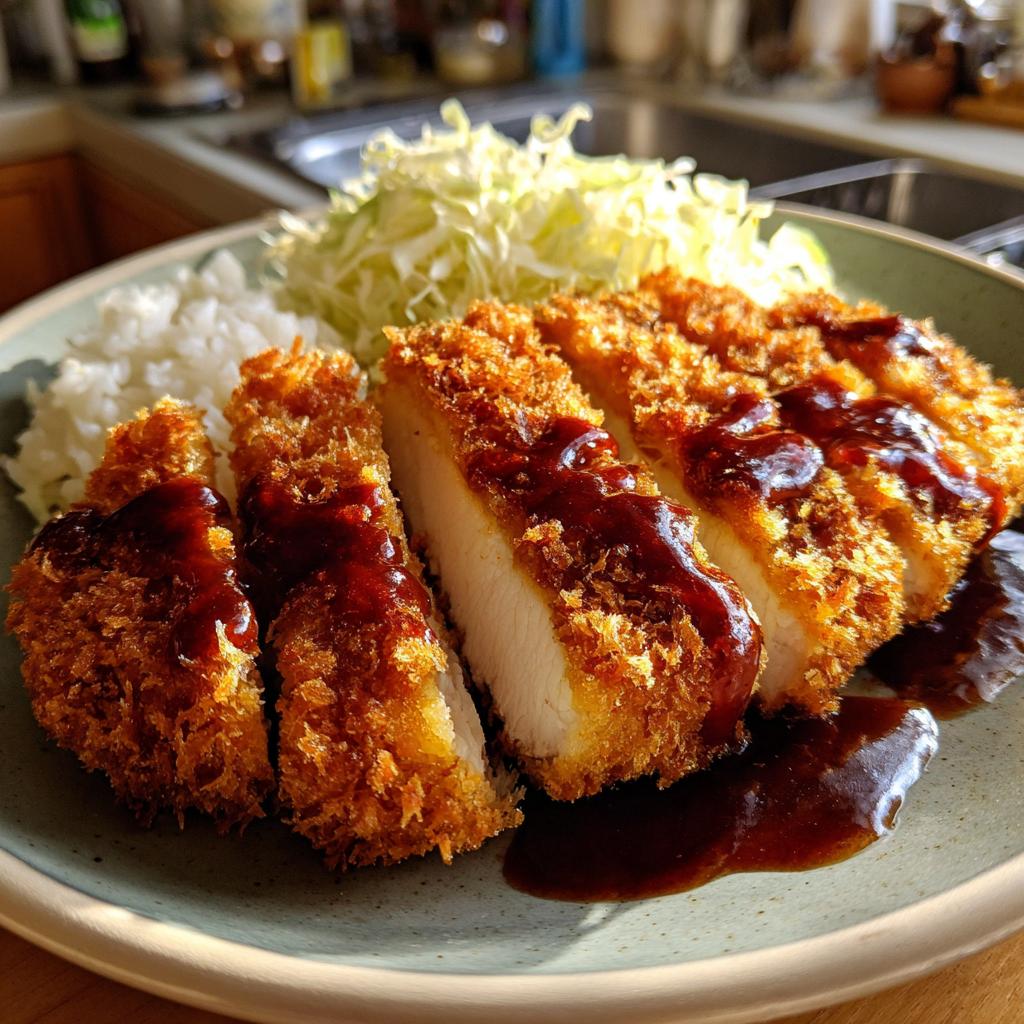
Let me tell you about the first time I tried katsu chicken – it was a game changer! I remember stepping into a cozy little Japanese restaurant, the air filled with the sizzling sounds of frying, and the aroma wafting through the air was simply irresistible. When that plate of crispy katsu chicken arrived, I was instantly hooked. The golden-brown coating was calling my name, and when I took that first bite, the crunch followed by the juicy tenderness of the chicken blew my mind! The savory tonkatsu sauce drizzled on top was the cherry on the cake. Ever since that day, katsu chicken has held a special place in my heart and in my kitchen. It’s not just a meal; it’s comfort food at its finest! And the best part? You can whip it up in your own kitchen in no time, bringing that amazing flavor right to your dinner table!
Ingredients List
Gathering the right ingredients is crucial for making the most delicious katsu chicken. Here’s what you’ll need:
- 2 chicken fillets: Make sure they’re boneless and skinless for easy cooking.
- 1 cup panko breadcrumbs: These Japanese-style breadcrumbs are key for achieving that irresistible crunch. Don’t skimp on this!
- 1/2 cup all-purpose flour: Used for coating the chicken, it helps the egg and breadcrumbs stick.
- 2 eggs: Beaten, these will create a lovely binding layer between the chicken and breadcrumbs.
- Salt to taste: Just a pinch to enhance the chicken’s flavor.
- Pepper to taste: A touch of black pepper adds a little kick!
- Vegetable oil for frying: Enough to cover the bottom of your pan; this helps achieve that beautiful golden color.
- Tonkatsu sauce for serving: This sweet and savory sauce is the perfect finish to your katsu chicken.
How to Prepare Katsu Chicken
Now that we’ve gathered our ingredients, let’s get started on preparing that crispy katsu chicken! I’ll guide you through each step, so you’ll have everything figured out in no time. Trust me, the process is straightforward, and the results are totally worth it!
Step 1: Prepare the Chicken
First things first, let’s flatten those chicken fillets! Place each breast between two pieces of plastic wrap or parchment paper. Using a meat mallet or rolling pin, gently pound the chicken until it’s about 1/2 inch thick. This helps them cook evenly and stay juicy. Once that’s done, season both sides generously with salt and pepper. This simple step truly enhances the flavor of the chicken, making every bite delicious!
Step 2: Breading Process
Now it’s time for the fun part – the breading! Set up your breading station: one plate with seasoned flour, another with the beaten eggs, and a third with the panko breadcrumbs. Take a chicken breast, coat it in the flour first, shaking off any excess. This helps the egg stick. Next, dip it into the eggs, letting the excess drip off, and finally, coat it well with the panko breadcrumbs. Make sure to press the breadcrumbs in a bit to get that crunchy texture. Repeat this for the other chicken breast, so you’re ready to fry!
Step 3: Cooking the Chicken
Heat a good amount of vegetable oil in a large pan over medium heat – enough to cover the bottom well. You want it hot but not smoking, around 350°F (175°C) is perfect. Carefully place the breaded chicken fillets in the pan, cooking them for about 4-5 minutes on each side until they’re golden brown and crispy. If they start to brown too quickly, don’t hesitate to lower the heat a bit. Once done, transfer the chicken to a plate lined with paper towels to drain any excess oil before slicing!
Step 4: Serving Suggestions
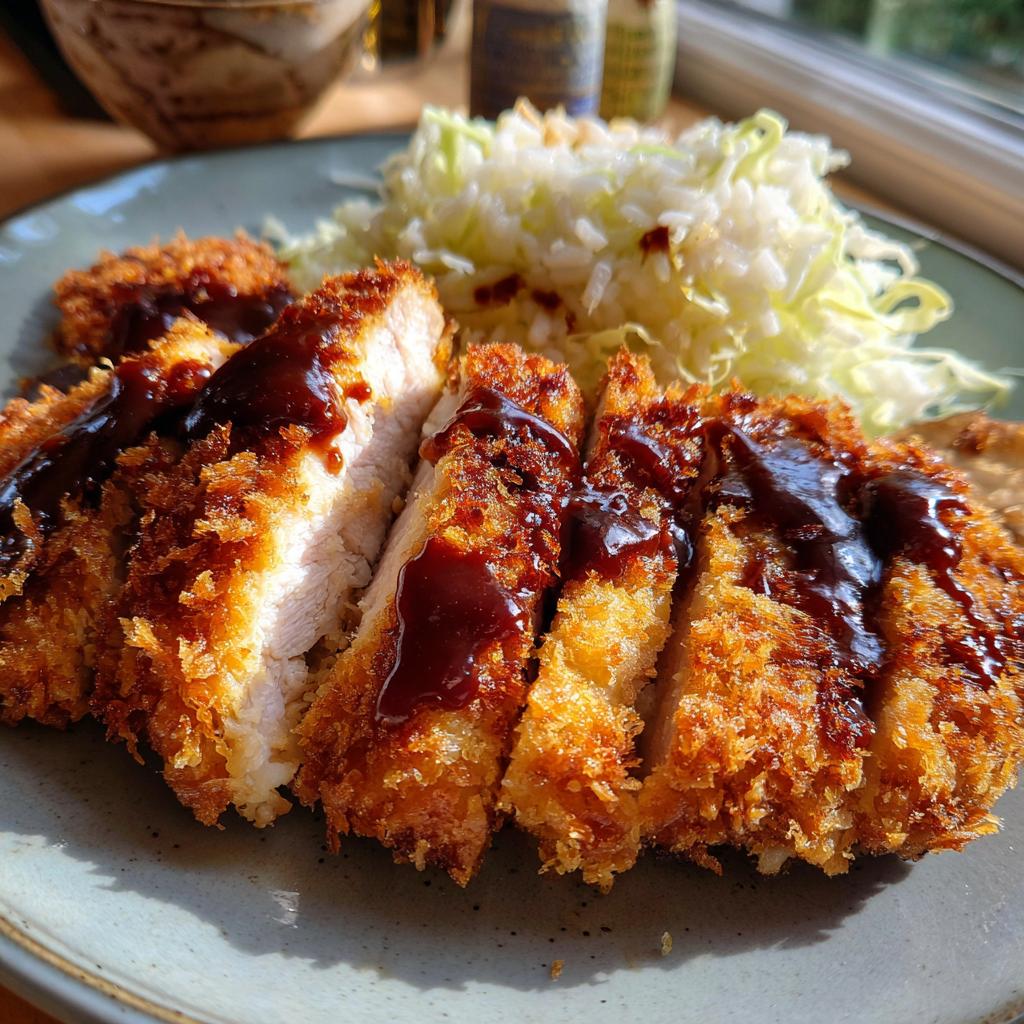
To serve your katsu chicken, slice it into strips or leave it whole if you prefer! Drizzle with tonkatsu sauce for that sweet and savory flavor that makes this dish shine. I love serving it with steamed rice and a side of shredded cabbage for a delightful crunch. It’s a meal that looks as good as it tastes, and you’ll be counting down the minutes until you can dig in!
Why You’ll Love This Katsu Chicken Recipe
This katsu chicken recipe is a favorite for so many reasons! Here’s why you’ll want to make it again and again:
- Quick Preparation: With just 15 minutes of prep and 10 minutes of cooking, you can have a mouthwatering meal ready in 25 minutes!
- Incredible Flavor: The combination of juicy chicken, crunchy coating, and savory tonkatsu sauce creates an explosion of flavor in every bite.
- Versatile Dish: Pair it with rice, noodles, or salad, and it fits any occasion from weeknight dinners to special gatherings.
- Kid-Friendly: Kids love the crispy texture and delicious sauce, making it a hit for family meals!
- Customizable: Feel free to add your favorite veggies or serve with different sauces for a personal twist!
Tips for Success
To ensure your katsu chicken turns out perfectly every time, here are some handy tips! First, consider double coating the chicken. After the first round of breading, dip it back into the egg and then again into the panko. This extra layer gives you an even crunchier crust! Next, keep an eye on your oil temperature. It should be around 350°F (175°C); if it’s too hot, the coating will burn while the chicken remains raw inside. Finally, don’t overcrowd the pan. Frying in batches allows the chicken to crisp up beautifully without steaming. Happy frying!
Nutritional Information
When it comes to enjoying katsu chicken, it’s good to know what you’re putting on your plate. Here’s the estimated nutritional breakdown per serving (1 piece):
- Calories: 300
- Fat: 15g
- Saturated Fat: 3g
- Cholesterol: 70mg
- Sodium: 500mg
- Carbohydrates: 25g
- Fiber: 1g
- Protein: 20g
- Sugar: 1g
Remember, these numbers are estimates and can vary based on the exact ingredients you use. It’s all about enjoying your meal while keeping an eye on your nutritional needs!
FAQ About Katsu Chicken
Got questions about katsu chicken? Don’t worry, I’ve got you covered! Here are some common queries that pop up:
- Can I use other meats besides chicken? Absolutely! Pork is a popular choice for katsu and delicious when prepared the same way. Just adjust your cooking time based on the thickness.
- What’s the best way to store leftovers? Keep any leftover katsu chicken in an airtight container in the refrigerator. It should stay fresh for about 2-3 days. Just reheat in the oven to maintain that crispy texture!
- Can I make katsu chicken gluten-free? Yes! Simply substitute the all-purpose flour with a gluten-free blend and use gluten-free panko breadcrumbs.
- What can I serve with katsu chicken? Katsu chicken pairs wonderfully with steamed rice, salad, or noodles. You can also add pickled vegetables for a tangy crunch!
- Is tonkatsu sauce necessary? While it adds a fantastic flavor, you can enjoy katsu chicken with other sauces like teriyaki or even a sweet chili sauce if you prefer something different!
Storage & Reheating Instructions
If you find yourself with leftover katsu chicken (which is rare, but hey, it happens!), storing it properly is key to keeping that deliciousness intact. First, let the chicken cool completely before placing it in an airtight container. It’ll stay fresh in the fridge for about 2-3 days. When you’re ready to enjoy it again, I recommend reheating in the oven rather than the microwave. Just preheat your oven to 375°F (190°C), place the chicken on a baking sheet, and heat for about 10-15 minutes. This way, you’ll get that lovely crispy texture back. Enjoy your katsu chicken again in style!
Print
Katsu Chicken: 5 Steps to Irresistibly Crispy Delight
- Total Time: 25 minutes
- Yield: 2 servings 1x
- Diet: Gluten Free
Description
Crispy and flavorful katsu chicken served with a savory sauce.
Ingredients
- 2 chicken fillets
- 1 cup panko breadcrumbs
- 1/2 cup all-purpose flour
- 2 eggs
- Salt to taste
- Pepper to taste
- Vegetable oil for frying
- Ton katsu sauce for serving
Instructions
- Flatten the chicken fillets to even thickness.
- Season flour with salt and pepper.
- Coat chicken in flour, then dip in beaten eggs, and finally coat with panko breadcrumbs.
- Heat vegetable oil in a pan over medium heat.
- Fry the chicken until golden brown, about 4-5 minutes per side.
- Drain on paper towels.
- Slice and serve with tonkatsu sauce.
Notes
- Serve with steamed rice and shredded cabbage.
- For extra crunch, double coat the chicken.
- Store leftovers in an airtight container in the refrigerator.
- Prep Time: 15 minutes
- Cook Time: 10 minutes
- Category: Main Course
- Method: Frying
- Cuisine: Japanese
Nutrition
- Serving Size: 1 piece
- Calories: 300
- Sugar: 1g
- Sodium: 500mg
- Fat: 15g
- Saturated Fat: 3g
- Unsaturated Fat: 10g
- Trans Fat: 0g
- Carbohydrates: 25g
- Fiber: 1g
- Protein: 20g
- Cholesterol: 70mg
Keywords: katsu chicken, Japanese chicken, fried chicken


