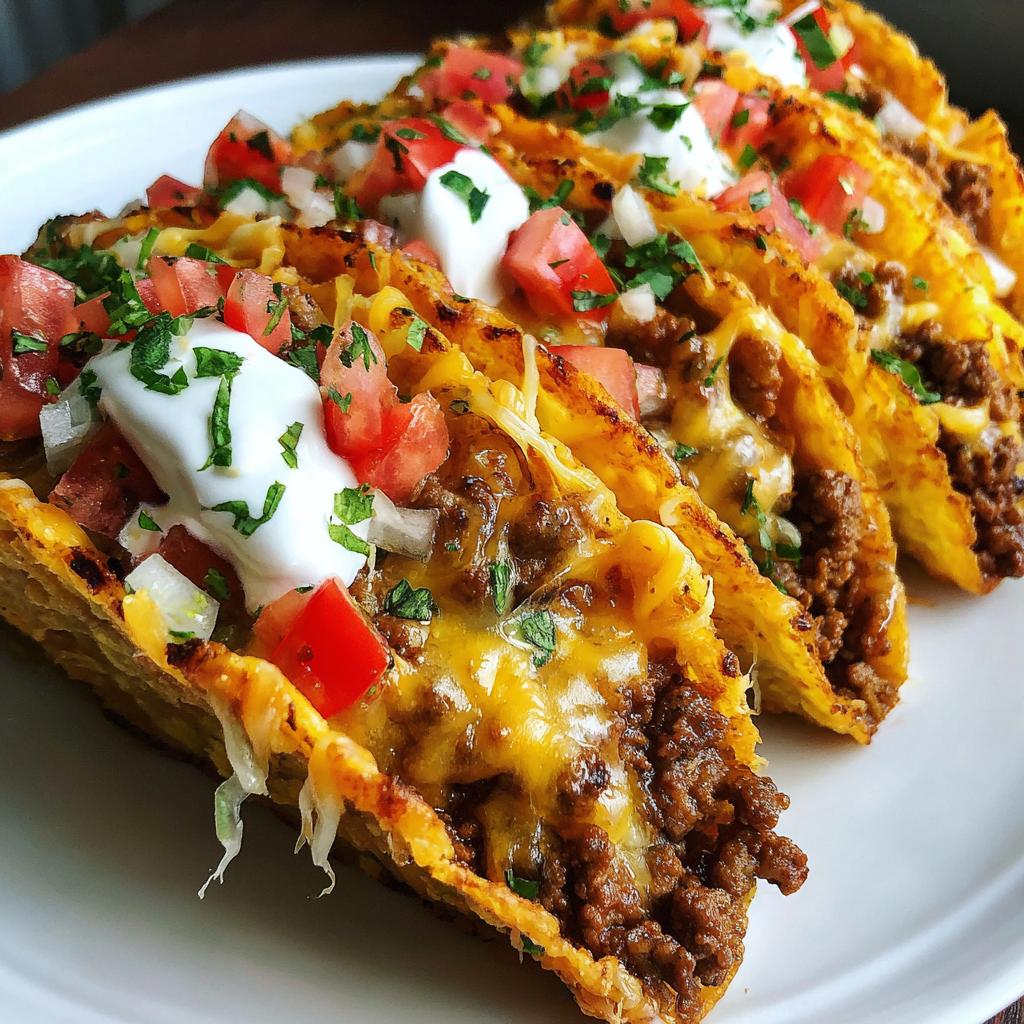
Oh my goodness, let me tell you about the sheer joy of loaded cheesy pocket tacos! These little delights take your standard taco night to a whole new level. Imagine biting into a crispy taco shell filled to the brim with seasoned ground beef, gooey melted cheese, and all your favorite fresh toppings. Trust me, once you try these, there’s no going back! I first whipped these up for a casual dinner with friends, and they were an instant hit. Everyone was raving about how comforting and satisfying they were – the perfect blend of flavors and textures. Plus, they’re super easy to make! You’ll want to keep this recipe handy for your next taco Tuesday or any fun gathering. Get ready to impress your friends with these loaded cheesy pocket tacos that are guaranteed to bring smiles to the table!

Ingredients List
To create the most delicious loaded cheesy pocket tacos, you’ll need a handful of simple yet flavorful ingredients. Here’s what you’ll need:
- 1 cup shredded cheese: I love using a mix of cheddar and Monterey Jack for that melty goodness, but feel free to use your favorite cheese blend!
- 1/2 cup cooked ground beef: Make sure to season your beef well with the taco seasoning to infuse it with flavor. It’s the heart of your taco!
- 1/4 cup diced tomatoes: Fresh and juicy, these tomatoes add a lovely burst of flavor and freshness to each bite.
- 1/4 cup diced onions: I usually go for yellow onions for a sweet touch, but red onions work beautifully too if you like a bit more bite.
- 1/4 cup sour cream: This creamy topping is a must! It adds the perfect tanginess to balance the richness of the cheese.
- 1 package taco seasoning: You can use store-bought or make your own blend. Either way, it’s essential for that authentic taco flavor.
- 1 package taco shells: Crunchy taco shells are perfect for holding all that cheesy goodness. You can use hard or soft shells – it’s totally up to you!
Gather these ingredients, and let’s get cooking! You’re going to love how easy and tasty these loaded cheesy pocket tacos are!
How to Prepare Loaded Cheesy Pocket Tacos
Preheat the Oven
Before diving into the fun part, let’s get that oven preheating to 350°F (175°C). This step is super important because it sets the stage for your loaded cheesy pocket tacos to cook evenly and get that deliciously melty cheese you’re craving. Preheating ensures that as soon as you pop those tacos in, they start cooking right away, giving you the perfect texture and flavor. Trust me, you don’t want to skip this part!
Prepare the Ground Beef Filling
Now, let’s get to the heart of our tacos: the ground beef filling! In a medium-sized bowl, take your cooked ground beef and sprinkle in that taco seasoning. I usually just eyeball it, but if you want to be precise, use the amount recommended on the seasoning packet. Mix it all together thoroughly until every nugget of beef is coated in that zesty goodness. This flavor-packed filling is what makes your tacos sing! If you want a little extra kick, feel free to add some chopped jalapeños or a dash of hot sauce at this point.
Assemble the Tacos
Now comes the fun part—assembling your loaded cheesy pocket tacos! Grab your taco shells and start filling each one with a generous scoop of the seasoned ground beef. Don’t be shy! Then, sprinkle a handful of that glorious shredded cheese on top. Next, toss in your diced tomatoes and onions. I like to layer them so that each taco has a bit of everything in every bite. Just think about all those flavors mingling together; it’s mouthwatering!
Bake the Tacos
Once your tacos are beautifully filled, it’s time to bake! Place them on a baking sheet and pop them into your preheated oven for about 10 minutes. Keep an eye on them while they bake; you’ll know they’re done when the cheese is beautifully melted and bubbly, and the taco shells are just starting to get golden. It’s hard to resist the aroma wafting through your kitchen during this step, but trust me, it’ll be worth the wait!
Serve and Enjoy
When your loaded cheesy pocket tacos are ready, take them out of the oven and let them cool for just a minute. Now, for the finishing touch: top each taco with a dollop of sour cream. I sometimes even add a sprinkle of fresh cilantro or a squeeze of lime for that extra zing. Serve them right away while they’re still warm and cheesy, and watch everyone’s eyes light up! These tacos are perfect for a cozy family dinner or a fun gathering with friends. Enjoy every cheesy bite!
Nutritional Information
Now, let’s talk about the nutritional side of these delicious loaded cheesy pocket tacos! While everyone loves indulging in tasty food, it’s always good to know what you’re putting in your body. Here’s a rough estimate of the nutritional values for two tacos:
- Calories: 350
- Fat: 20g
- Saturated Fat: 10g
- Unsaturated Fat: 8g
- Trans Fat: 0g
- Sodium: 600mg
- Carbohydrates: 30g
- Fiber: 3g
- Sugar: 2g
- Protein: 15g
- Cholesterol: 40mg
Keep in mind that these values can vary based on the specific ingredients you choose, like different types of cheese or the amount of sour cream you add. But overall, these loaded cheesy pocket tacos are a great balance of flavors and nutrition that make for a satisfying meal. Enjoy them guilt-free!
Tips for Success
Now that you’re ready to whip up those loaded cheesy pocket tacos, here are some tips to ensure they turn out perfectly every time! First off, don’t be afraid to get creative with your cheese selection. Mixing different types of cheese, like pepper jack for a spicy kick or gouda for a smoky flavor, can elevate your tacos to a whole new level!
Next, when you’re seasoning the ground beef, taste as you go! If you like it spicier, add a bit more taco seasoning or some hot sauce. Also, remember to drain any excess grease from the beef after cooking to keep your tacos from getting soggy.
When assembling, pack your taco shells generously but don’t overfill them or they might spill over while baking. And for an extra layer of flavor, consider adding a sprinkle of taco seasoning directly onto the cheese before baking. It’s a little trick that makes a big difference!
Lastly, serve your tacos immediately after baking while they’re warm and melty. If you’re making a big batch, keep them warm in a low oven while you finish up. Trust me, these tips will have your loaded cheesy pocket tacos stealing the show at any gathering!
Variations on Loaded Cheesy Pocket Tacos
The beauty of loaded cheesy pocket tacos is how versatile they are! You can easily customize them to suit your taste buds or whatever ingredients you have on hand. If you’re feeling adventurous, why not try adding some black beans or corn to the filling? They’ll add a nice texture and a bit of sweetness that complements the savory beef.
If you want to go meatless, swap the ground beef for sautéed mushrooms or roasted veggies. Trust me, a mix of bell peppers, zucchini, and onions roasted until they’re caramelized can make for a delightful filling!
When it comes to toppings, the sky’s the limit! Consider adding sliced jalapeños for heat, or go all out with a guacamole drizzle for that creamy touch. Fresh cilantro, diced avocados, or even a zesty pico de gallo can elevate your tacos to gourmet status.
For cheese lovers, try adding a layer of crumbled feta or queso fresco on top before baking for a tangy twist. You can also experiment with flavored sour creams, like ranch or chipotle, to give your tacos a whole new vibe. Get creative and make these loaded cheesy pocket tacos your own!
Storage & Reheating Instructions
If you happen to have any leftovers from your delicious loaded cheesy pocket tacos (which is rare, trust me!), storing them properly is key to keeping that cheesy goodness intact. Start by letting the tacos cool down to room temperature. Once they’re cool, you can wrap each taco individually in aluminum foil or place them in an airtight container. I usually opt for a container because it’s easier to stack and saves space in the fridge!
These tacos can be stored in the refrigerator for up to 3 days. If you want to keep them longer, consider freezing them. Just make sure to wrap them tightly in plastic wrap or foil, then pop them into a freezer-safe bag or container. They’ll be good for about a month in the freezer.
When you’re ready to enjoy your leftovers, preheat your oven to 350°F (175°C). Place the tacos on a baking sheet and cover them with foil to prevent them from getting too crispy. Bake for about 10-15 minutes, or until they’re heated through and the cheese is melty again. If you’re in a hurry, you can also microwave them for about 1-2 minutes, but I find that the oven gives them that nice, crispy texture we all love. Enjoy your cheesy tacos again just like the first time!
FAQ Section
Q1. Can I use different types of meat in my loaded cheesy pocket tacos?
Absolutely! While I love classic ground beef, you can switch it up with ground turkey, chicken, or even shredded pork for a delicious twist. And if you’re going vegetarian, consider using black beans or grilled veggies as a hearty filling!
Q2. How do I make my loaded cheesy pocket tacos spicier?
If you’re looking to turn up the heat, add some diced jalapeños or a sprinkle of cayenne pepper to your ground beef mixture. You can also serve them with a side of spicy salsa or hot sauce for those who like it extra fiery!
Q3. What’s the best way to keep leftover loaded cheesy pocket tacos?
To keep your leftovers fresh, wrap them in aluminum foil or place them in an airtight container. They can stay in the fridge for up to 3 days. For longer storage, freeze them for up to a month. Just remember to reheat them properly for that delightful cheesy texture!
Q4. Can I skip baking the tacos?
You could, but then you’d miss out on that beautiful melted cheese and crispy taco shell! Baking brings everything together beautifully, so I highly recommend it. Plus, it’s super easy and only takes about 10 minutes!
Q5. What toppings work best with loaded cheesy pocket tacos?
The fun part about these tacos is that you can customize the toppings! Fresh cilantro, diced avocado, or a drizzle of ranch dressing are fantastic options. I also love adding a dollop of guacamole or some zesty pico de gallo for that extra flavor punch!

Loaded Cheesy Pocket Tacos That Will Make You Smile
- Total Time: 25 minutes
- Yield: 4 servings 1x
- Diet: Gluten Free
Description
Loaded cheesy pocket tacos are a delicious twist on traditional tacos, filled with cheese and various toppings.
Ingredients
- 1 cup shredded cheese
- 1/2 cup cooked ground beef
- 1/4 cup diced tomatoes
- 1/4 cup diced onions
- 1/4 cup sour cream
- 1 package taco seasoning
- 1 package taco shells
Instructions
- Preheat the oven to 350°F (175°C).
- In a bowl, mix ground beef with taco seasoning.
- Fill each taco shell with the seasoned beef.
- Add shredded cheese, tomatoes, and onions into each shell.
- Bake in the oven for 10 minutes until cheese is melted.
- Top with sour cream before serving.
Notes
- Use your favorite cheese for extra flavor.
- Customize toppings as per your preference.
- Prep Time: 15 minutes
- Cook Time: 10 minutes
- Category: Main Course
- Method: Baking
- Cuisine: Mexican
Nutrition
- Serving Size: 2 tacos
- Calories: 350
- Sugar: 2g
- Sodium: 600mg
- Fat: 20g
- Saturated Fat: 10g
- Unsaturated Fat: 8g
- Trans Fat: 0g
- Carbohydrates: 30g
- Fiber: 3g
- Protein: 15g
- Cholesterol: 40mg
Keywords: loaded cheesy pocket tacos, cheesy tacos, taco recipe